June 2014
4-37
Xerox® Phaser® 3052/3260 Service Manual
REP 1.25
Repairs
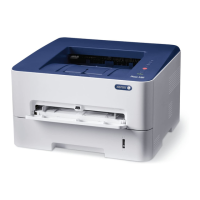
7. Remove the following (Figure 5):
a. Drive Gears (2).
b. Feed Clutch Bushing, remove the Snap Ring.
c. Feed Shaft Bushings (2), release the latch and rotate the bushing.
d. Feed Assembly screw (1).
Figure 5 Feeder Drives
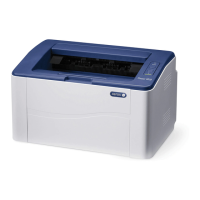
8. Remove the Feed Assembly bottom screws (2) (Figure 6).
Figure 6 Feeder Assembly Bottom Screws (Bottom View)
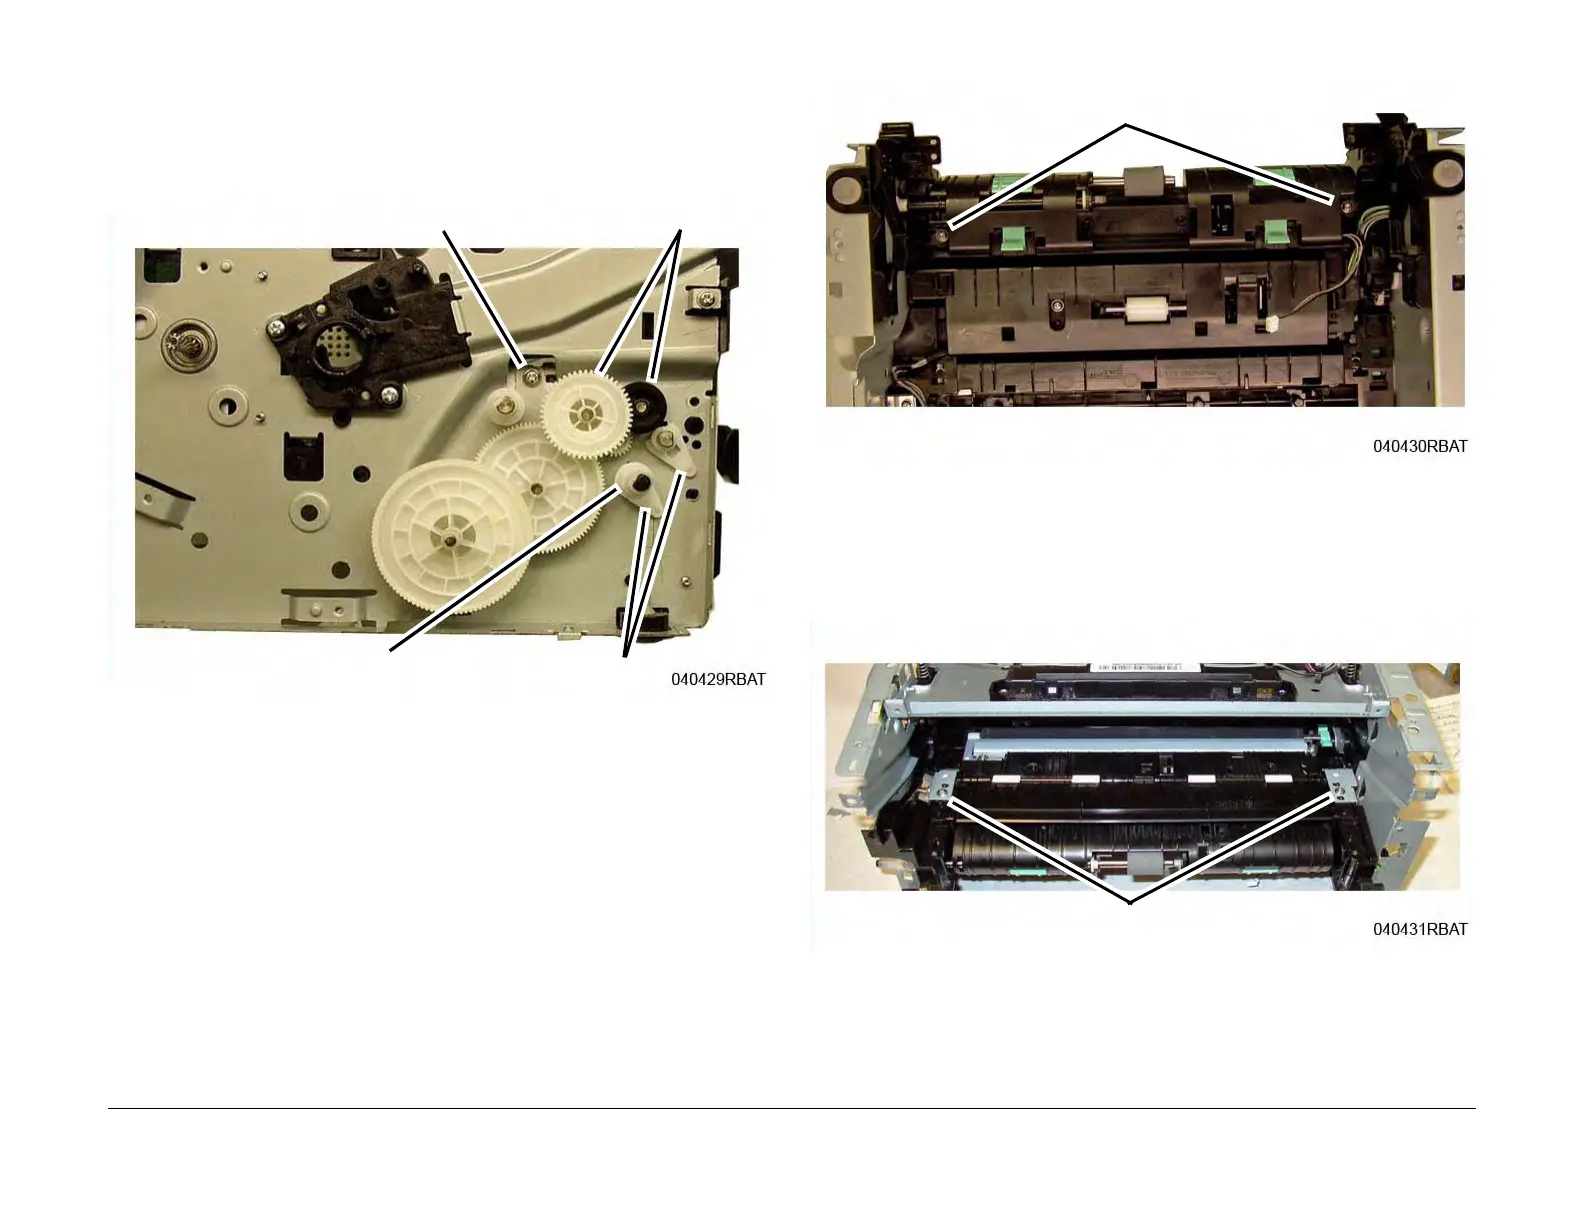
CAUTION
The Brackets holding the Registration Pinch Rolls and Guide are Spring Loaded. Maintain light
pressure on the Brackets when removing them to avoid damaging parts or personal injury.
9. Remove the Registration Pinch Rolls and Paper Guide Brackets (2 screws) (Figure 7):
Figure 7 Registration Pinch Rolls and Paper Guide Brackets
Clutch Bushing
Drive Gears
Screws
Feed Shaft Bushings
Screws
Screws