Installation and Setup
Xerox
®
Phaser
®
3610 Black and White Printer 33
User Guide
4. To enable the wireless network adapter, disconnect the Ethernet cable from the printer.
Note: Only one network connection can be active. During power on, if a network cable is detected, it
is enabled and the wireless network adapter is disabled.
5. Turn on the printer.
6. In the Admin Menu, configure the Wi-Fi settings. For details, see the System Administrator Guide at
www.xerox.com/office/WC3615docs.
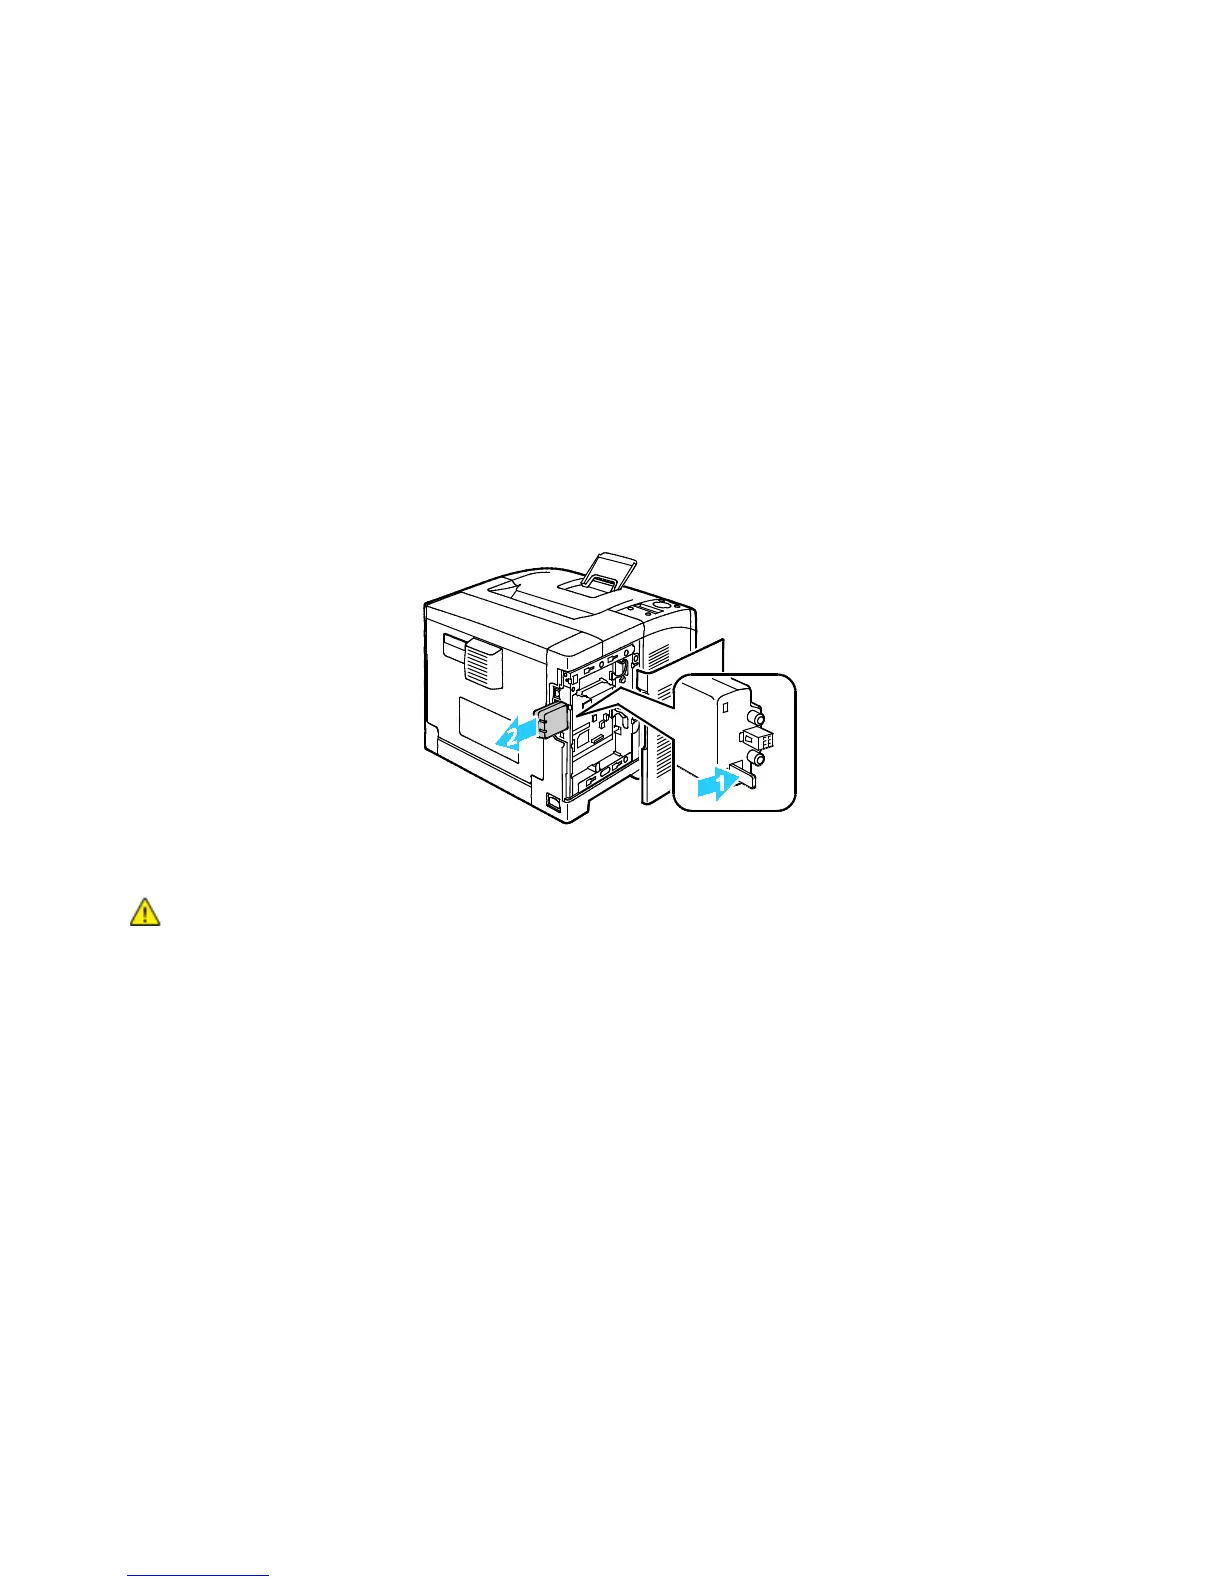
Removing the Wireless Network Adapter
1. Turn off the printer.
2. Unscrew the thumbscrew on the back of the left door, then open the left door.
3. Locate the plastic latch release on the wireless network adapter that protrudes through the back of
the chassis.
4. To remove the wireless network adapter, reach into the chassis and push inward, then back on the
latch release.
CAUTION: Do not use force to pull on the wireless network adapter. If the latch is released properly,
the adapter pulls out easily. Pulling on the adapter can damage it.
5. Close the left door, then on the back of the door, screw in the thumbscrew.
6. Connect the printer to your computer with a USB cable or through the network using an Ethernet
cable.
7. Turn on the printer.
Resetting Wireless Settings
If the printer was previously installed in a wireless network environment, it could retain setup and
configuration information.
To prevent the printer from attempting to connect to the previous network, reset the wireless settings.
For details on resetting or connecting to a wireless network, see the System Administrator guide at
www.xerox.com/office/WC3615docs.