192 A Appendix
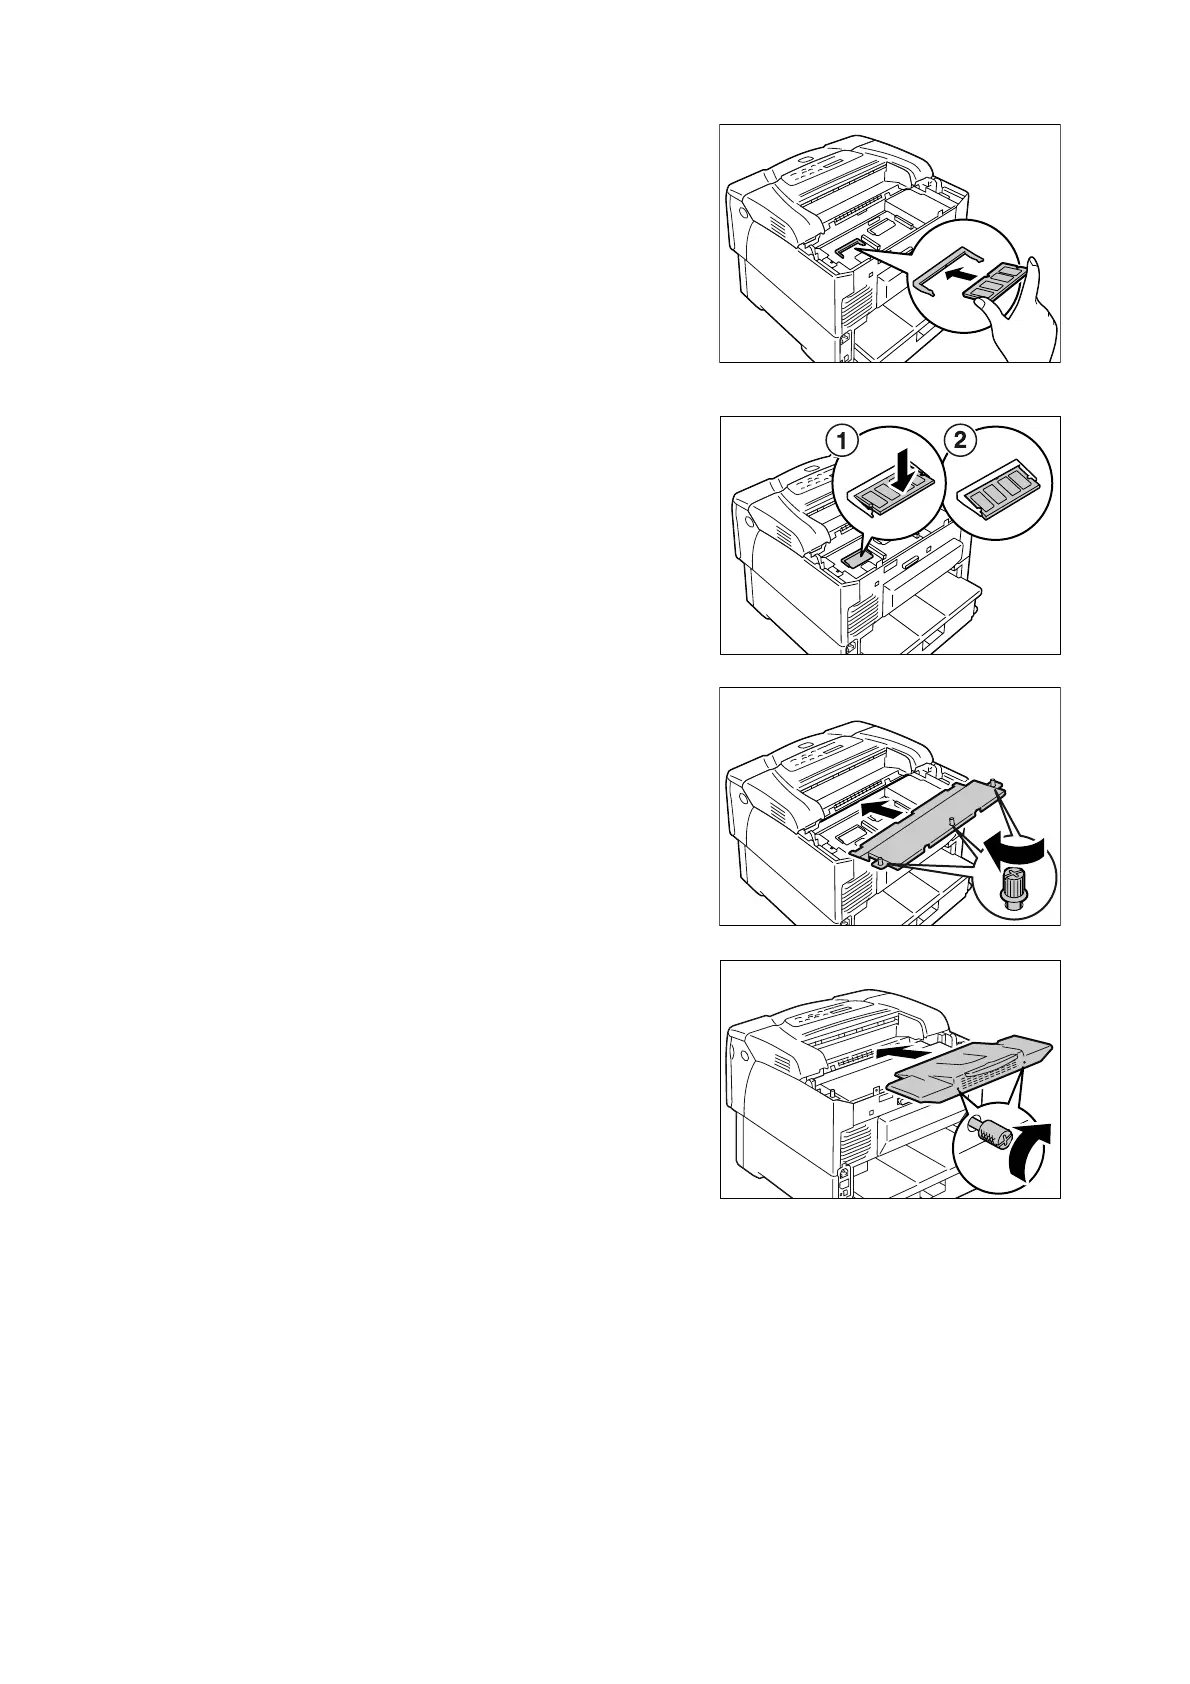
9. Align the notch on the new memory card
with the projection on the RAM slot (printed
as "SDRAM op." on the controller board),
and insert the memory card at an angle into
the slot.
Important
• The memory card should be installed to the left of the
controller board. The slot at the right part of the
controller board is for an optional ROM, which is
installed parallel to the controller board. Make sure to
insert the memory card into the correct slot.
10. Push the new memory card as shown in the
figure. When the card is installed correctly,
it clicks into place.
11. If the network expansion card was
removed, reinstall it in the printer.
12. Re-attach the metal plate cover on the
printer by tightening the three screws
loosened in Step 4.
13. Re-attach the rear cover on the printer by
tightening the two screws removed in Step
2.
14. Plug in the power cord and switch on the power by pressing the power switch to the
<|> position.
The installation is now complete.
Note
• You can check whether the memory card is installed correctly by printing out the [Printer Settings] list.
[Memory Capacity] under [General] shows the total memory capacity of the printer (which is the memory
on the controller board (64 MB) plus the memory you just added). For information on how to print the
[Printer Settings] list, refer to " <OK/Eject>Printing a Report/List" (P. 147).
• If you added memory while the printer is in use, change the memory capacity setting on your print driver.
For details, refer to the online help provided for the print driver.