12. Select or clear the Set Printer as Default and Print a Test Page check boxes.
13. Click Continue, then click Close.
AAddddiinngg tthhee PPrriinntteerr
For networking, set up your printer using Bonjour
®
(Rendevous), or connect using the IP address of
your printer for an LPD/LPR connection. For a non-network printer, create a desktop USB connection.
Online Support Assistant at: www.xerox.com/office/VLC405support
To add the printer using Bonjour
1. From the computer Applications folder or from the dock, open System Preferences.
2. Click Printers & Scanners.
The list of printers appears on the left of the window.
3. Under the list of printers, click the plus button (+).
4. At the top of the window, click the Default icon.
5. Select your printer from the list, then click Add.
Note: If your printer was not detected, verify that the printer is on and that the Ethernet cable
is connected properly.
Adding the Printer by Specifying the IP Address
To add the printer by specifying the IP address:
1. From the computer Applications folder or from the dock, open System Preferences.
2. Click Printers & Scanners.
The list of printers appears on the left of the window.
3. Under the list of printers, click the Plus icon (+).
4. Click IP.
5. From the Protocol list, select the protocol.
6. In the Address field, enter the IP address of the printer.
7. In the Name field, enter a name for the printer.
8. From the Use list, choose Select a driver to use.
9. From the printer software list, select the print driver for your printer model.
10. Click Add.
IInnssttaalllliinngg SSccaann DDrriivveerrss ffoorr MMaacciinnttoosshh
1. Insert the Software and Documentation disc into your computer.
2. To view the .dmg file for your printer, double-click the Disc icon on your desktop .
3. Open the Scan Installer.dmg file, then navigate to the appropriate installer file for your
operating system.
4. Open the Scan Installer package file.
52
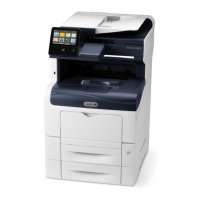
Xerox
®
VersaLink
®
C405 Color Multifunction Printer
User Guide
Getting Started

 Loading...