XP0100 Enterprise IP Phone Getting Started
Xorcom Ltd. 6 www.xorcom.com
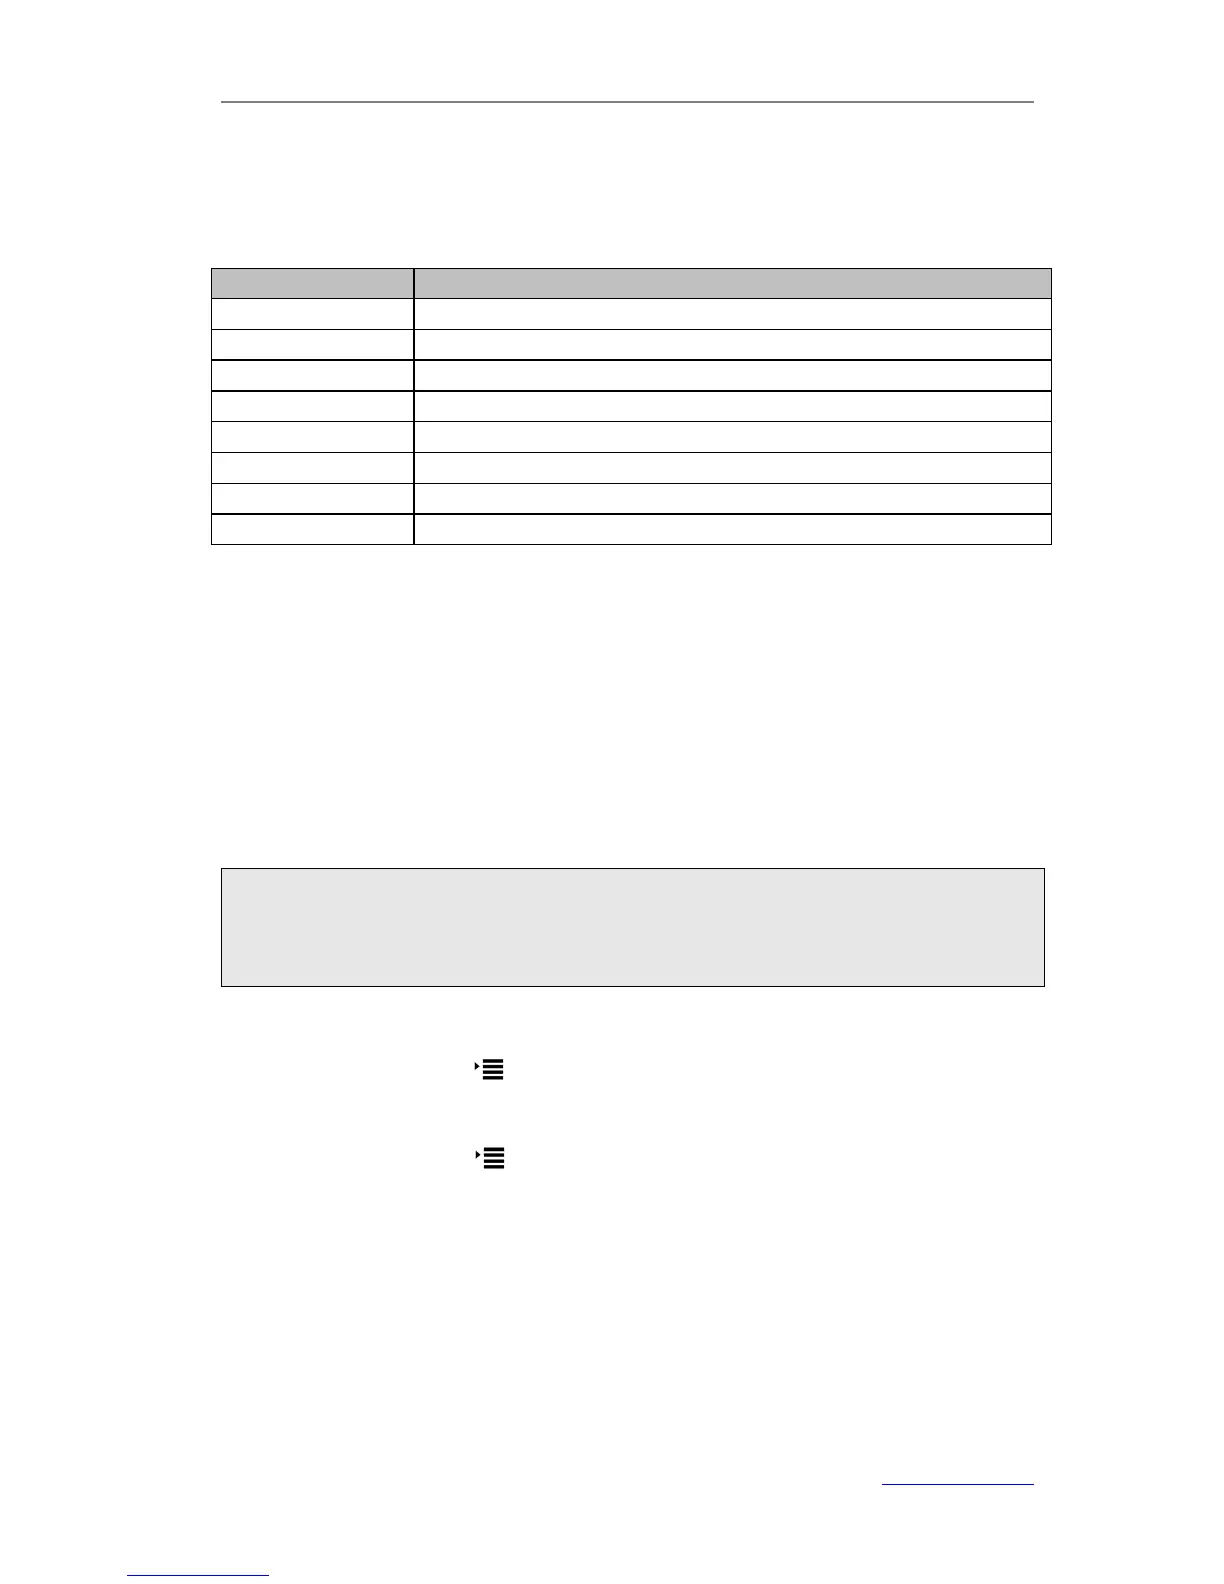
Account Settings
The phone attempts to register to the SIP server using the account/registrar data
provided by the automatic or manual initialization.
Click on Account->Basic, you will find the following parameters:
It shows the register status of the phone.
You can select Enabled/Disabled to set the account respectively
It is showed on the LCD for users to identify the account.
It is showed as Caller ID when making a phone call.
It is authenticated ID for authentication, provided by ITSP.
User account information, provided by VoIP service provider.
It is provided by ITSP for registration.
Server for registration, provided by ITSP.
When all accounts register fail, phone will display "No Service" on the idle screen.
When the phone reboot, it will register automatically. If many phones register at the
same time, this will affect the server, users can set the register power up time so that
the phone will random register automatically within the set time.
To configure the power up time via web user interface:
1) Click on Network->Advanced.
2) Scroll to Registration random field, and then enter the time in the Registration
random field.
3) Click Confirm to save the change.
Note:
Should the IP PBX (SIP registrar) require an authentication, you will be prompted to
enter the correct password. Make sure you are using the appropriate input method or
enter the password via web user interface.
Configuring via keypad
Network Settings: Press , and then press Settings-> Advanced-> Network->
WAN Port/PC Port /VLAN/Web Type/802.1x Settings to configure the network
settings.
Account Settings: Press , and then press Settings->Advanced->Accounts to
configure the account settings.
Refer to Configuring via Web Page for the parameter details.