FT-920 Operating Manual
94
Installation of
Optional Filters YF-116C/YF-116A
Q Remove the bottom case of the transceiver (see
previous page).
R Refer to Figure 2 on the previous page, and lo-
cate the mounting positions for the CW (YF-116C)
and/or AM (YF-116A) filters on the MAIN Unit.
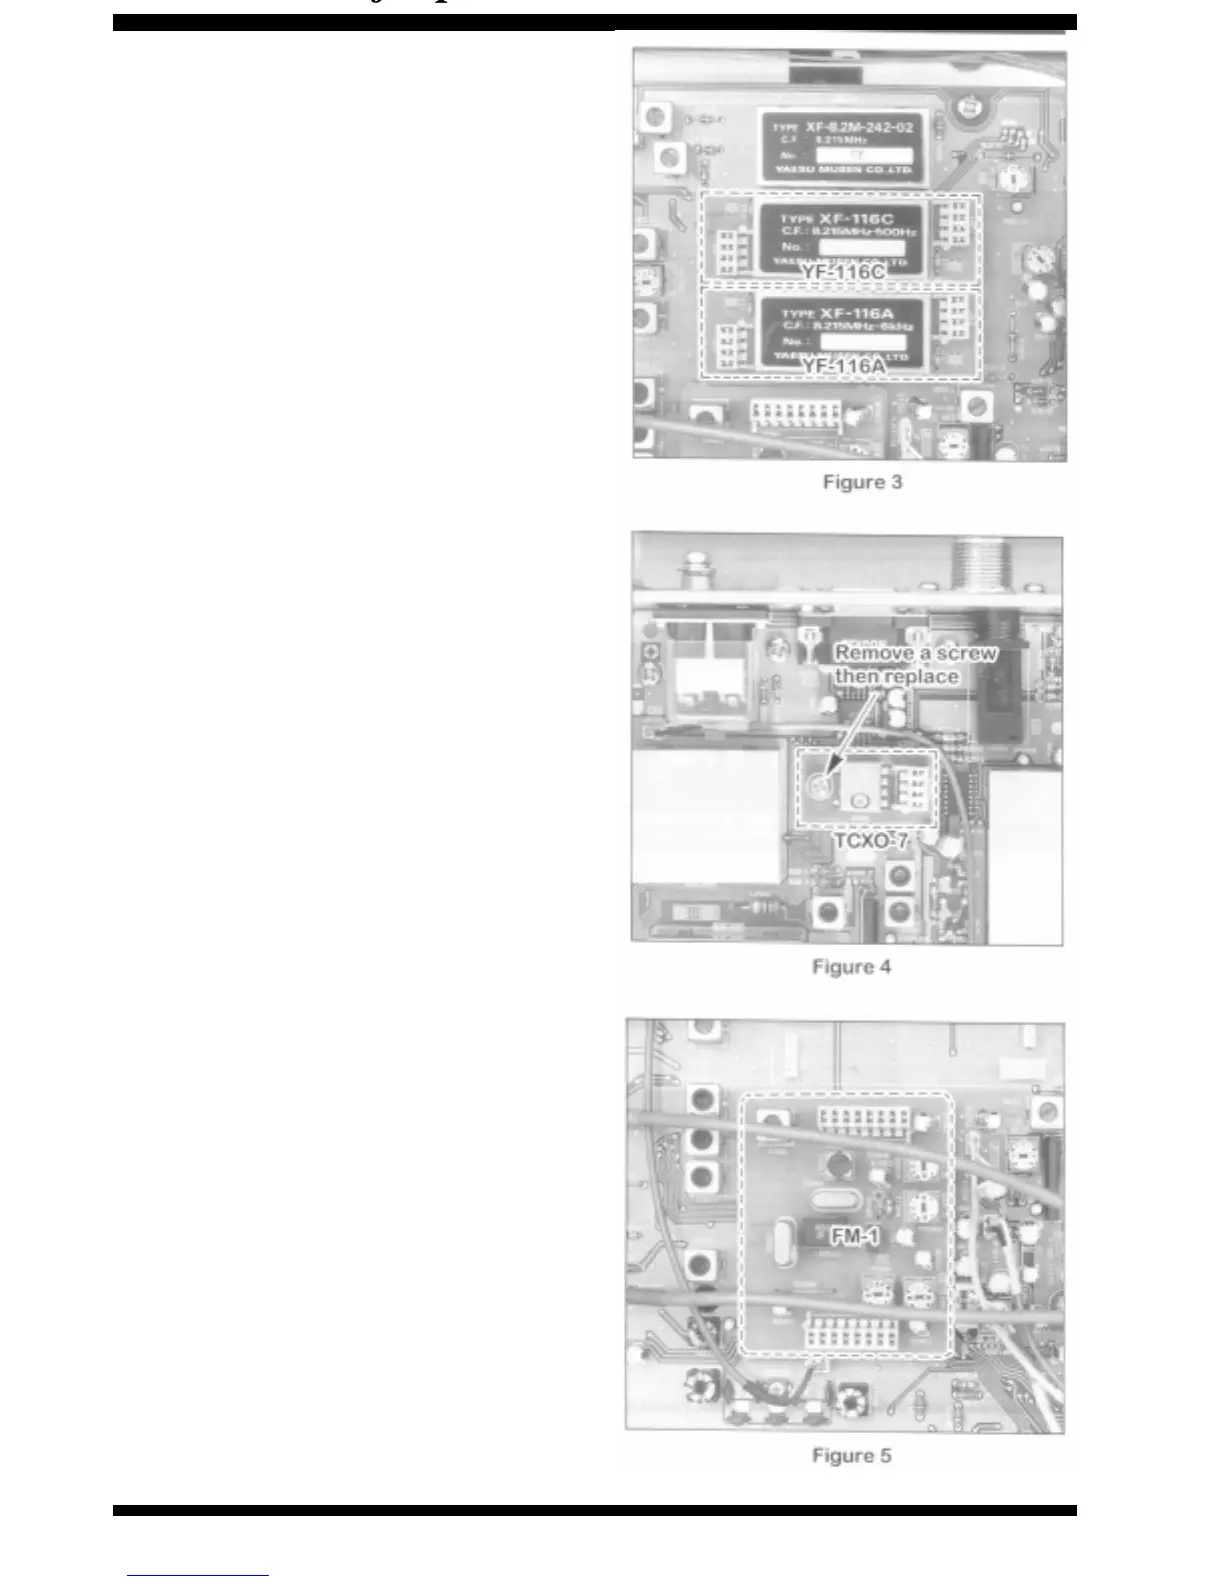
S Refer to Figure 3, and push the optional filter board
onto the pins corresponding to its assigned mount-
ing location on the radio. Gently press the board
down until it is firmly seated in its connectors.
T Replace the bottom case of the transceiver.
U Turn the transceiver on, and enter the Menu mode.
Per the chart below, change the setting of Menu
Item U-69 to “O
N” if installing the YF-116C CW
filter, and/or change the setting of Menu Item U-
70 to “ON” if installing the YF-116A AM filter.
V Filter installation is now complete.
Installation of
High-Stability Oscillator TCXO-7
Q Remove the bottom case of the transceiver (see
previous page).
R Refer to Figure 2 on the previous page, and lo-
cate the mounting position for the TCXO-7, which
currently is occupied by the “REF OSC UNIT.”
S Refer to Figure 4, and remove the REF OSC UNIT,
replacing it with the TCXO-7.
T Installation is now complete, as the TCXO-7 has
been carefully aligned at the factory and should
require no adjustment after installation. Replace
the bottom case of the transceiver.
Installation of FM Unit FM-1
Q Remove the bottom case of the transceiver (see
previous page).
R Refer to Figure 2 on the previous page, and lo-
cate the mounting positions for the FM-1 on the
MAIN Unit.
S Refer to Figure 5, and push the optional FM-1
board onto the pins corresponding to its assigned
mounting location on the radio. Gently press the
board down until it is firmly seated in its connec-
tors.
T Installation is now complete, as the FM-1 has been
carefully aligned at the factory and should require
no adjustment after installation. Replace the bot-
tom case of the transceiver.






 To Next Page