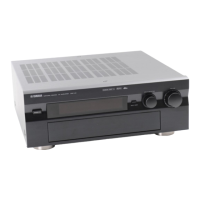
RX-V2500/DSP-AX2500
17
RX-V2500/
DSP-AX2500
3. 本機の電源をONします
4. ラインに接続するためにCONNECTボタンまたはCOM
メニューをクリックし、CONNECTをクリックします。
3. Turn on the power to the unit.
4. To connect the line, click the CONNECT button or the
COM menu, then click the CONNECT.
After connecting, the "Connected" message is
displayed in the status bar.
5. Click the File Change button and then select the file to
be loaded.
To start the loading, click the Program Macro button.
<CAUTION>
Never disconnect the power cable of the unit while
loading the firmware, or the flash ROM data may be
destroyed.
6. When the firmware loading is finished, the checksum
information will be displayed on the information box.
7. To disconnect the line, click the BREAK button or click
the COM menu, then click the BREAK.
接続された後、ステータスバーにConnectedと表示さ
れます。
5. FileChangeボタンをクリックし、書き込むファイルを
選択します。
ProgramMacroボタンをクリックすると書き込みが開始
されます。
<注意>
書き込み中に本機の電源コードは絶対に抜かないでくだ
さい。誤って書き込み中に電源コードを抜いた場合、フ
ラッシュROMのデータが破壊されます。
6. ファームウェア書き込み終了後、チェックサム情報が表
示されます
7. ライン接続を解除するために、BREAKボタンまたは
COMMenuをクリックし、BREAKをクリックします。
COM > CONNECT Menu
なお、より詳細な情報が必要な場合は、WEBSITEにある
FIRMWAREUPDATEPROCEDURESにアクセスしてく
ださい。
For more information, access to the “FIRMWARE
UPDATE PROCEDURES” on the WEB SITE.
COM > BREAK Menu
 Loading...