PSR-A5000 Reference Manual 19
1
Styles
4 Start playback of the Style and play along with it.
5 Touch [On/Off] just before the measure you want to start loop playback of the chord
sequence.
[On/Off] flashes to indicate loop playback is in standby. On the next measure of the Style, [On/Off] is turned on
and the chord sequence will be played back in a loop.
6 As necessary, change the Chord Looper Memory number.
To change the Memory number, touch the desired number. The chord sequence changes on the next measure of the
Style.
7 Touch [On/Off] to stop loop playback.
The playback of the chord sequence is immediately stopped, and the Style returns to normal playback.
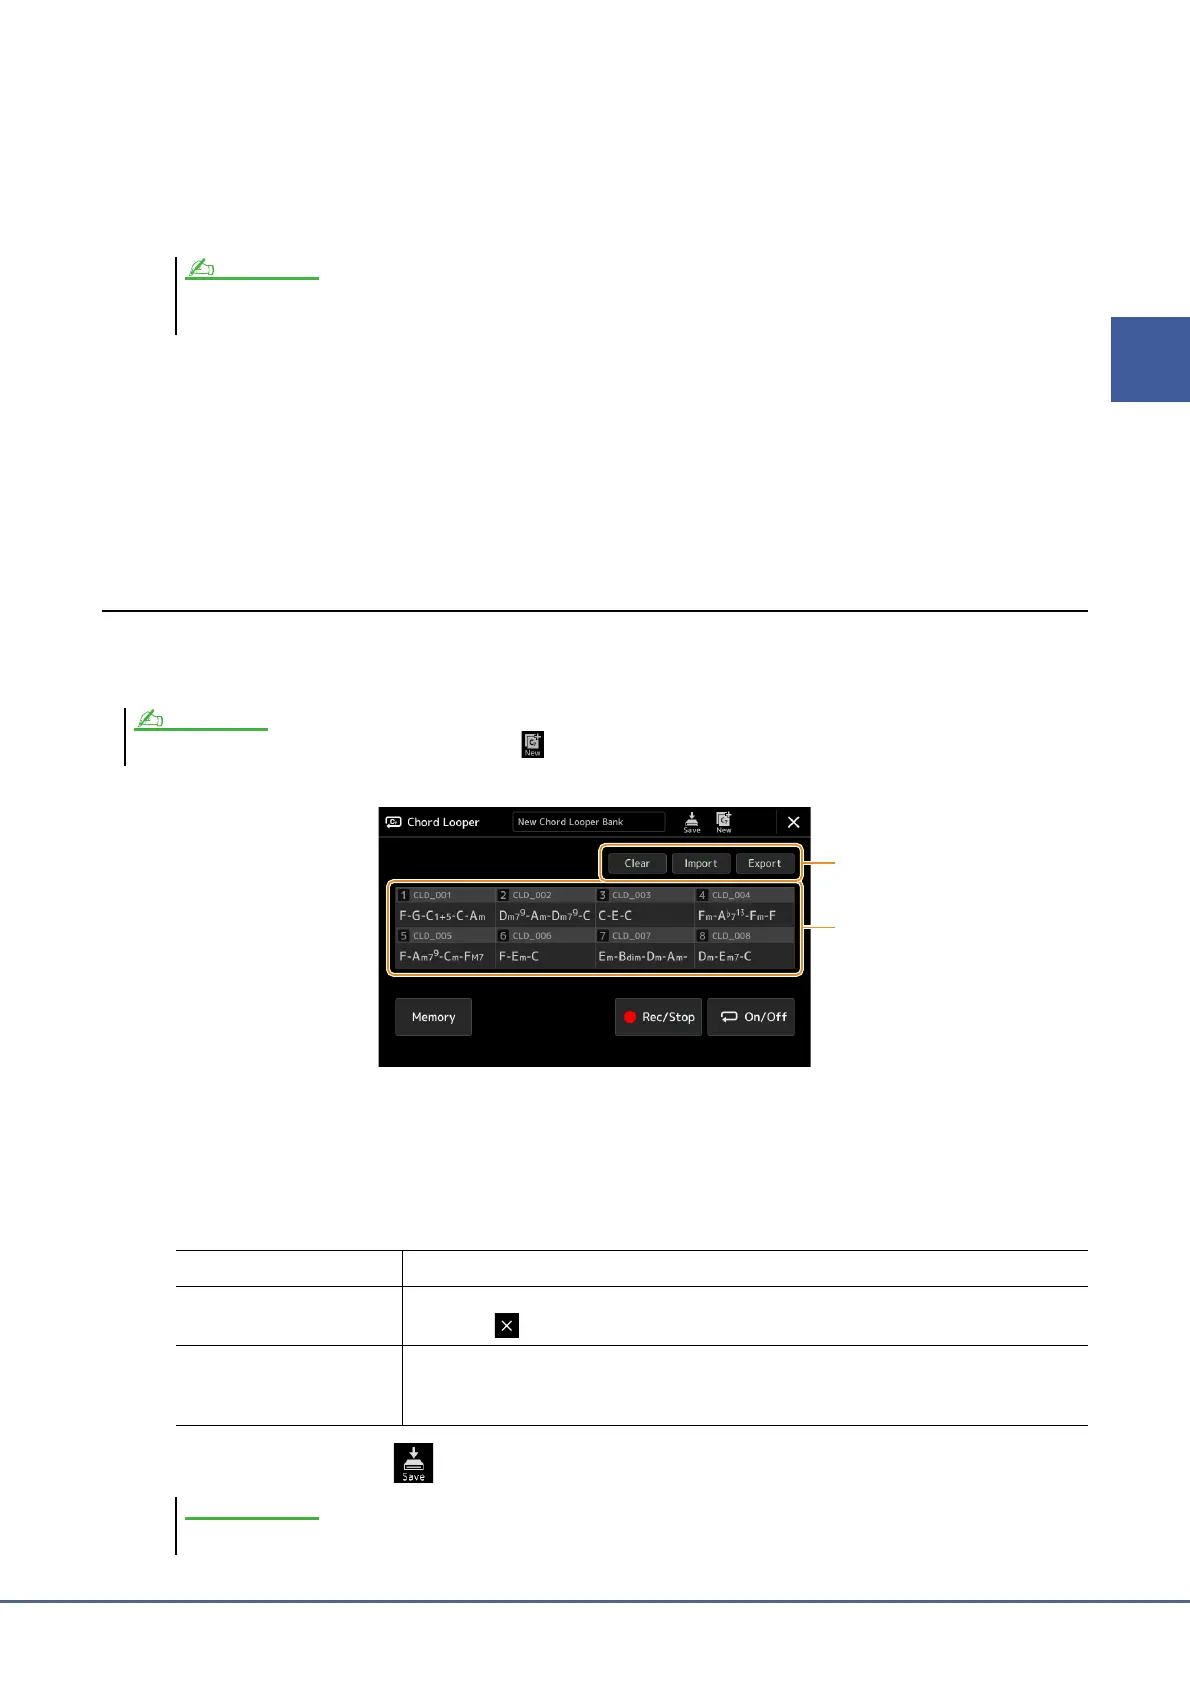
Editing the Chord Looper Bank (Export, Import, Clear)
Each Chord Looper Memory number contained in the Chord Looper Memory Bank can be edited (cleared, imported,
and exported) one by one. The Memory data is exported/imported as a Chord Looper Data (*.cld) file.
1 Touch the desired operation: [Clear], [Import] or [Export].
Follow the onscreen instructions. To cancel the operation at this point, simply touch an empty area of the display.
2 Touch the desired memory number, and then execute the action selected in step 1 as
described below.
3 As necessary, touch (Save) to save the edited Chord Looper Bank as a new file.
During loop playback, [On/Off] lights (and the CHORD LOOPER [ON/OFF] lights in orange), and the [ACMP] button flashes. In this condition, the chord input from
the keyboard is disabled, and the whole keyboard can be used for performance.
If you want to clear all data shown in the Chord Looper display, touch (New) to create the new Bank.
Clear A confirmation message appears. Touch [Yes] to execute clear.
Import The File Selection display for importing is called up. Touch the desired file to import, and
then touch or press the [EXIT] button to return.
Export The File Selection display for exporting is called up. Touch [Export] on the display, enter the
file name, and then touch [OK].
The file name is entered automatically, but you can rename it when saving.
If you select a Chord Looper Bank file before saving the edited data, the data will be lost.
 Loading...