PSR-A5000 Reference Manual 21
1
Styles
Basic Procedure for Creating a Style
1 Select the desired Style to be used as the basis for the new Style.
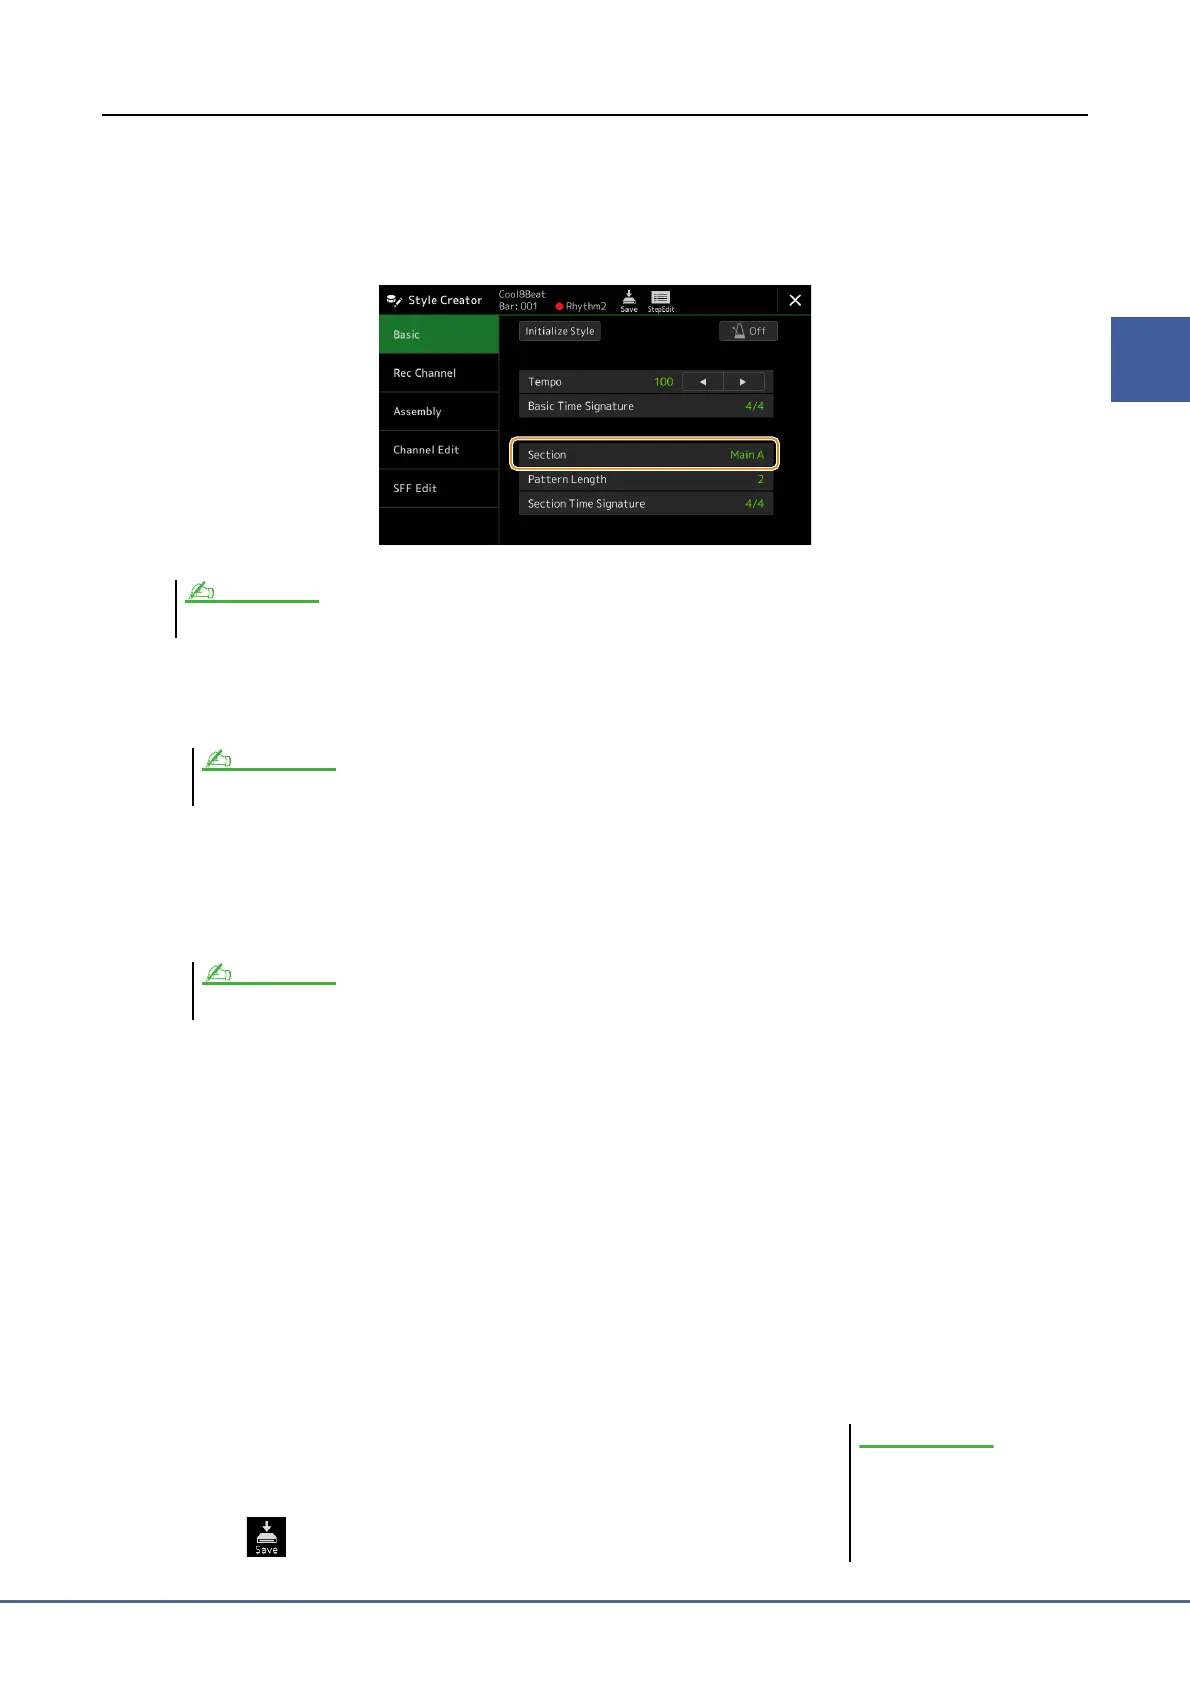
2 Call up the Style Creator display via [MENU] [Style Creator].
3 On the “Basic” display, select the desired Section.
As necessary, make the following settings.
• If you want to create a Style entirely from scratch, touch [Initialize Style] to make the current Style empty.
• If you initialize the Style, set the “Pattern Length” (measure amount of the Source Pattern). After inputting the
value, touch [Execute] to actually enter the changes.
• Set the basic parameters such as “Tempo.” The settings here commonly apply to all Sections except Section
Time Signature and Pattern Length, which can be set for each section.
• The time signature set in “Basic Time Signature” is applied to all Sections. You can also set a different time sig-
nature to each Section in “Section Time Signature.” After setting time signatures, touch [Execute] to actually
enter the changes. A setting of “Basic Time Signature” is applied automatically to sections without settings in
“Section Time Signature.”
4 Create the Source Pattern for each channel.
• Realtime Recording (page 22)
Lets you record the Style by simply playing the keyboard.
• Step Recording (page 25)
Lets you enter each note individually.
•Style Assembly (page 26)
Lets you copy various patterns from other preset Styles or Styles you have already created.
5 Edit the already recorded channel data.
• Channel Edit (page 26)
Lets you edit the MIDI data of the already recorded channels.
•SFF Edit (page 28)
Lets you edit the SFF (Style File Format) related parameters of already recorded
channels other than Rhythm channels.
• Drum Setup (page 32)
Lets you edit the rhythm part of the Style, such as changing the sounds of the
individual instruments.
6 Repeat steps 3–5 as desired.
7 Touch (Save) to save the created Style.
You can also select the Section by pressing one of the corresponding STYLE CONTROL buttons on the panel.
If an Audio Style is selected as starting data, changing the pattern length deletes the corresponding Audio part.
All existing recorded data are deleted when changing the time signature.
The created Style will be lost if
you change to another Style or
turn off the power to the instru-
ment without carrying out the
Save operation.
NOTICE
 Loading...