THE EDIT
MODE
I
J
L
U
The
Edit
mode allows you to edit all the paramenters relating
to
voice
data, as well as function data. The 1
45
voice
parameters are
listed in Table
4-1
in the MIDI FORMAT
section.
The
25 function parameters are
listed
in
the UTILITY
chapter (Clear And Intialize All
Functions
section). However, for a detailed
description of
all
parameters,
consult
the DX7 owner's
manual.
Virtually all
parameters
may be edited from a DX7; the only
plarameters which
must be edited on the fornt
panel
of the
TX816
are Output Level Attenuation and Limit Highest/
Lowest Note. The Edit mode is entered
by
holding
down
SW3.
If the TX816
is
in
the
Play
mode,
the next display shown
on the
LED
Display will
be the Edit
mode
shown above. When you see this
display, release the
SW3 key. It takes about
one second
to
move from
Play
to
Edit.
SW3
selects the
sub-
modes
within
the Edit
mode. These are as follows:
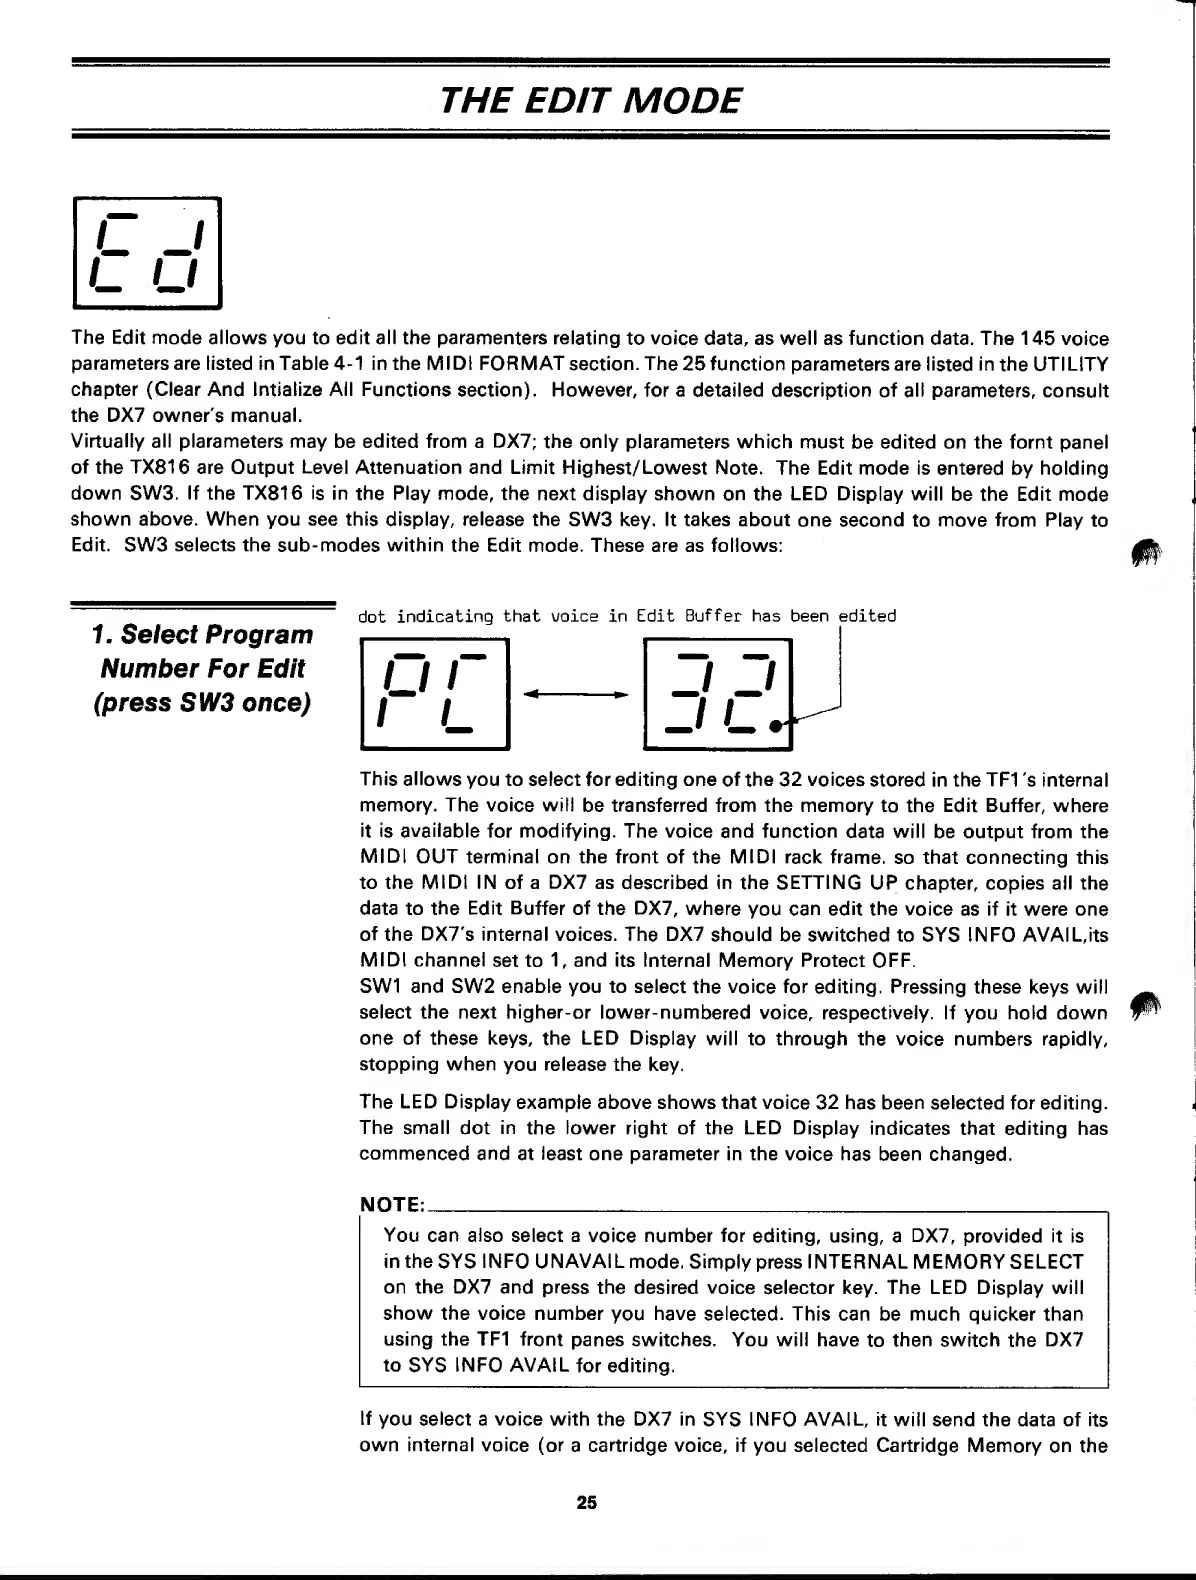
dot
indicating
that
uoice
in
Edit
Buffer
has been edited
1.
Select
Program
Number For Edit
(press SW3 once)
This
allows
you to select for editing one
of
the
32 voices stored
in the TF1 's Internal
memory. The
voice
will
be
transferred
from the memory
to
the Edit Buffer,
where
it is available
for modifying. The voice and
function
data
will
be output from the
MIDI
OUT terminal on the front of the MIDI
rack frame,
so that connecting this
to the
MIDI
IN of a
DX7
as
described
in
the
SETTING
UP chapter, copies all the
data to
the
Edit
Buffer of
the DX7, where
you
can edit the
voice as if it were one
of
the
DX7's
internal voices. The DX7
should
be
switched
to SYS INFO AVAIL,its
MIDI channel
set to
1,
and its
Internal Memory Protect OFF.
SW1 and SW2 enable you to
select the voice
for
editing.
Pressing these keys will
select the next higher-or
lower-numbered
voice, respectively. If you
hold
down
one of these
keys, the
LED
Display
will to through the
voice numbers rapidly,
stopping when
you
release
the key.
The LED Display
example above shows that voice
32 has been selected
for editing.
The small
dot
in
the lower right of the LED Display
indicates
that editing has
commenced
and
at
least
one parameter in the
voice has been changed.
NOTE:
You
can also select a
voice number
for
editing,
using, a
DX7,
provided it is
in the
SYS
INFO UNAVAIL
mode.
Simply press INTERNAL MEMORY SELECT
on the DX7 and
press the
desired voice selector
key.
The LED Display will
show the voice number
you
have selected.
This can be much quicker
than
using the TF1 front
panes switches. You will have
to
then switch
the
DX7
to
SYS
INFO AVAIL
for editing.
If
you
select
a voice with the DX7 in
SYS
INFO AVAIL, it
will send the data of
its
own internal
voice (or
a
cartridge
voice, if you selected Cartridge Memory
on
the
25