28
2" (5,1 cm)
3" (7,6 cm)
PARTSREQUIRED(TEMPORARY):
2 x 4 x 94-1/2" (5,1 x 10,2 x 240 cm)
x1
3" (7,6 cm)
UN
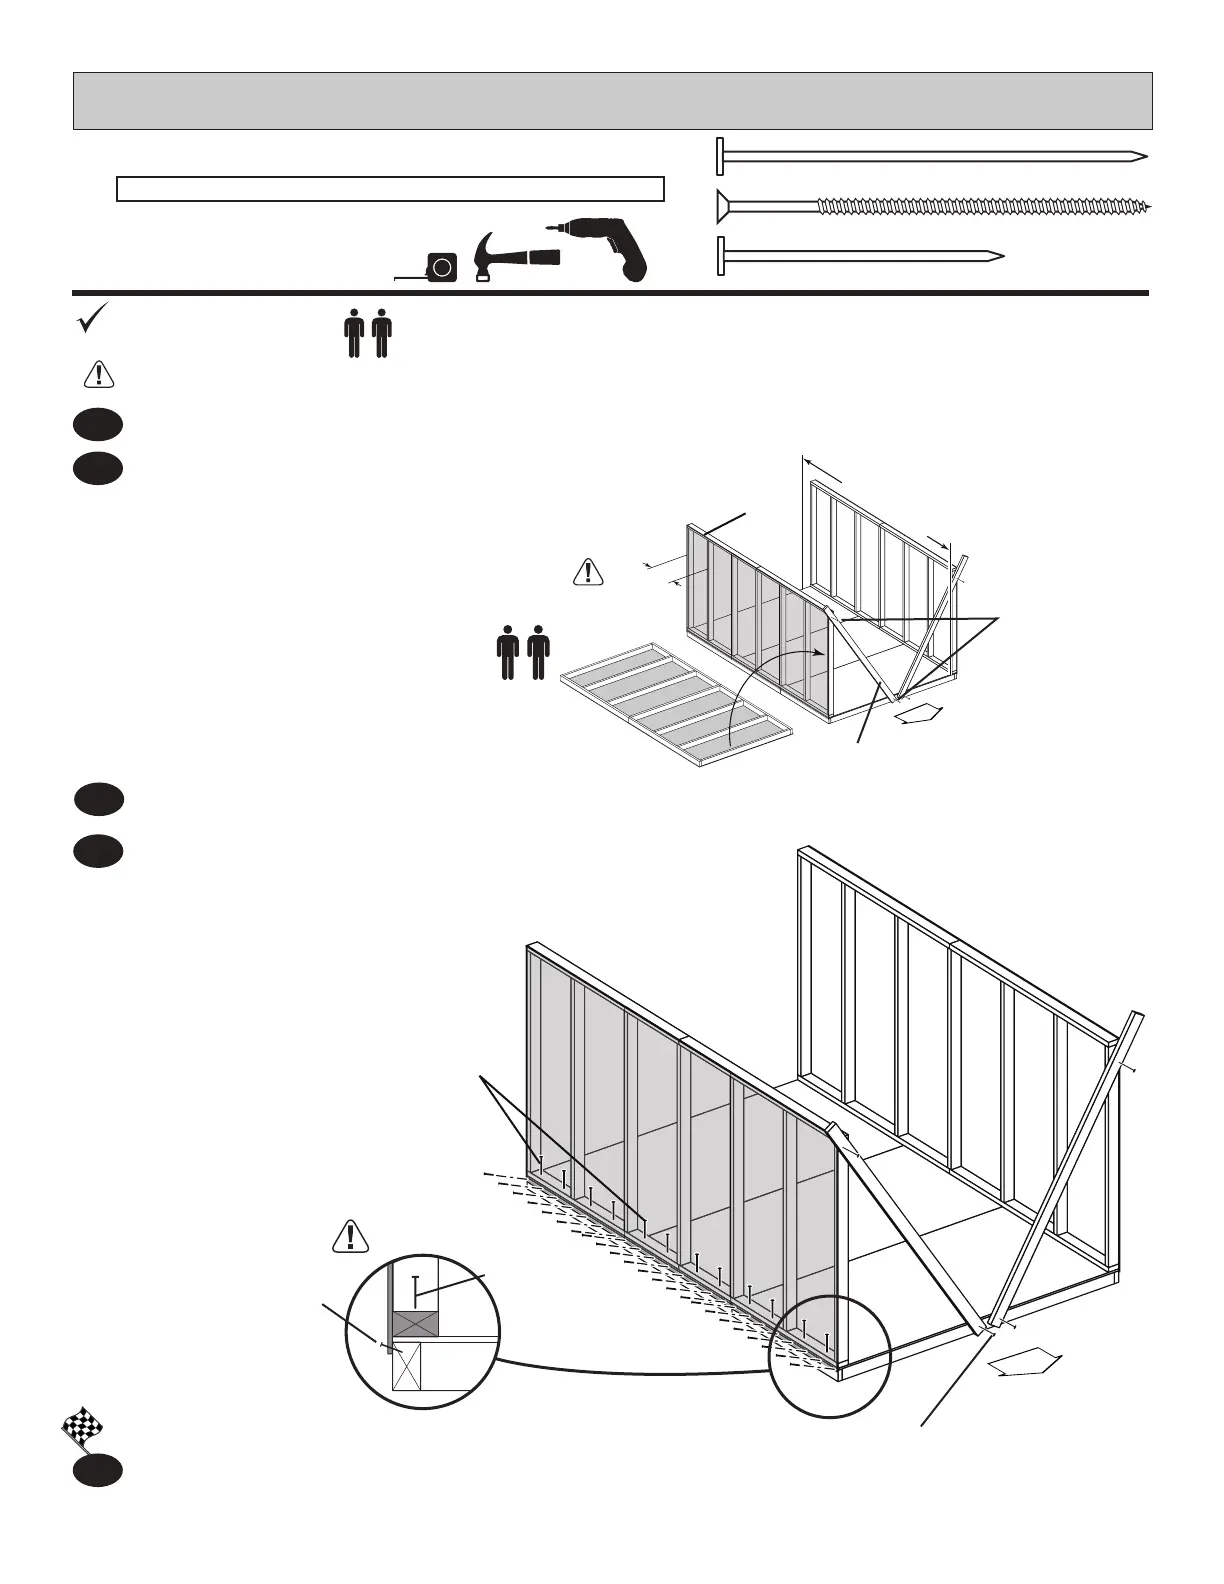
First, nail lower edge of panel to oor frame using 2" nails 6" apart.
Angle nail to hit oor frame (Fig.A).
3
You have nished standing your left side wall.
FINISH
5
Secure side wall bottom plates to oor using 3" nails (Fig.A).
4
x12
x2
x25
LEFT SIDE WALL INSTALLATION
3"(7,6cm)
Screws
UN
3"Nailsintobottomplate.
DOOR
DOOR
Panel
Flush
3"(7,6cm)
Screw
Stand left sidewall on oor.
It is important to secure the left sidewall in the following order.
ENSURE20-5/8"MEASUREMENTISTOWARDBACKOFSHED.
Center left sidewall assembly on the 140-5/8" (357,2 cm) oor dimension.
Use UN as a temporary brace. Secure with two 3" screws.
2
1
140-5/8"
(357,2 cm)
20-5/8"
(52,4 cm)
Nail2"nailsrst.
2"(5,1cm)
Nails
3"(7,6cm)
Nails
Fig.A
 Loading...