74
FINISH
7
PARTS REQUIRED:
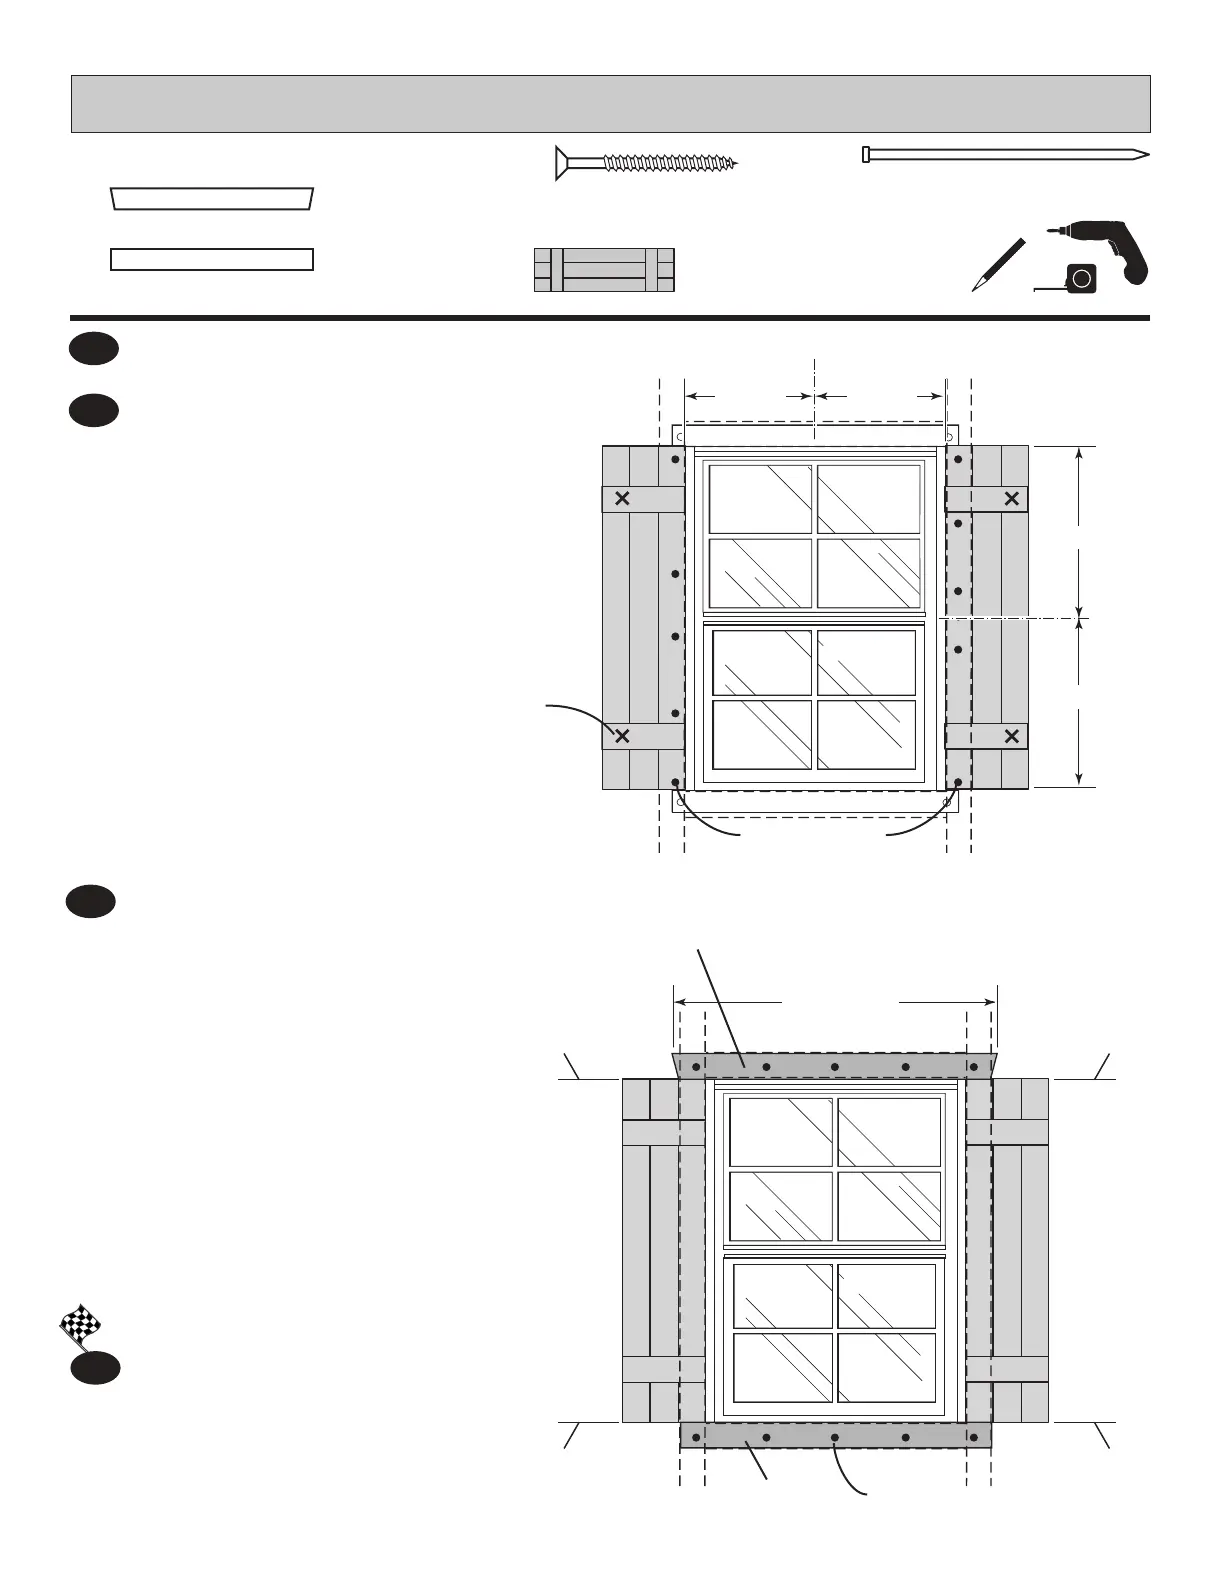
Locate one shutter centered on marks as shown.
5
6
4
Attach one shutter using a 2"
nish nail at "dot". Nail into wall
frame inside.
Then, from INSIDE of the shed,
use two 1-1/4" screws to secure
the shutter indicated at "X".
Repeat steps to attach shutter on
opposite side.
Locate ROR centered on mark and ush to
shutters as shown. Attach using 2" nish nails.
Nail into window frame inside.
Locate DLA centered on mark
and ush to shutters as shown.
Attach using 2" nish nails. Nail into
window frame inside.
You have nished installing
your window and shutters.
x20
2" (5 cm)
x2
LARGE WINDOW SHUTTERS
DLA
ROR
Flush Flush
Flush
2" Finish nails
Flush
CENTER
Mark
2" Finish nails
into wall frame
1-1/4" Screws
from inside
Mark
CENTER
CENTER
CENTERCENTER
x1
DLA
19/32 x 3 x 30" (1,5 x 7,6 x 76,5 cm)
x2
ROR
19/32 x 3 x 28-1/2" (1,5 x 7,6 x 72,4 cm)
1-1/4" (3,2 cm)
x4
 Loading...