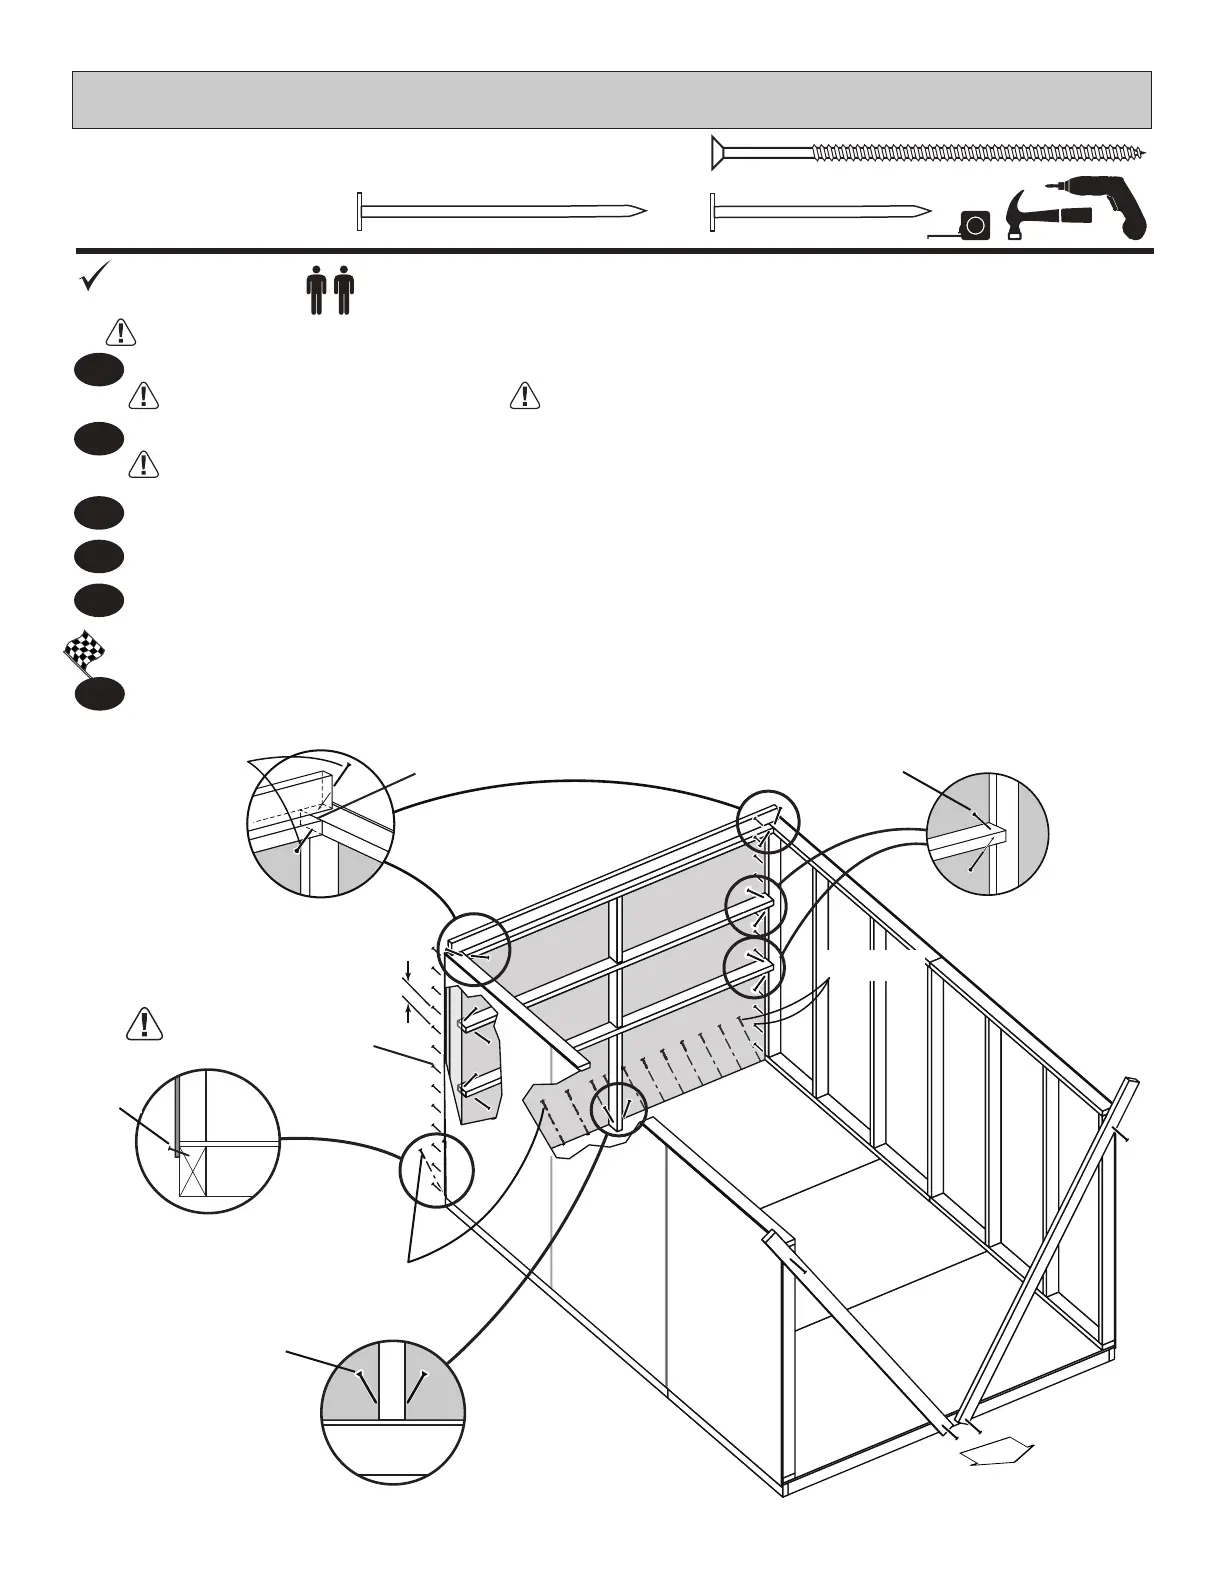
Set back wall on side wall top plates and secure using two 3" screws on each side (FigA).Set back wall on side wall top plates and secure using two 3" screws on each side (FigA).
1
You have nished standing your back wall.
FINISH
6
29
BACK WALL INSTALLATION
3" (7,6 cm)
2" (5,1 cm)
x17
x14
x26
1-1/2" (3,8 cm)
PARTSREQUIRED:
2
Nail lower edge of panel to oor using 2" nails 6" apart. Angle nail to hit oor frame (Fig.B).
ENSUREWALLISCENTEREDONFLOORBEFORENAILING.
Secure back wall upright to oor using two 3" screws (Fig.C).
Nail back wall panel to side wall stud using 1-1/2" nails at 6" apart.
Secure the two back wall center horizontal 2 x 3" shelf supports using two 3" screws into back
wall frame at an angle as shown (Fig.D).
3
4
5
Stand back wall on oor.
It is important to secure the back wall in the following order.
6"
(15,2 cm)
(2)3"(7,6cm)
Screws
(2)3"(7,6cm)
Screws
(2)3"(7,6cm)
Screws
Fig.A
Flush
Fig.B
2"(5,1cm)
Nail
2"(5,1cm)
Nails
1-1/2"
(3,8cm)Nails
1-1/2"
(3,8cm)Nails
Fig.C
Fig.D
Nail2"nailsrst.
DOOR
BESURETOPPLATESAREFLUSH.
 Loading...