43
1
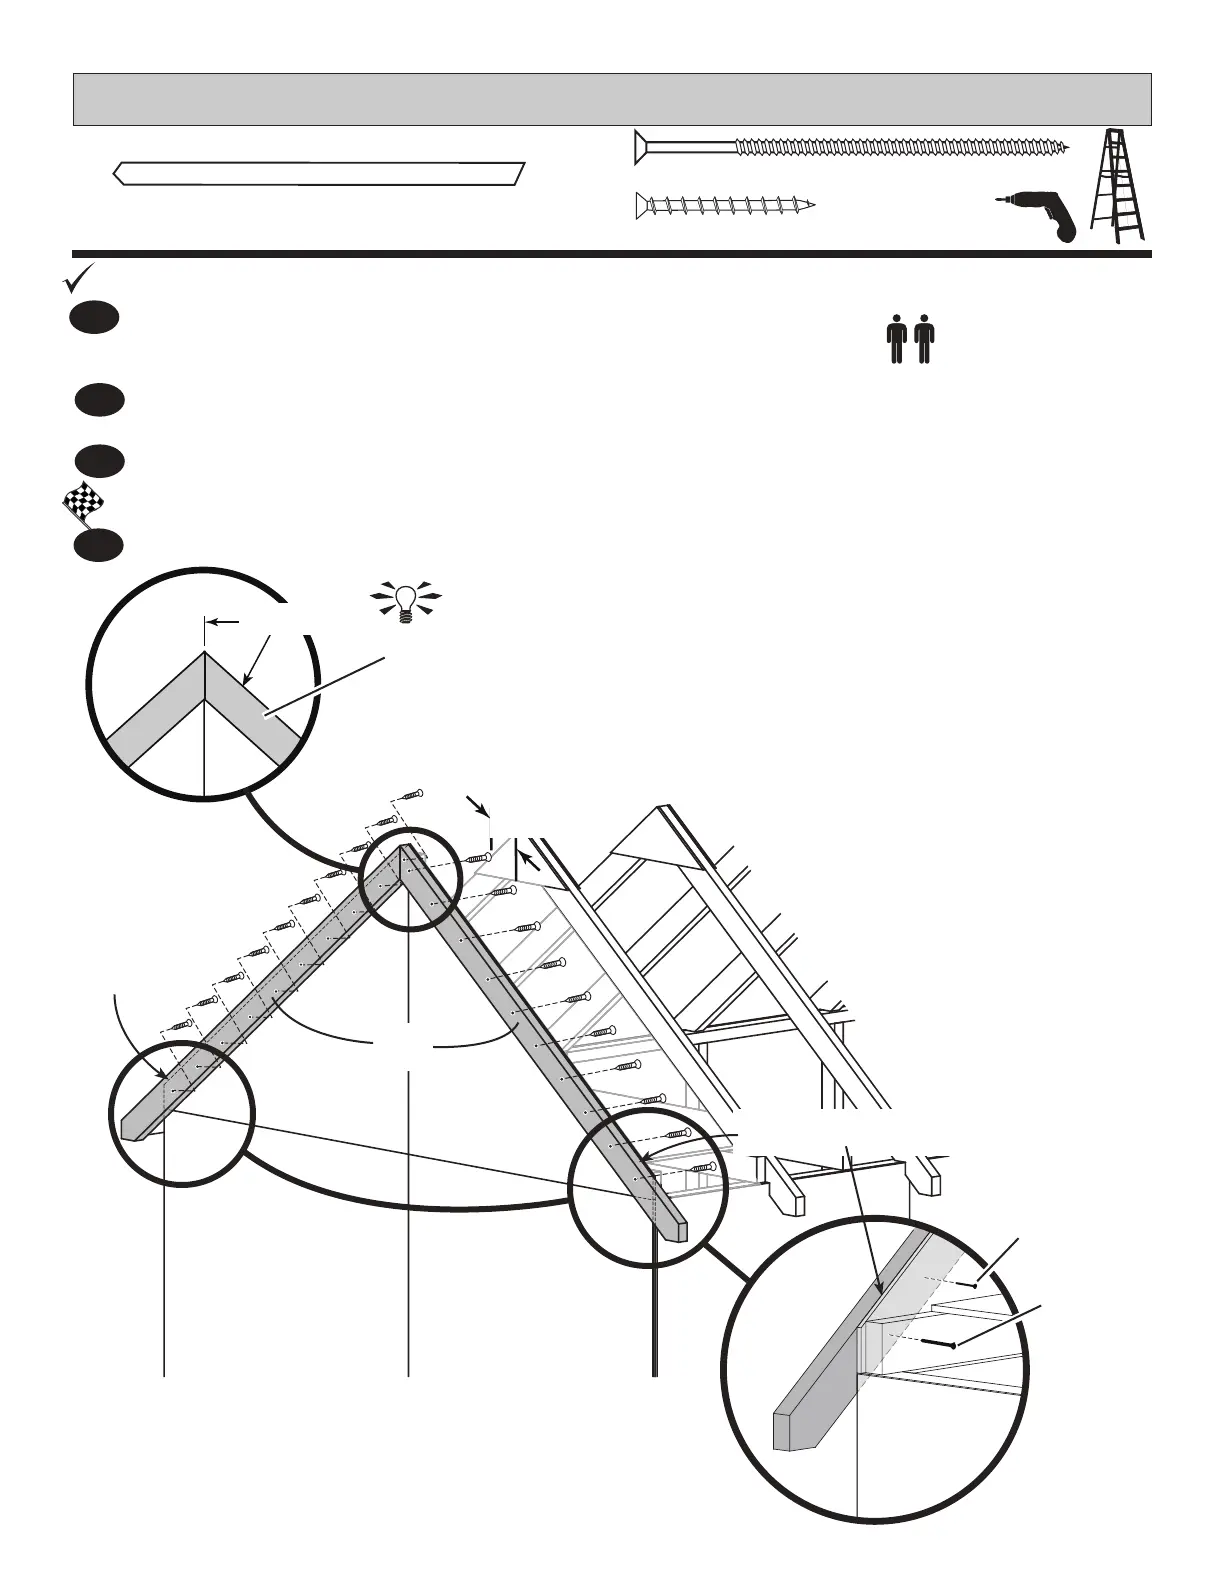
HINT:
Clampinposition
beforescrewing.
1-1/4"(3,2cm)
Screws
3"(7,6cm)
Screws
BACK GABLE TRIM
FINISH
4
Position one WWush to back gable panel edge and center with panel
seam (Fig.A). Attach trim with ten 1-1/4" screws from inside
approximately 7" (17,8 cm) apart.
Position second WW ush to panel edge and ush to WW already attached (Fig.A).
Attach trim with ten 1-1/4" screws from inside approximately 7" (17,8 cm) apart.
ReinforceWW with one 3" screw through loft support at each end (Fig.B).
You have nished attaching your back gable trim.
2
3
PARTSREQUIRED:
1-1/4" (3,2 cm)
WW
Fig.A
Fig.B
7"
(17,8cm)
Flush
Flushwithpaneledges.
Flushwith
paneledges.
x2
2 x 4 x 69-7/8" (5,1 x 10,2 x 177,5 cm)
WW
x20
x2
3" (7,6 cm)
 Loading...