15
ForsquarenessmaintainFlushand3/4"
measurementalongpaneledges.
LEFT SIDE WALL PANELS
48 x 72"
(121,9 x 213,4 cm)
PARTSREQUIRED:
x1
x45
2" (5,1 cm)
Fig.B
BEGINHERE
Fig.A
3/4"
(1,9 cm)
3/4"
(1,9 cm)
2Nails
2Nails
Flush
DOOR
48"
(121,9 cm)
3/4"
(1,9 cm)
1”
(2,5 cm)
3/4"
(1,9 cm)
12"
(30,5 cm)
6"
(15,2 cm)
20-5/8"
(52,4 cm)
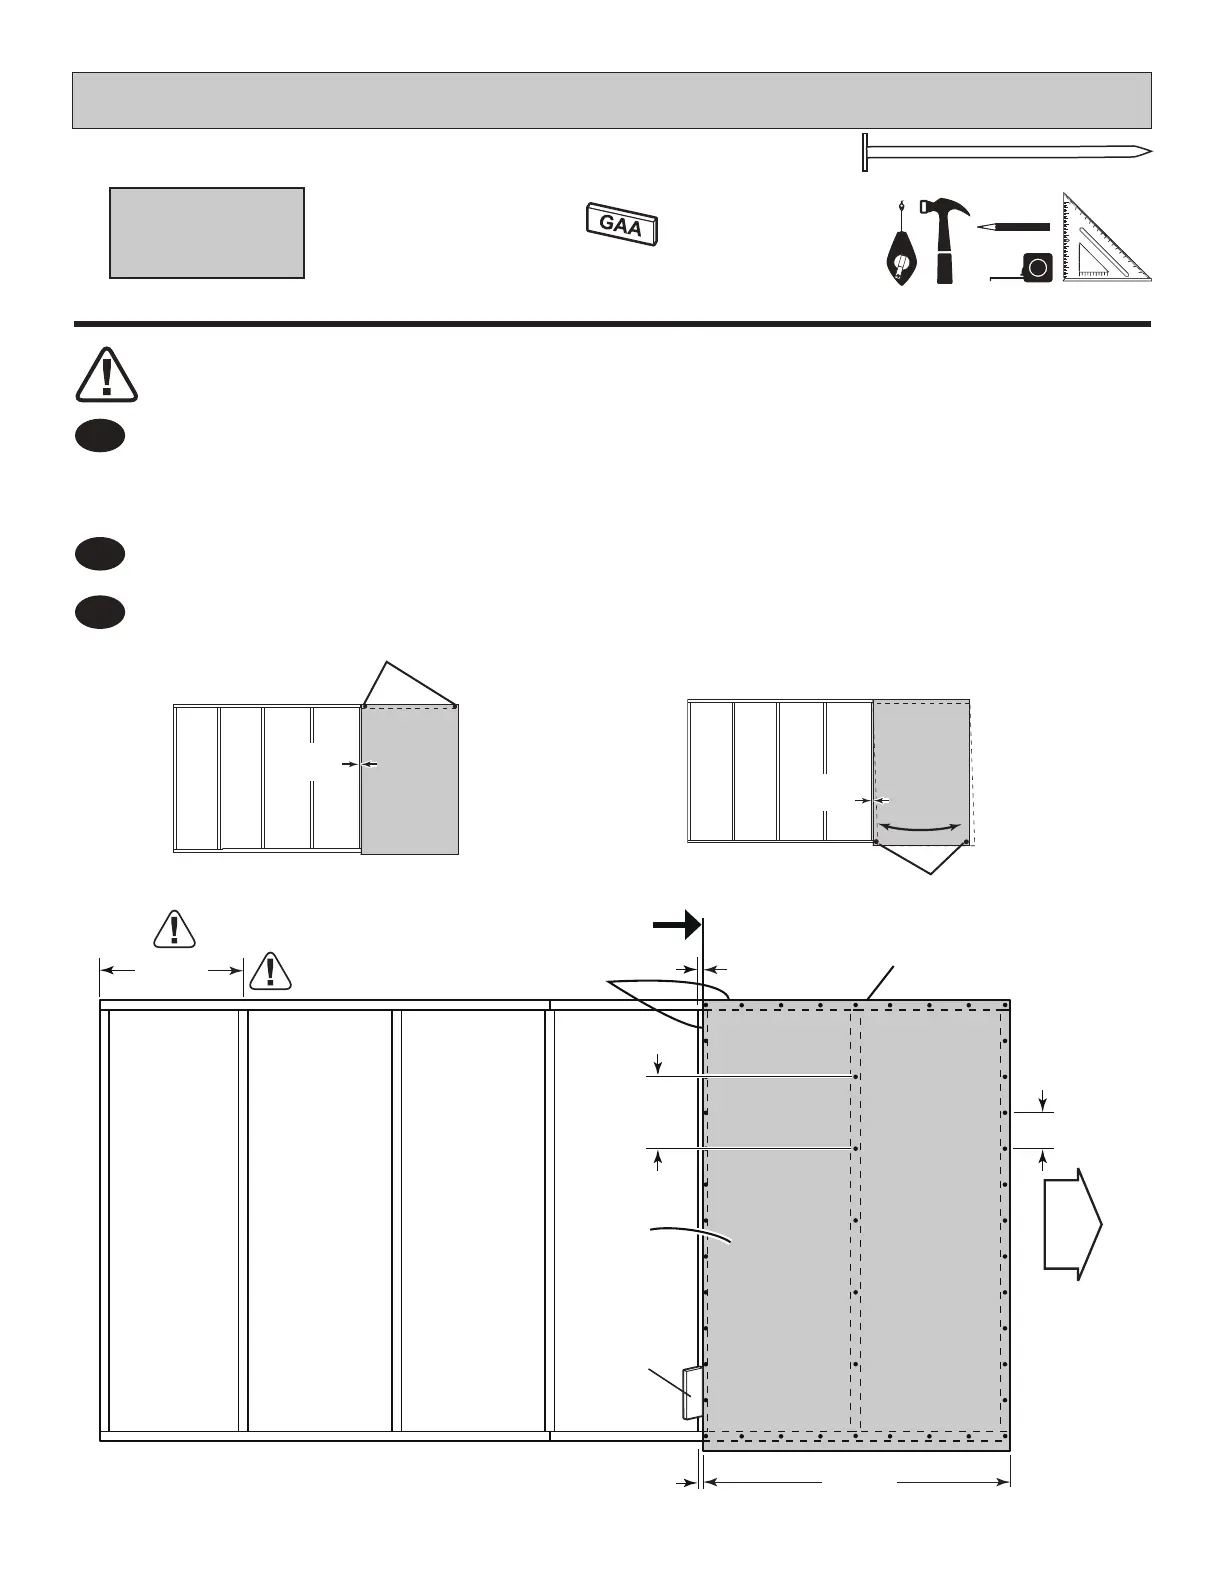
Place 48x72" panel onto wall frame ush to top of frame with primed side up as shown.
Use the gauge block to mark the 3/4" measurement on the wall stud. Secure panel with
two 2" nails in the corners (Fig.A).
Nail the panel using 2" nails 6" apart on edges and 12" apart inside panel.
Ensureyourwallframeissquarebyinstallingonepanelandsquaringframe.
YOUWILLASSEMBLEONELEFTANDONERIGHTWALLSEPARATELY.
Move to the opposite end. Using the long edge of the panel as a lever move the panel side-to-side until you have
a 3/4" measurement on the wall stud. Secure corner with two 2" nails (Fig.B).
4
5
3
3/4"GAUGE
BLOCK
3/4"GAUGE
BLOCK
Primed
sideup
 Loading...