73
DOOR
1
2
Inside View of Wall
30”
(76cm)
32”
(81,2cm)
22-1/2”
(57cm)
3/8” Starter
Inside View
1
2
Inside View of Wall
30”
(76cm)
32”
(81,2cm)
22-1/2”
(57cm)
3/8” Starter
Inside View
1-1/4" (3,2 cm)
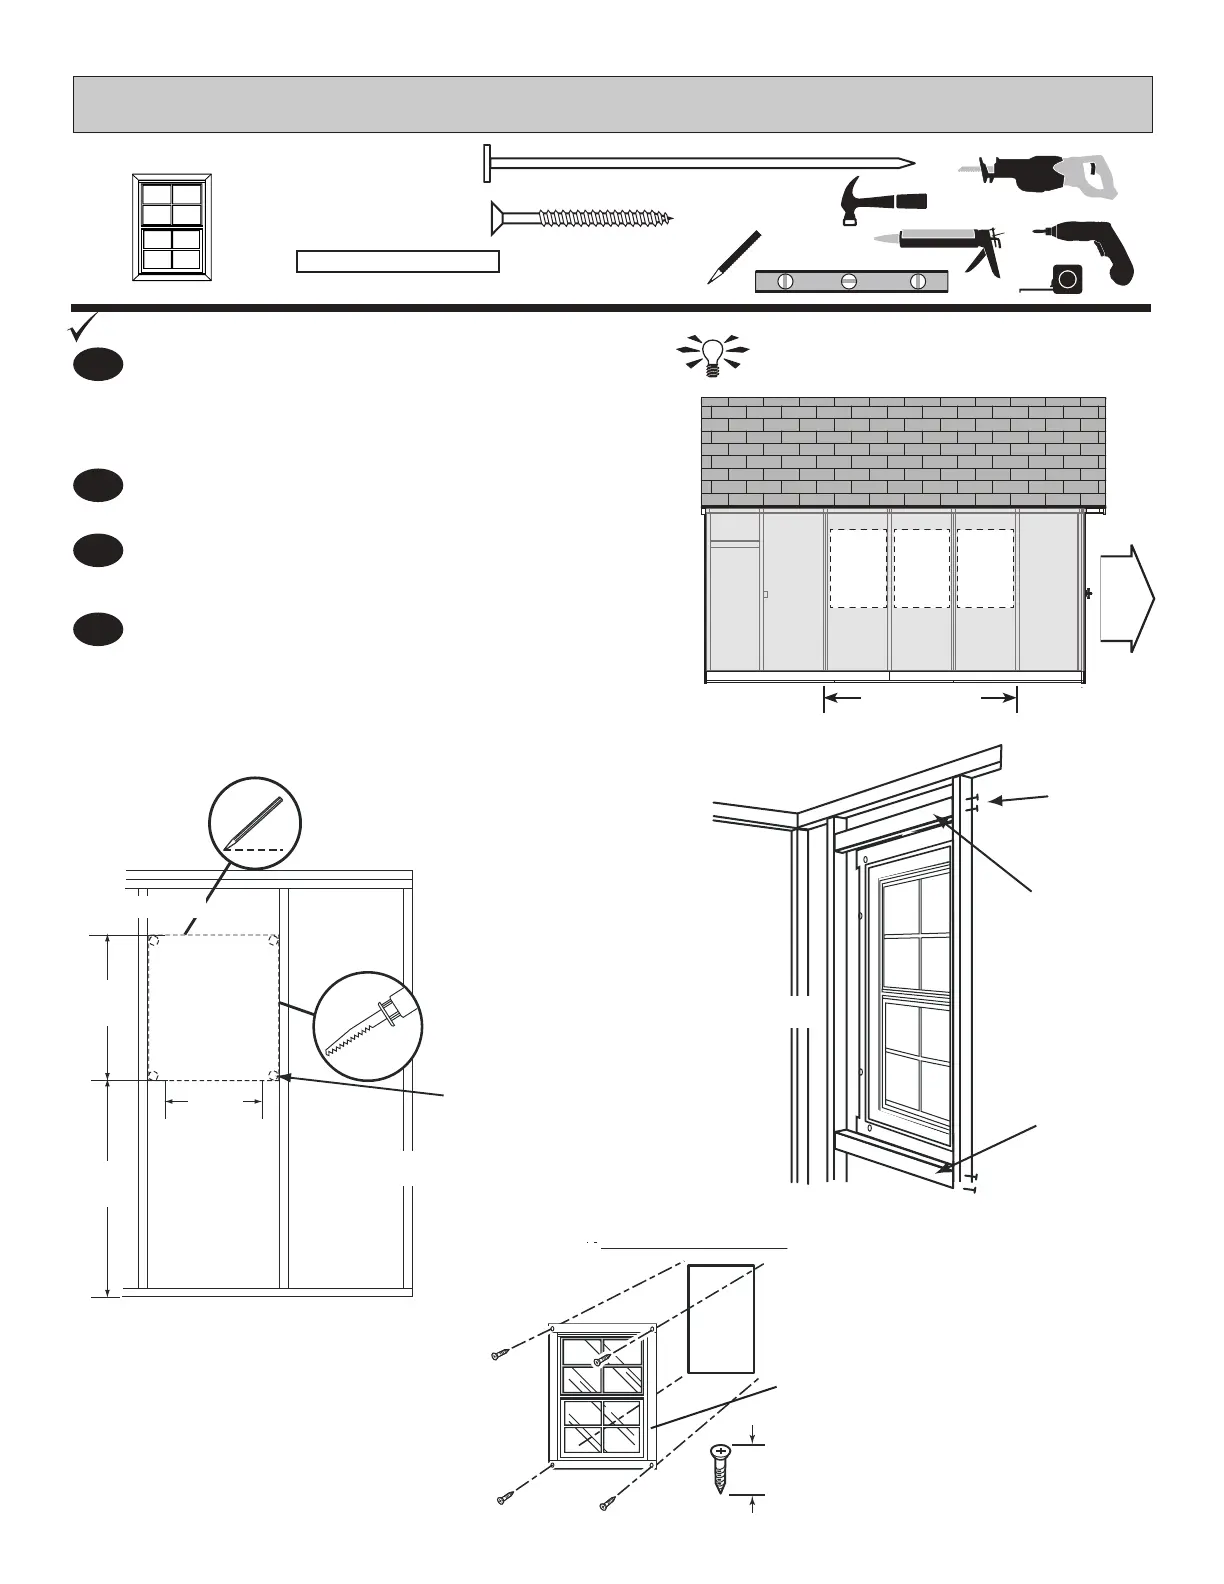
PARTS REQUIRED:
Seal window with high-quality exterior-
grade caulk before installing (Fig. C).
3
2
1
4
Attach window from outside using four 1-1/4" (3,2 cm)
screws as shown. Ensure window is level (Fig C).
Choose your window location.
From inside, measure up 32" from oor panel
and mark a 22-1/2" wide by 30" high opening
BETWEEN STUDS as shown (Fig A).
Place framing AO at top and bottom of
cutout ush with opening edges, nail through
studs into framing ends with 3" nails (Fig. B).
Drill 3/8” starter hole in corners. Cut
opening according to marked line (Fig. A).
You can place your window within
three locations on either side of shed
Large Window
x1
x8
LARGE WINDOW
* * *
1-1/4"
(3,2 cm)
HERE HERE HERE
AO
AO
3" (7,6 cm)
Nails
x8
x2
AO
2 x 4 x 22-1/2" (5,1 x 10,2 x 57,1 cm)
3" (7,6 cm)
1
2
Inside View of Wall
30”
(76cm)
32”
(81,2cm)
22-1/2”
(57cm)
3/8” Starter
Caulk behind
frame near
edge.
WINDOW AREA
Fig. A
Fig. B
Fig. C
 Loading...