x2
2 x 3 x 18-3/8" (5,1 x 7,6 x 50,2 cm)
WJ
x1
2 x 3 x 93" (5 x 7,6 x 236,2 cm)
PL
x8
x4
39
SHELF & WORKBENCH
PARTSREQUIRED:
3" (7,6 cm)
2
3
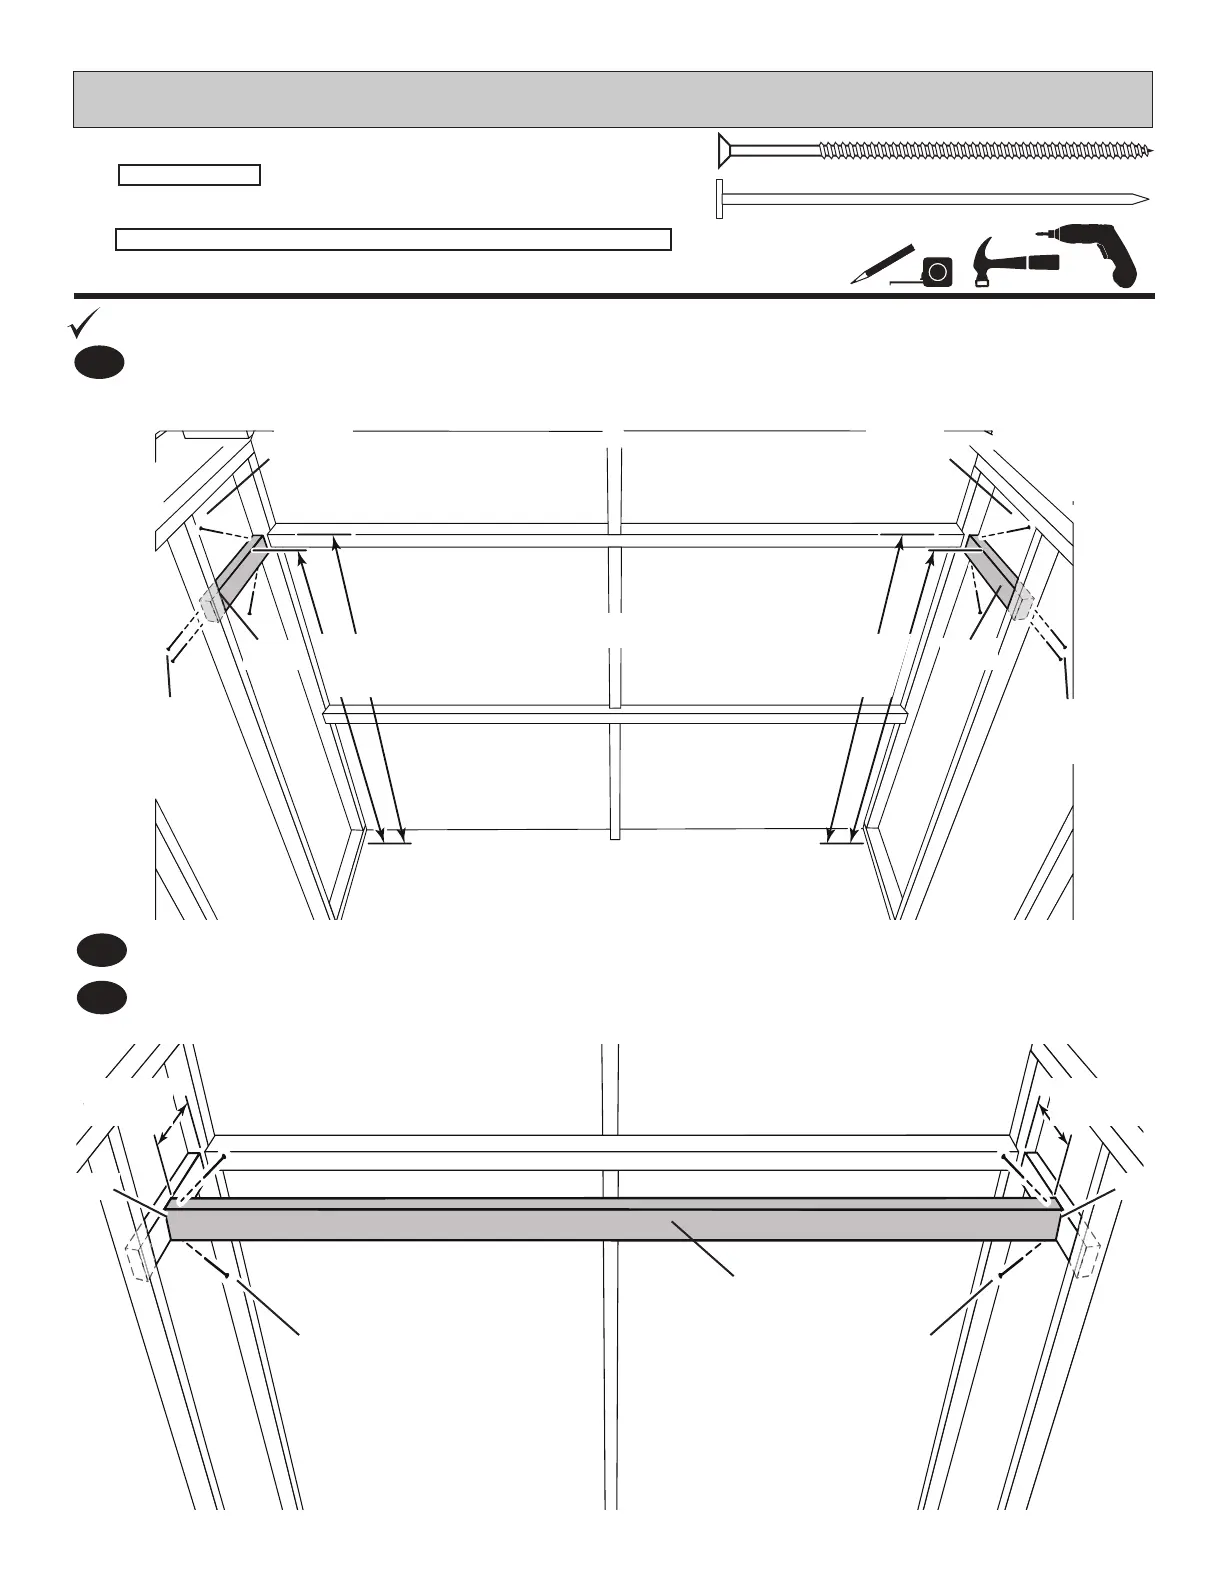
Place shelf support WJ at same height as horizontal wall brace and secure using
two 3" screws into back stud and two 3" nails into rst stud as shown.
SAME
HEIGHT
RepeatStep1 to attach second shelf support WJ.
Place PL ush to shelf supports and 8-5/8" (21,9 cm) from back stud as shown.
(2)3"
(7,6cm)
Nails
(2)3"
(7,6cm)
Nails
(2)3"
(7,6cm)
Screws
Flush
(2)3"
(7,6cm)
Screws
(2)3"
(7,6cm)
Screws
8-5/8"
(21,9cm)
8-5/8"
(21,9cm)
(2)3"
(7,6cm)
Screws
WJ
WJ
PL
Flush
3" (7,6 cm)
BACKWALL
SAME
HEIGHT
1
 Loading...