6. Operation
Afteryouhaveinstalledtheowtubeintotheprocess
piping, wired the input/output terminals, set up the
required parameters, and performed a pre-operation zero
adjustment,themagneticowmetershouldoutputan
accurateowsignalfromitsterminalsassoonasowof
theuidtobemeasuredbegins.Thissectiondescribes
zero adjustment and the corresponding procedures.
6.1 Pre-operation Zero
Adjustment
Zero adjustment is carried out to ensure that the output
forzeroowis0%(i.e.,4mA).Althoughadjustmentto
zero is performed at the manufacturing plant prior to
shipment, this procedure must be carried out once again
following the installation of piping in order to match the
magneticowmetertoitsoperatingconditions.
This section describes the zero adjustment procedure
using display unit switches from the converter. Also, it
can be operated using the BT200 Handheld Terminal.
Accordingly, one of these methods should be selected
and implemented.
IMPORTANT
• Zero adjustment should be carried out before
actual operation. Note that setting and update
functions cannot be carried out during this
procedure (i.e., for approximately 30 seconds).
• Zero adjustment should only be carried out when
theowtubehasbeenlledwithmeasurement
uidandtheuidvelocityiscompletelyzeroby
closing the valve.
• Eachtimethattheuidbeingmeasuredis
changed, it will be necessary for zero adjustment
tobecarriedoutforthenewuid.
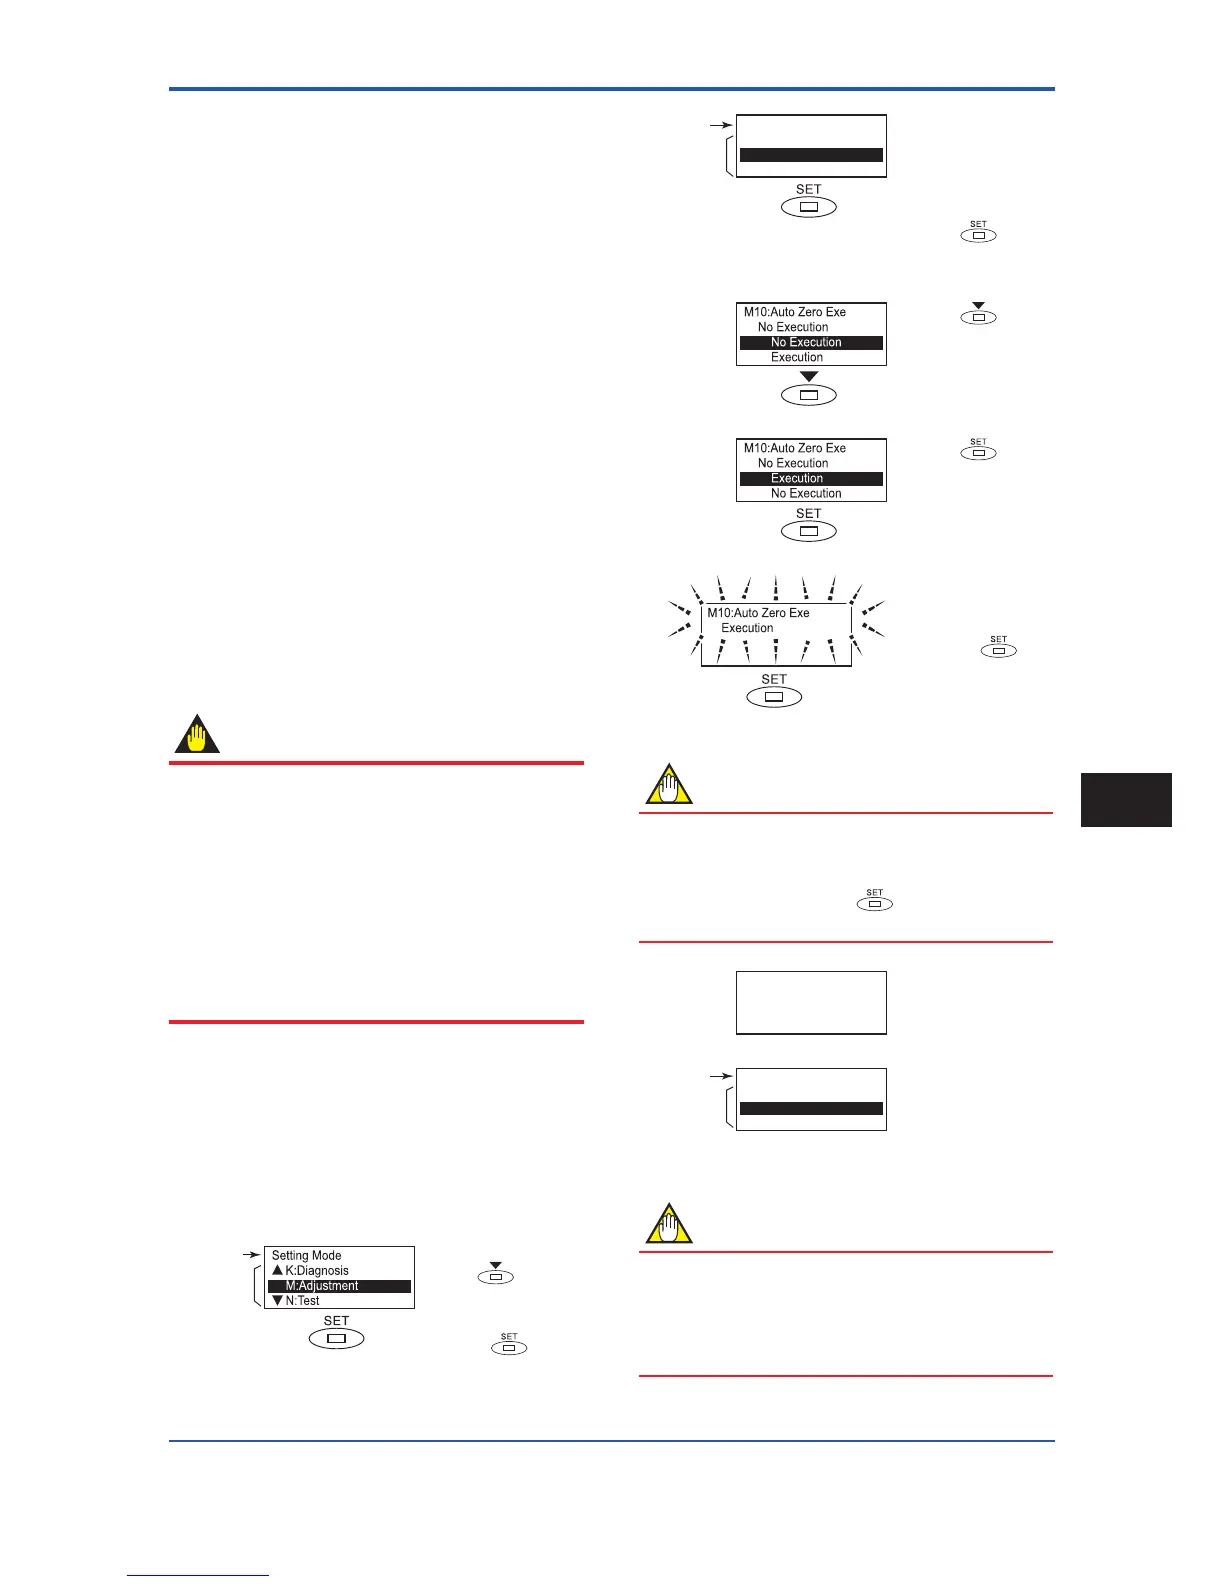
6.2 Zero Adjustment Using
Display Unit Switches
The parameters for zero adjustment are B50/M10: Auto
Zero Exe (and either of these can be used to carry out
this procedure). The parameter M10: Auto Zero Exe will
be used in the following description.
In order to request
conrmation,theentire
displayashesonand
off. Touch the
switch once again at
thistimetoxselection
of the automatic zero
adjustment function.
NOTE
When no operations are carried out for 20 seconds in
theashingstate,thesystemwillautomaticallyreturn
to the Sub-item Parameter Search Mode.
When the operations except
switch are carried
out, the parameter cannot be set.
 Loading...