IM 12D08B02-01E
6-2 Calibration
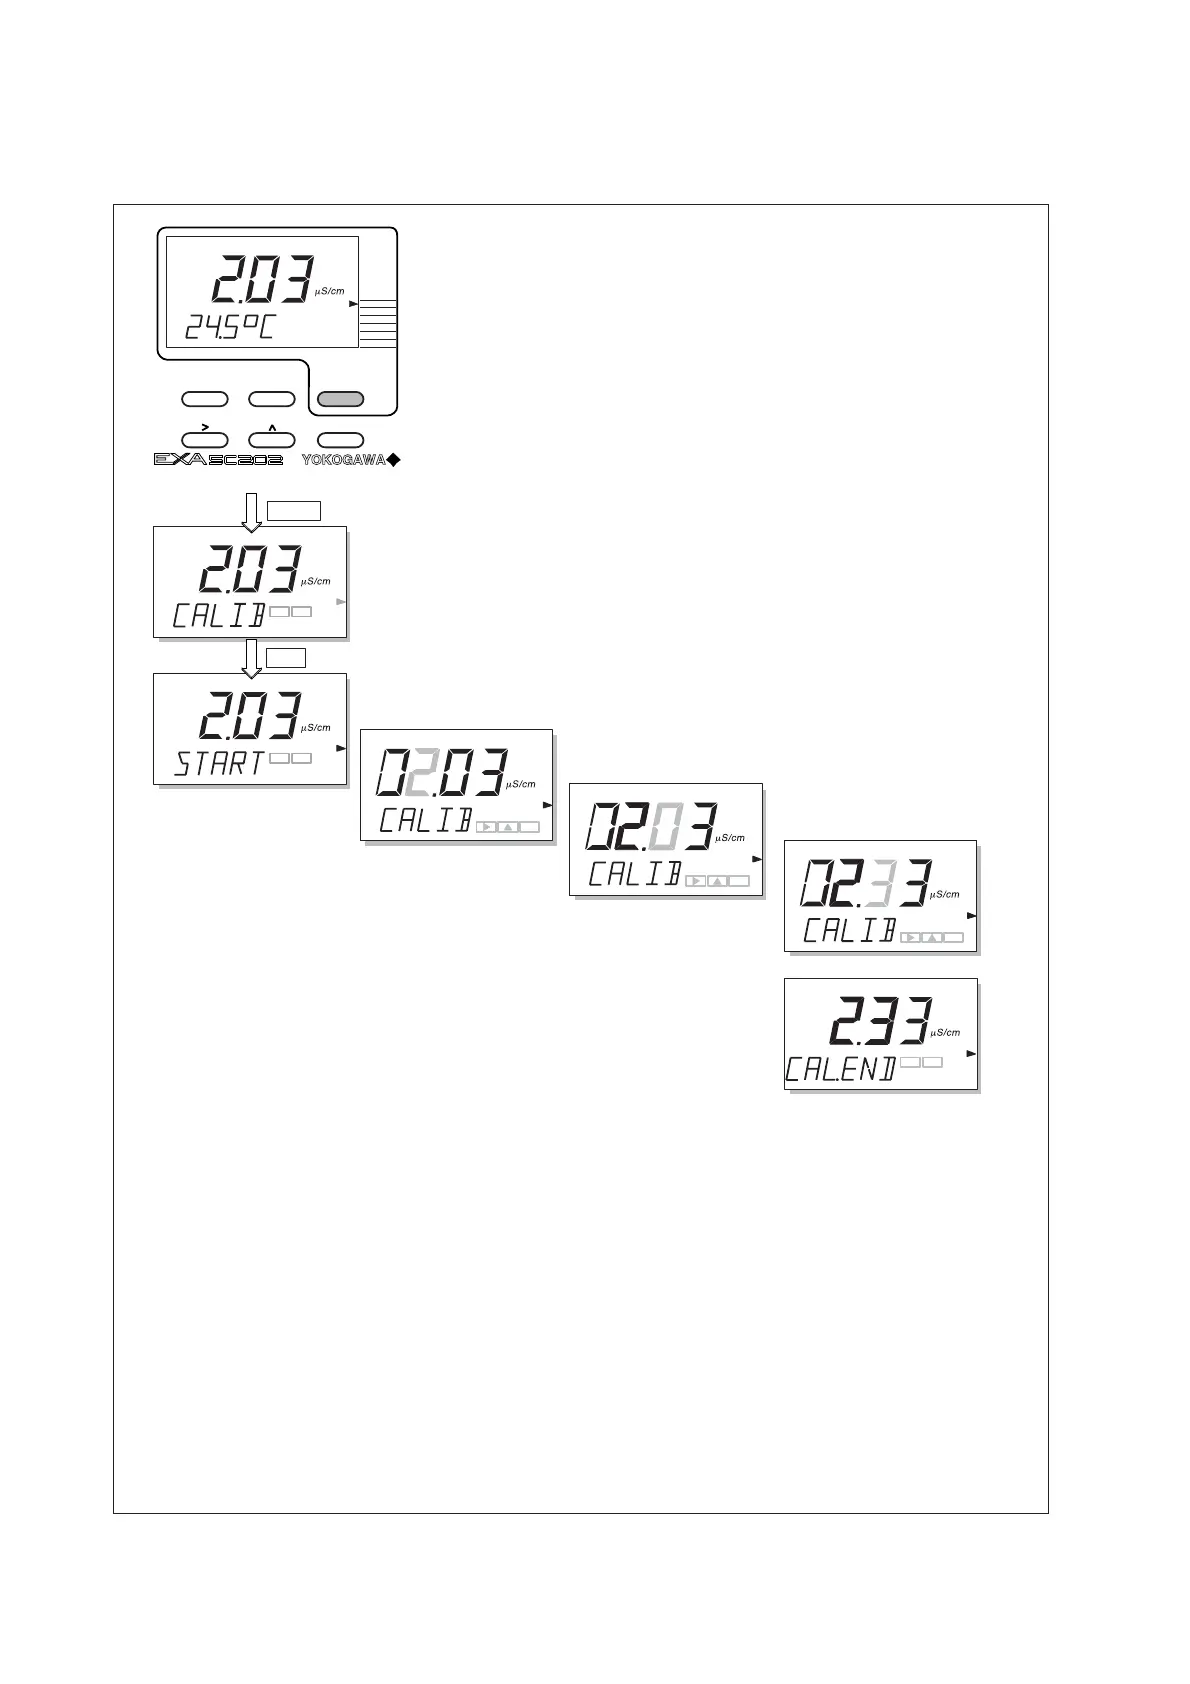
6-2. Calibration procedure
ENT
ENT
>
Select the flashing digit with the > key.
Increase its value by pressing the key
>
After the indication is stable, set the value
using the >,,ENT key.
Put the sensor in standard
solution. Press YES.
When the correct value is displayed,
press ENT to enter the change.
After briefing displaying WAIT,
the CAL.END message appears.
The calibration is now complete. Put the
sensor back in the process and press YES.
NOYES
NOYES
MODE
NOYES
YES
ENT
NO MODEYES
MODE
MEASURE
DISPLAY
CAL
HOLD
Press the MODE key.
The legend CALIB
appears, and the YES/NO
key prompt flags flash.
ENT
The cell constant is automatically updated after the calibration and the new
value can be read on the display as described in section 4.5.
The calculation is as follows: Cell constant in /cm= (Conductivity of calibration solution in mS/cm) x
(Cell resistance in kOhm)
Comparing this calibrated cell constant with the initial nominal cell constant in service code 03
gives a good indication of the stability of the sensor. If the calibrated cell constant differs more than
20% from the nominal cell constant error E3 is displayed.

 Loading...