IM 12D08B02-01E
Appendix 3-1
13. APPENDIX 3 QUALITY INSPECTION
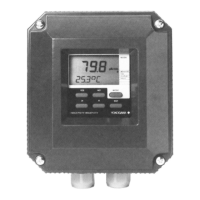
13-1. SC202G 2-Wire Conductivity Transmitter
Quality
Inspection
Standards
SC202G, SC202SJ
2-Wire Conductivity Transmitter
QIS 12D08B02-01E
1st Edition: Feb. 2001(YK)
6th Edition: Mar. 2007(YK)
1. Scope
This inspection standard applies to the SC202/SC202SJ 2-Wire Conductivity Transmitter.
2. Inspection Items
2.1 Insulation resistance test
2.2 Current output test
2.3 Temperature indication check
2.4 Resistance (conductivity) check
3. Inspection Methods, Standards and Conditions
z Connect the testing circuit as shown in Figure 1. Allow the instrument to warm up for at least
5 minutes before conducting the tests. For the connections for the insulation resistance test,
follow the instructions in Section 3.1.
z Performance tests should be done in the inspection mode where the tests from Section 3.2
through Section 3.4 take place in sequence and cannot be retraced. If the reconfirmation of
a test is needed, turn off the power to the transmitter, turn on the power again, and enter the
inspection mode to restart the tests.
z Set the equipment as follows.
Decade resistance box 1 (temperature): 960.9 :
Decade resistance box 2 (conductivity): 10 :
DC source: 24 VDC
3.1 Insulation Resistance Test
As for the PH202G, follow the instructions below.
(1) Apply 500 V DC between the power supply terminals shorted together (+ and –) and the
earth terminal (G). The insulation resistance must be 100 M or greater.
(2) Apply 500 V DC between the input terminals shorted together (11 to 16) and the earth
terminal (G). The insulation resistance must be 100 M or greater.
As for the PH202SJ, follow the instructions below.
(1) Apply 125 V DC between the power supply terminals shorted together (+ and –) and the
earth terminal (G). The insulation resistance must be 9.5 M or greater.
(2) Apply 125 V DC between the input terminals shorted together (11 to 16) and the earth
terminal (G). The insulation resistance must be 100 M or greater.
3.2 Current Output Test
<Test>
(1) Enter Service Code 87 and then password 070.
(2) When the message display shows “*HIF”, press the [YES] key.
(3) Press the [ENT] key. (The date in day-month-year (last 2 digits) order will appear.)
(4) Press the [ENT] key. (The time in hour-minute-second order will appear.)
(5) Press the [ENT] key.
(6) When the message display shows “4 (mA),” the output current must be within the range
shown in Table 1.
(7) After confirmation, press the [ENT] key.
(8) To skip the current output if not needed to be checked, just press the [ENT] key.

 Loading...