Primo Star / Primo Star iLED Start-Up and Operation Carl Zeiss
M60-2-0011 v 08/2008 33
En
lish
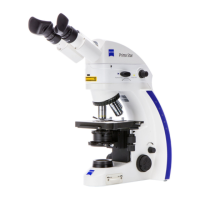
3.5.5 Installing/removing the mirror
The mirror serves to illuminate the specimen if no
power outlet is available.
It can be used only in combination with the
Primo Star Fixed-Köhler Microscope. For this
purpose, it is necessary to remove the condenser
and the condenser carrier insert.
Installing the mirror:
• Remove the cover cap (
Fig. 30/6) from the
luminous-field diaphragm (
Fig. 30/5).
• Unscrew the stop screw (
Fig. 30/8) and lower
the condenser carrier fully down using the
knurled screw for vertical adjustment.
• Using an Allen key, loosen the clamping screw
(
Fig. 30/2) of the condenser and the centering
screws (
Fig. 30/3) of the condenser carrier
(
Fig. 30/4) so that the condenser (Fig. 30/7) can
be removed frontward. Remove the condenser
(
Fig. 30/7).
• Unscrew the clamping screw (
Fig. 30/2 or Fig.
31/1) from the condenser carrier insert (
Fig.
30/1 or
Fig. 31/3).
• Push the condenser carrier insert backward
against the spring and inclining it remove it
upward from the condenser carrier (
Fig. 30/4).
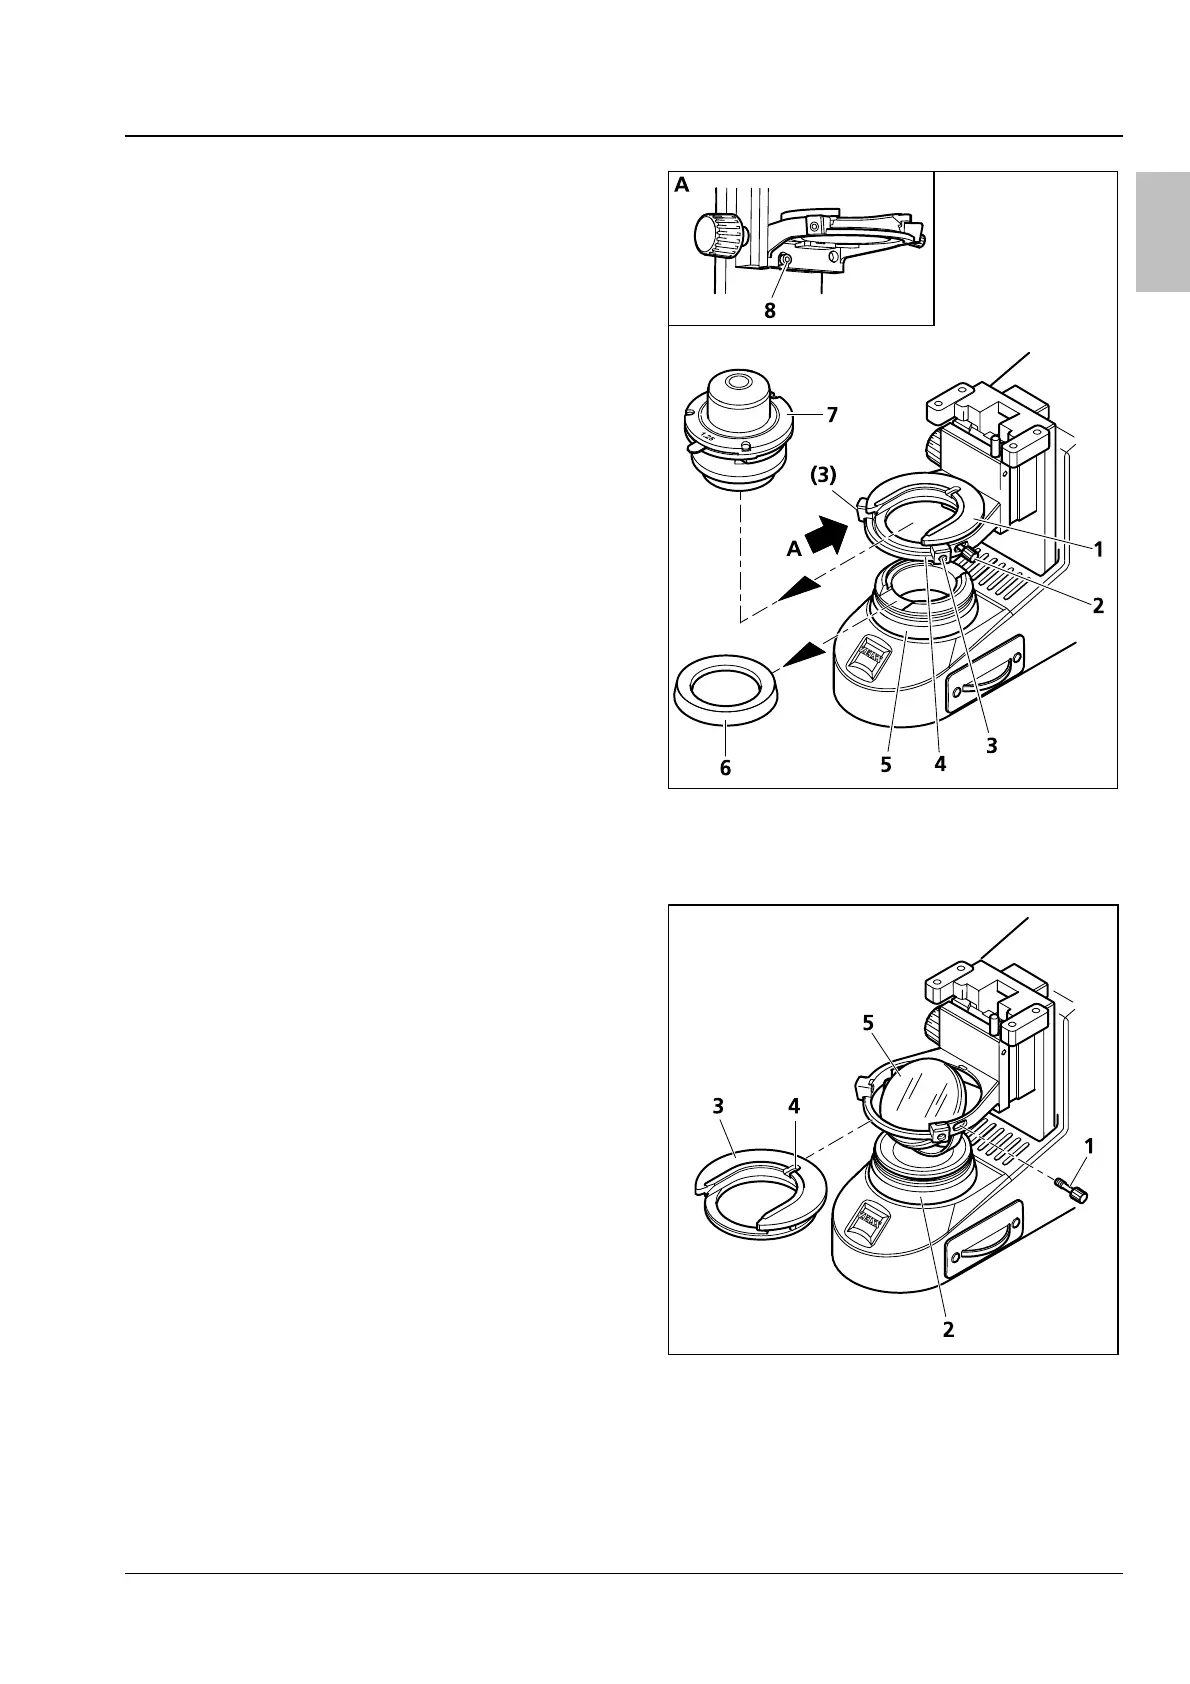
• Insert the mirror (
Fig. 31/5) from top through
the opening of the condenser carrier and place
it onto the mount of the luminous-field
diaphragm (
Fig. 31/2). Take care that the mirror
rests horizontally on the mount.
• Rotate and incline the mirror until the daylight is
reflected homogeneously into the light path.
Removing the mirror:
Removal of the mirror is done in reversed order.
Fig. 30 Removing/installing the condenser
Fig. 31 Installing/removing the mirror
 Loading...