ENGLISH
83
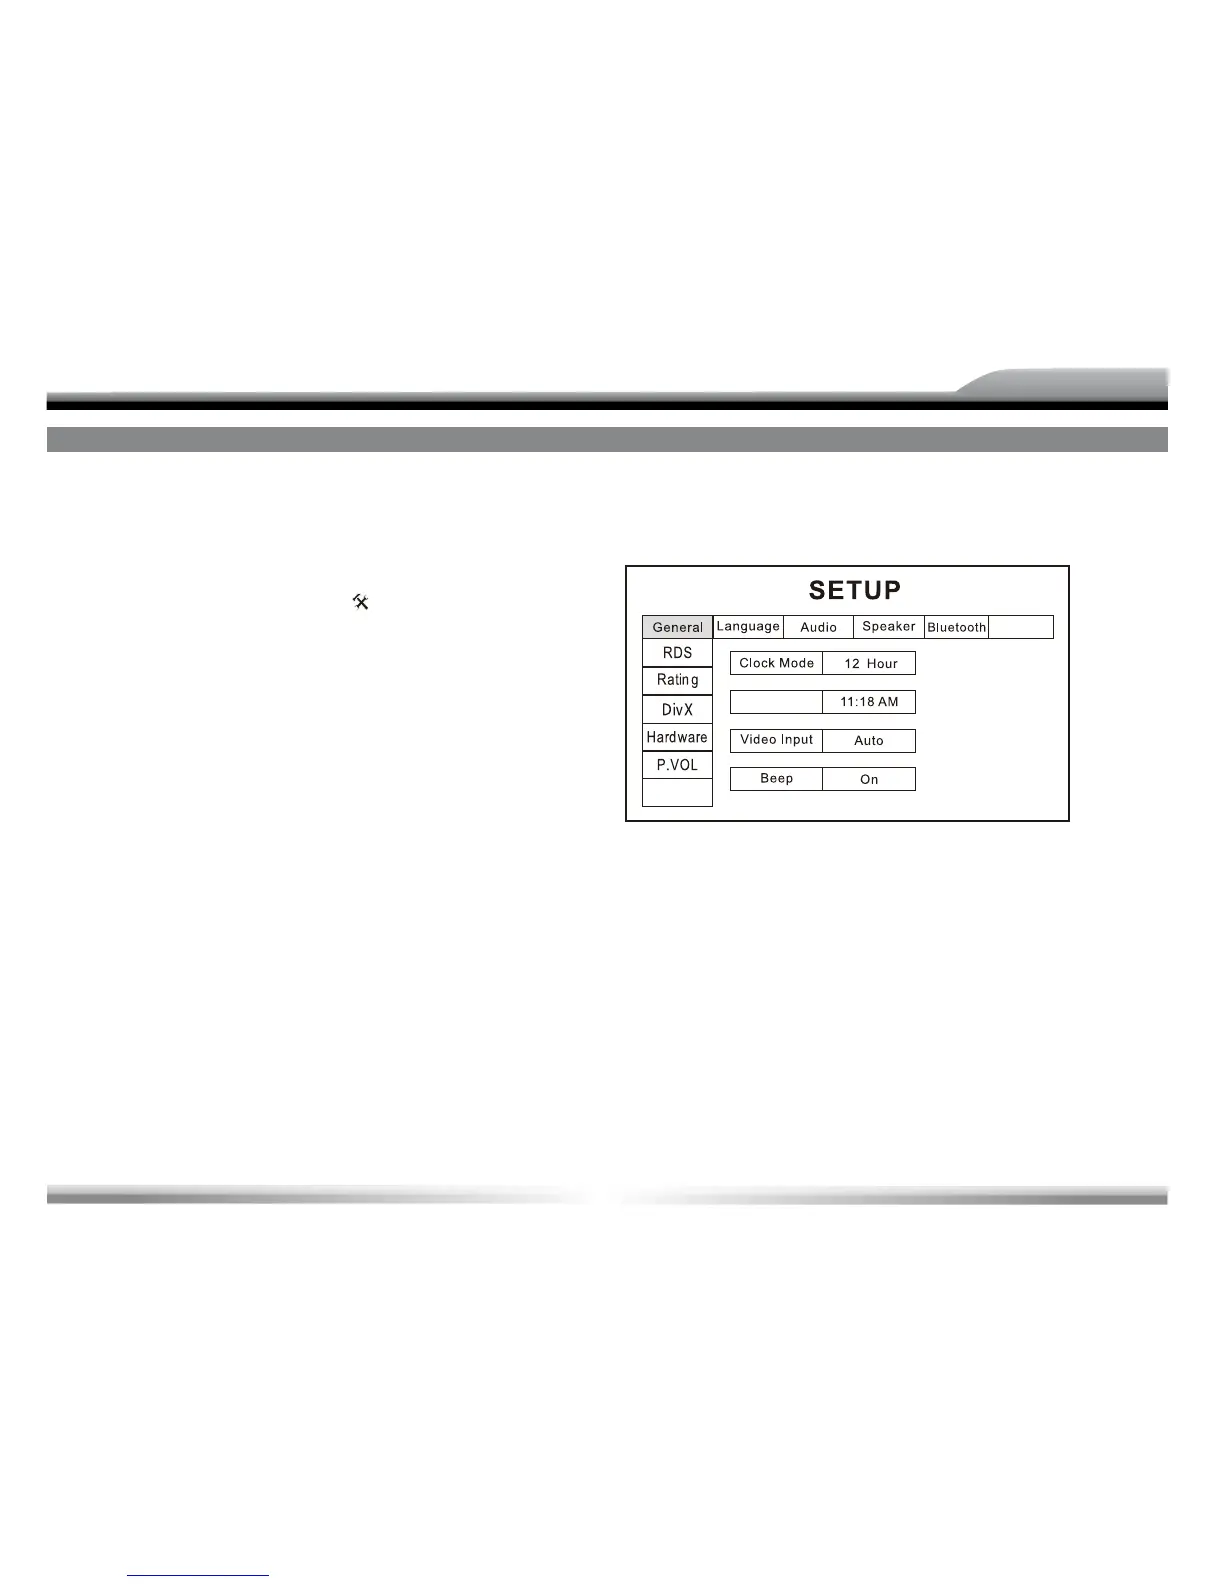
SETUP
You can configure this unit after entering the SETUP menu.
SETUP PROCEDURE
1. Enter setup mode
Method 1: Press the [SETUP] key on the remote control.
Method 2: Touch the setup icon [
] on the user interface.
2. Select one option
Press the [Up], [Down], [Left] or [Right] key on the remote
control.
3. Select one item
Press the [Up] or [Down] key on the remote control.
4. Confirm
Press the [ENTER] key on the front panel or on the remote
control.
5. Select one value
Press the [Up] or [Down] key on the remote control or rotate the
[TUNE.ENT] key on the front panel.
6. Confirm
Press the [ENTER] key on the front panel or on the remote
control.
NOTE:
■ All following settings can be done by touching the corresponding
options directly.
USER INTERFACE OF SETUP MENU
The following menu appears after entering the setup mode.
The ‚General‘ sub-menu is highlighted by default.
GENERAL
Clock mode
12Hr: The clock displays in the type of 12 hours such as 11:18
AM.
24Hr: The clock displays in the type of 24 hours such as
20:18.
Clock adjust
Adjust the clock appearing in the top right corner of the TFT
screen.
NOTE:
■ When ”CT” is activated, the unit adjust the clock/time itself
(RDS).