2
INSTALLING THE
3C509B NIC
You can install the 3C509B NIC in a PC with an available
ISA or EISA slot. If you need to change the configuration,
see Chapter 4.
This chapter describes how to install the 3C509B NIC in
your PC and connect it to the network.
Installing the 3C509B NIC
To install the 3C509B NIC into the PC, follow these steps:
1 Open the shipping container and inspect each item
for damage.
CAUTION: Each NIC is packed in an antistatic container
to protect it during shipment. To avoid damaging any
static-sensitive components, reduce any static electricity
on your person before handling the NIC. You can do this
simply by touching the metal chassis of your computer.
You can maintain grounding by wearing a wrist strap
attached to the chassis.
2 Unplug the PC and disconnect all cables.
3 Remove all jewelry from your hands and wrists.
Use only insulated or nonconductive tools.
4 Remove the PC cover and select an available ISA or
EISA expansion slot.
5 Remove the backplate from the slot.
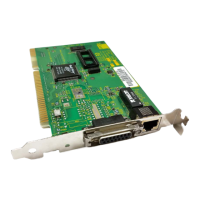
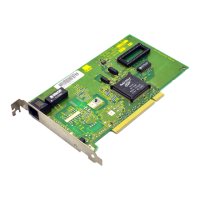
6 Insert the 3C509B NIC in the slot, as shown in
Figure 2-1. Press it in firmly to get a good
connection.