3D Systems, Inc.
5
STEPS FOR PRINTING YOUR FIRST PRINT
The software that will be used to create and send les to print a build job is called 3DSPRINT
TM
. This section is designed to walk you
through selecting your printer, selecting materials, and printing your rst print. For detailed information on the features of 3DSPRINT you
can access the full help document by clicking on the icon inside the 3DSPRINT software.
PRINTING A PART
To print your rst part follow these instructions.
NOTE: Ensure print platform is installed prior to printing a part. See Print Platform Installation for more information.
Launch 3DSPRINT
Double click the 3DSPRINT icon on your computer/laptop or
select it from your list of available programs loaded on your
computer.
NOTE: Before beginning click on the Settings
Icon to check the units of measure before you
begin to ensure you have the correct units of
measure selected.
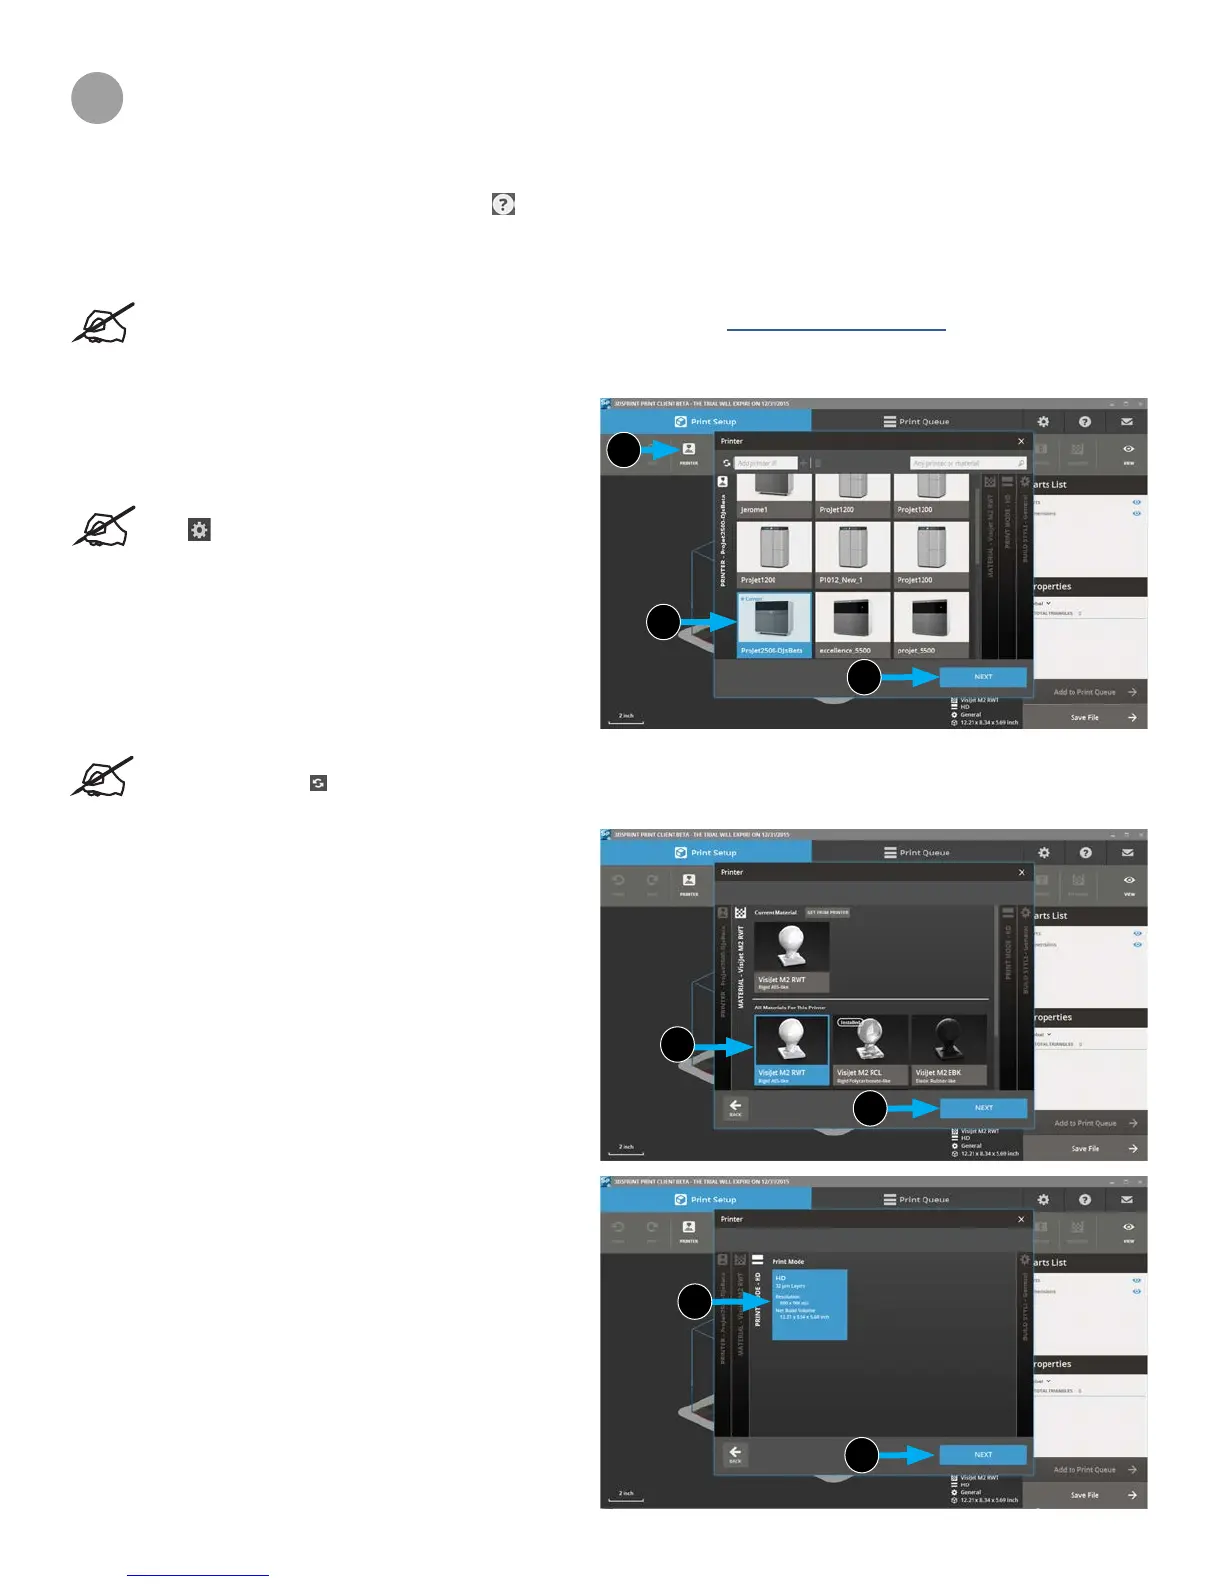
Selecting the Printer
1. Select the printer you wish to print your part on. Click on
the Printer (1) button at the top.
2. A list of available printers will come up. Click on desired
printer (2a) on the printer you wish to use and select
Next (2b).
NOTE: If desired printer is not listed you can
select refresh icon or manually type the IP
adress in the eld next to refresh.
Selecting Material
1. At this point you must select the desired material part will
be printed with. Double Click desired material (3a) and
select Next (3b).
Selecting Print Mode
1. The next option to select is the print mode. Available print
modes will automatically populate after your select your
material. Click on desired mode (4a) and select
Next (4b).
1
2a
2b
3a
3b
4a
4b
18