3D Systems, Inc.
MATERIAL CARTRIDGE REMOVAL AND INSTALLATION
When a material cartridge is empty and needs to be replaced, or if a partially lled container needs to be replaced with a full container,
perform the following procedure.
NOTE: It is important to verify the type of material currently in the MDM before proceeding with these steps.
IRRITANT! Wear protective clothing, disposable nitrile gloves, and goggles, while performing the following steps:
Removing Material Cartridge
NOTE: Cartridges cannot be removed from a cold printer. The
printer must be warm before drawer will open and cartridges
can be removed.
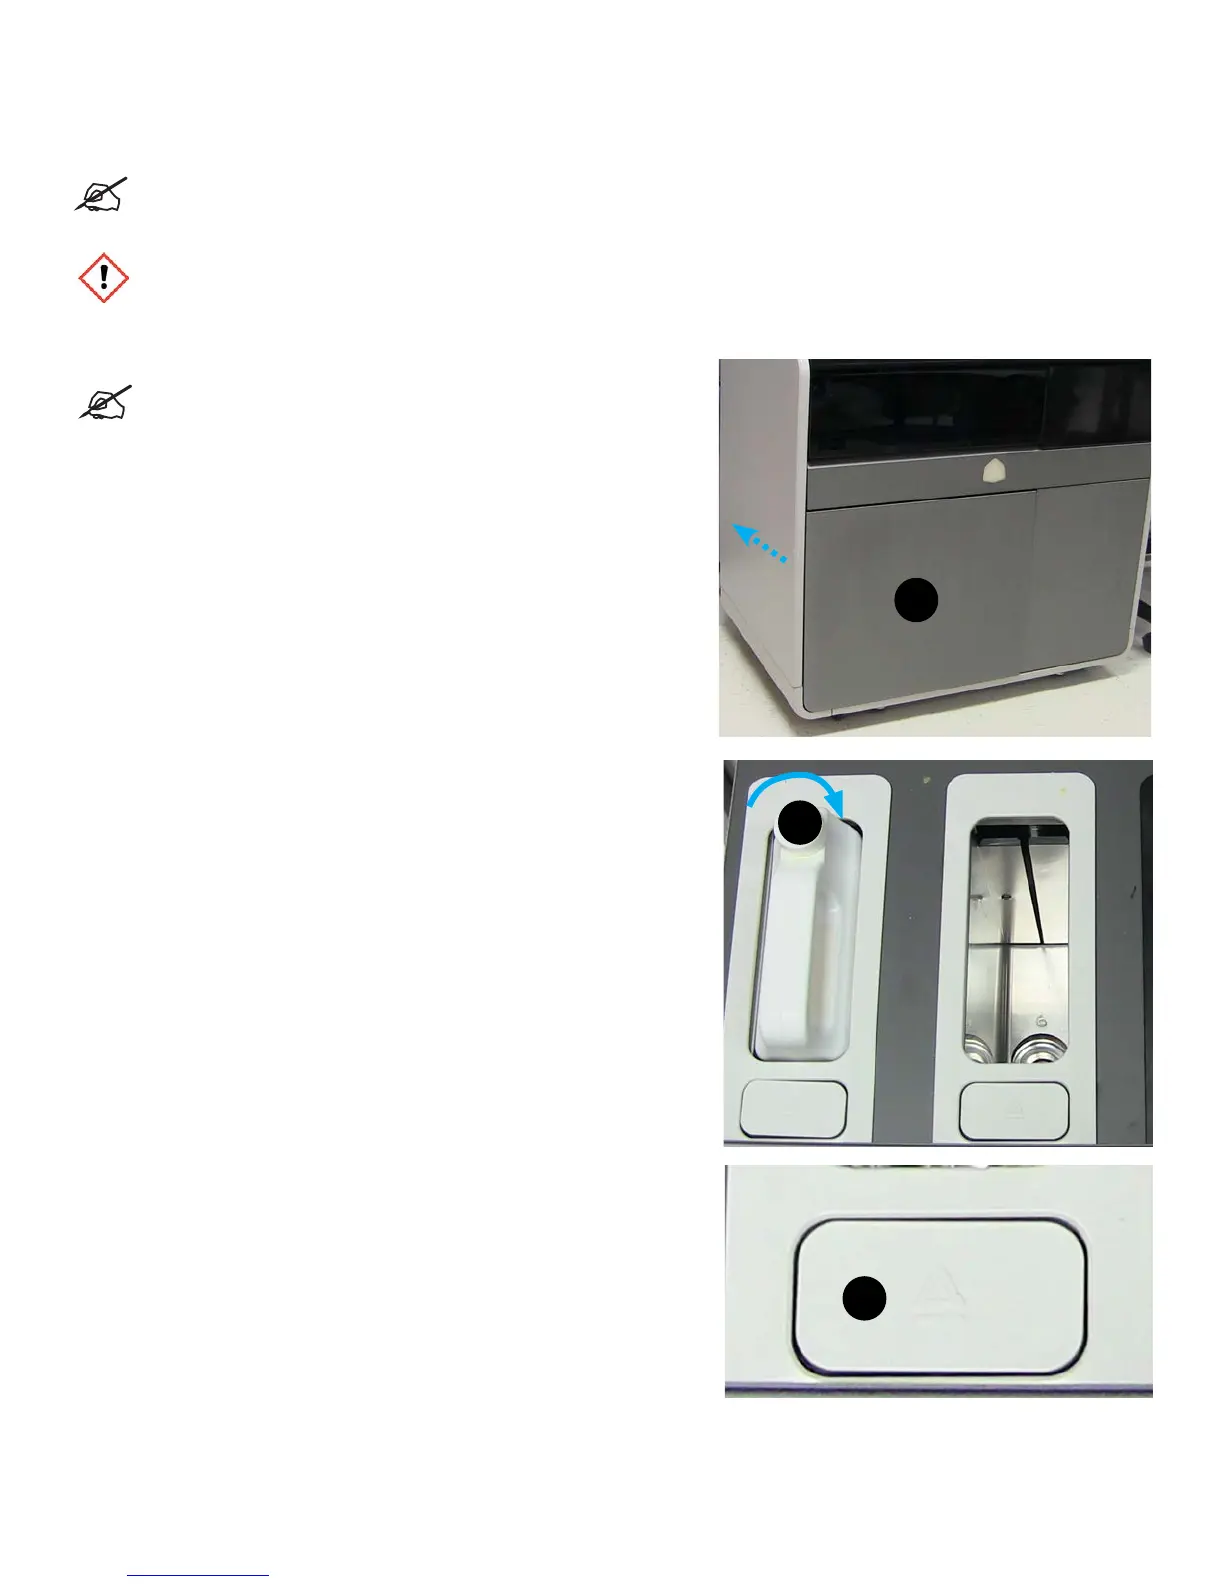
1. The MDM drawer (A) is a push/push mechanism. Push to open
drawer, push to lock drawer.
2. Open the MDM drawer by pushing the drawer panel in so it opens.
3. Pull the MDM drawer open.
4. Turn the material cap (B) a 1/2 turn to clockwise to tighten the vent cap.
5. Press the release button (C) on the front. You will hear the cartridge
release. Pull the cartridge out of the slot.
6. Dispose of the empty cartridge according to local regulations.
7. Wearing nitrile gloves, use a disposable paper towel and wipe all material from the container seal assembly, if necessary you can
use some isopropyl alcohol on the paper towel to wipe up the excess material.
A
B
C
33