5
ENGLISH
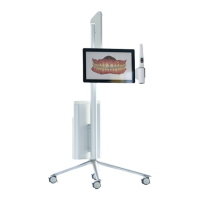
The friction of the arm of the MOVE/MOVE+ cart that holds the scanner
and the display can be adjusted. The corresponding tool is provided with
the system. (Figure 4)
IMPORTANT NOTICE
Maximum current available for the USB port is 200 mA.
Step 1: Move the arm to the top-most position.
Step 2: Insert the tool into the hole on the bottom side of the arm,
located approx. half way along the arm.
Step 3: Turn the tool clockwise to increase friction, anticlockwise
to reduce friction.
Step 4: Adjust friction so that the monitor is steady (does not sink,
does not go up) in the following scenarions:
• Scanner is positioned in scanner holder
• Scanner is not positioned in scanner holder
System S2P furthermore comprises:
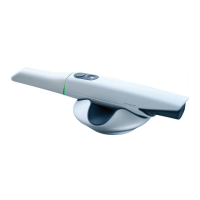
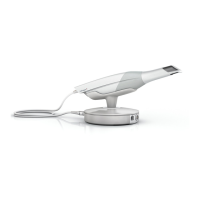
Pod, PS2-2 (Figure 5):
• A mount for the scanner (S24)
• A USB wireless dongle for the PC (S25)
• A USB license dongle (S25)
4.7 Setting up TRIOS
It is recommended that unpacking, assembly and connection of the TRIOS
IOS system be performed by TRIOS authorized technical service personnel.
It is recommended to fully charge batteries for the scanner before use.
CAUTION
If the system has just been delivered from a cold
environment, let it adjust to room temperature to avoid
internal condensation and to allow for proper calibration.
CAUTION
Examine all parts of the system. Look for physical damage,
loose parts or signs of wear that could interfere with proper
use and functionality. Contact your service provider if there
is visible damage or malfunctioning.
System S2A (MOVE/MOVE+ cart) only
Please follow the steps below for assembling TRIOS (Figure 1 and 2):
Step 1: Follow the instructions in the packaging to assemble the foot
onto the MOVE/MOVE+ cart. Tools are provided in the box.
Step 2: Place the MOVE/MOVE+ cart optimally in relation to the patient
chair and your work position.
Step 3: Attach the protection tip to the TRIOS scanner if not already in
place (S4).
Step 4: Place a fully charged battery in the scanner (S12). Connect the
LAN cable to the MOVE/MOVE+ cart’s LAN connection at the bottom of
the computer unit (S21)
Step 5: Place the scanner in its designated scanner mount on the
MOVE/MOVE+ cart (S16).
Step 6: Connect the MOVE/MOVE+ cart end of the power cable to the
socket in the bottom of the MOVE/MOVE+ cart’s base. (S20)
Step 7: Connect the power cable to a grounded power outlet. Ensure
that the MOVE/MOVE+ cart is placed so it does not block the switch on
the mains socket-outlet. To isolate the MOVE/MOVE+ cart and thus the
scanner from supply mains, unplug the flexible power cord from mains.
System S2P (Pod) only
Please follow the steps below for assembling TRIOS (Figure 1 and 5):
Before you start: Place the pod on a flat and horizontal surface
optimally in relation to the patient chair and your work position. Attach
the protection tip to the TRIOS scanner if not already in place (S4).
Step 1: Place a fully charged battery in the scanner. Insert it fully into the
rear of the scanner (S12).
Step 2: Place the scanner in the Pod (S24).
Step 3: Attach the Wireless USB dongle into a USB port on the PC (S25).
CAUTION
If the charger indicates yellow, the battery is damaged and
should be discarded, unless the battery is too hot or too
cold, see section 4.10 TRIOS System Environment.
4.8 Starting and Shutting Down TRIOS
Please follow the steps below to start TRIOS for the first time:
Step 1: Turn the system ON.
S2A-10, S2A-18: Press the standby button on the top of the backside of
the display. The TRIOS software starts automatically.
S2P-2: Start the PC. If the PC has no TRIOS software pre-installed, please
install the TRIOS software first. In case of difficuclties with software
installation, please contact 3Shape support.
Step 2: Log on using a default TRIOS Operator.
Step 3: Configure and use your TRIOS system.
The scanner is turned on by pressing the button on the scanner. The
scanner can be turned off manually by removing the battery.
Follow on-screen instructions for connecting to the wireless scanner.
When using the TRIOS system the user will be guided by messages
shown in the TRIOS software. Examples of messages include:
• When the scanner has not been calibrated for the last 8 days, the user
is asked: “It is 8 days since last calibration. Please perform calibration
now.“
• When calibration is completed, the user is reminded to remove
calibration tip: “Ensure that the calibration tip is removed before
proceeding.”
• When entering the scan page, the user is reminded to mount the
scanner tip: “Please make sure the scanning tip is mounted on the
scanner.”
 Loading...