____________________________________________________________________________________________________________
G1 Introduction to AC500 1-51 AC500 / Issued: 07.2006
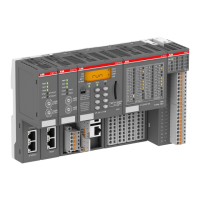
To configure the FBP address, please follow the procedure described below:
ETH
FBP
COM1
COM2
SYS
BATT
I/O-Bus
1. First select the item to be configured by
pressing the CFG key, the CPU changes to
configuration mode and a small triangle is
displayed on the LCD on the first right up
position of the display beside the ETH in-
scription and the already configured ad-
dress is displayed.
Press one time more the CFG key to move
the triangle to the position below ”FBP”.
The FBP is then selected, and the current
address is shown.
CFG
ETH
FBP
COM1
COM2
SYS
BATT
I/O-Bus
CFG
2. Press then the arrow keys UP or DOWN to
increase or decrease the address, the mo-
dified value blinks to indicate that it differs
from the previously stored one.
ETH
FBP
COM1
COM2
SYS
BATT
I/O-Bus
3. Once the desired address is reached,
press OK to accept and quit or only ESC to
exit the menu without saving the changes.
The CPU status is then displayed
run/StoP.
OK
ESC
or
ETH
FBP
COM1
COM2
SYS
BATT
I/O-Bus
ATTENTION
If the FBP address set on the AC500 CPU module is different from those
assigned into the Fieldbus configurator software of the Master device for that
station, the station could not be accessed and the complete Fieldbus could not
work properly or be completely down!
ATTENTION
The modified address will only be valid after a Power OFF / Power ON!
A AC500 CPU equipped with a FieldBusPlug is always a slave device on the bus. To act as a master, a
AC500 CPU should be equipped with master couplers (e.g CM572-DP for PROFIBUS DP).
Make the Connection of the FieldBusPlug to the Fieldbus Master Device
The FieldBusPlug module has to be connected to the master device and the power supply has to be
provided. Please use the dedicated accessories to the FBP used for the desired Fieldbus.
Refer to the FBP documentation for the installation instructions.
 Loading...