Operation Manual / TPL76-C
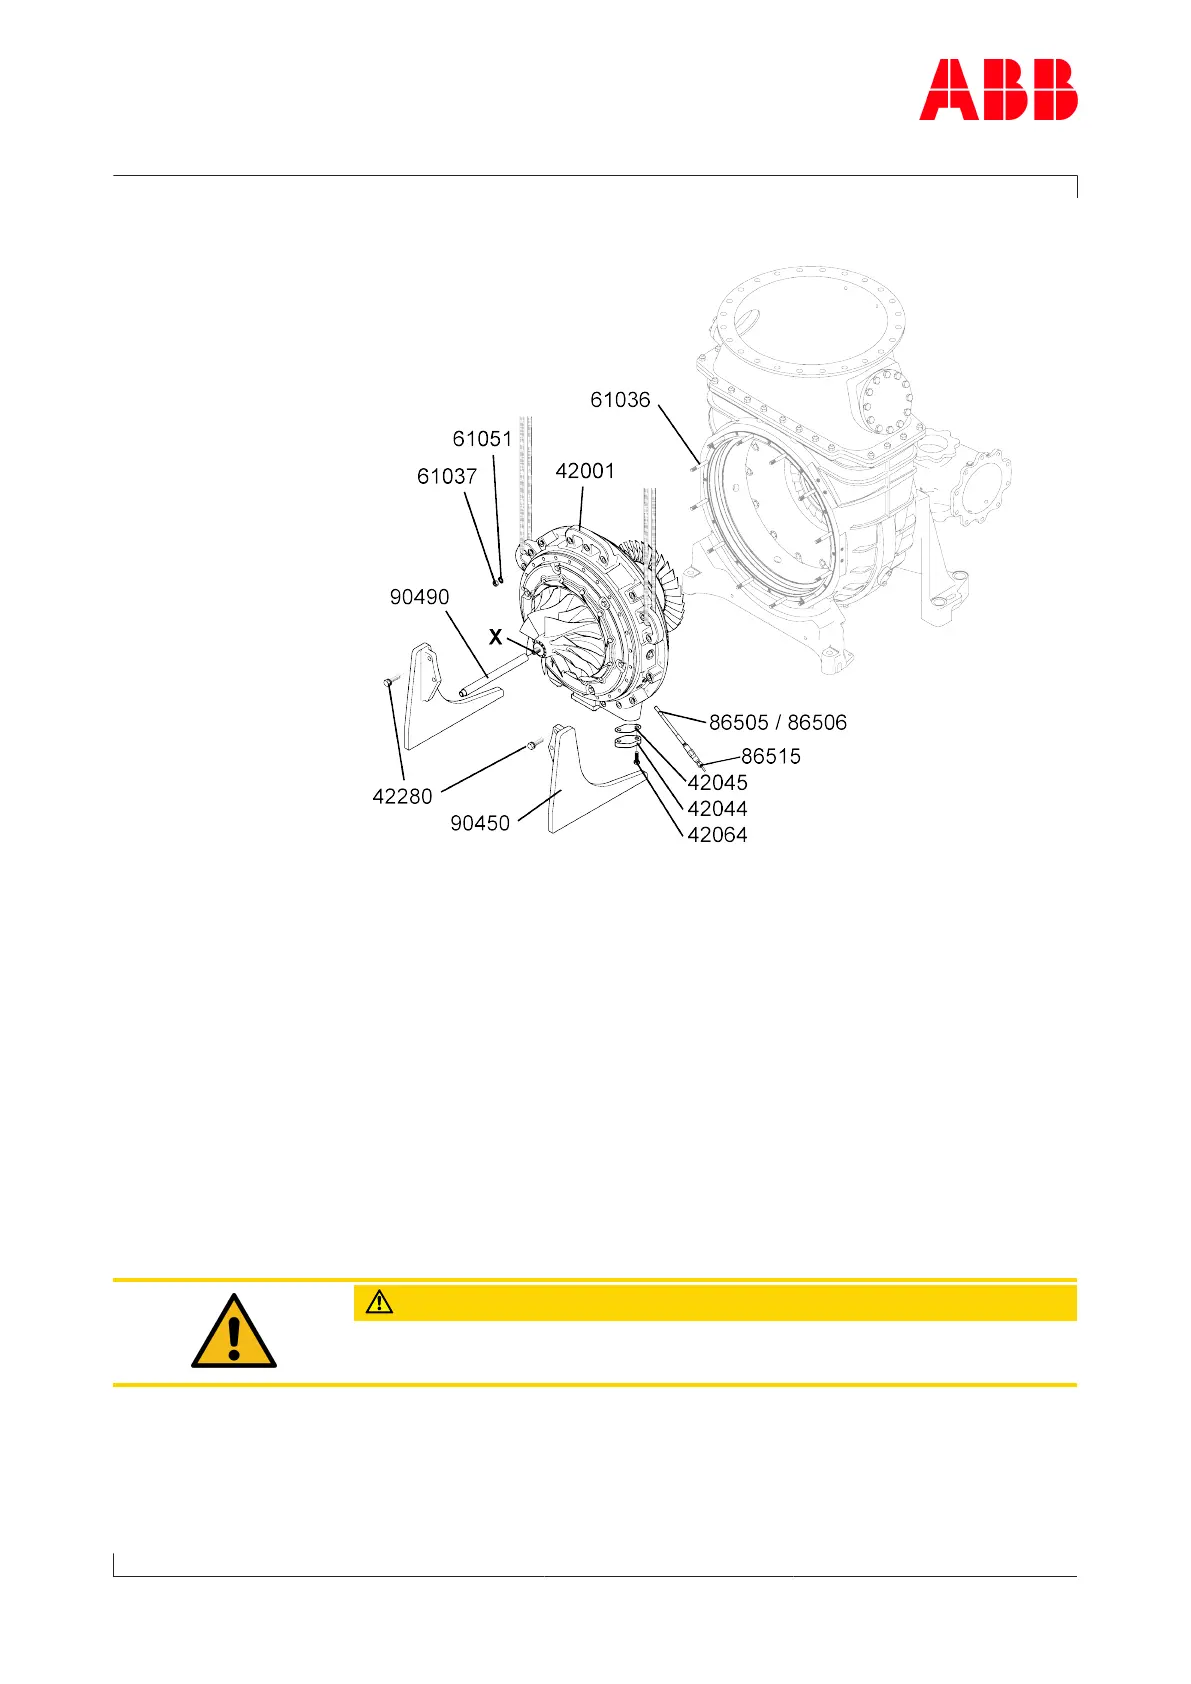
8 Disassembly and assembly / 8.7 Installing cartridge group
© Copyright 2018 . All rights reserved. HZTL2485_EN Revision F April 2018
u Remove cover from oil connection.
u Fit flange (42044) with new gasket (42045) and screws (42064).
u Check lifting gear and attach to bearing casing (42001) in such a way
that cartridge group is suspended in a straight position.
u Screw guide rod (90490) onto threaded stud (X) to balance cartridge
group.
u Remove supports (90450) and carefully insert cartridge group.
u Fit three oiled nuts (61037) complete with new Verbus Ripp® washers
(61051) around circumference at 120° intervals.
u Tighten the three nuts (61037) evenly and alternately with pre-tight-
ening torque of (MV) (see chapter Table of tightening torques).
u Each time the three nuts (61037) are gradually tightened, check rotor
by turning it. The blades must not touch other parts.
CAUTION
If the blades have insufficient or no clearance between the rotor and
the casing, the blades and the casing may be damaged.
u Fit the remaining oiled nuts (61037) complete with new Verbus Ripp®
washers (61051) and tighten with pre-tightening torque (MV) (see
chapter Table of tightening torques).
u Tighten all nuts (61037) in a star pattern with tightening angle (DW)
(see chapter Table of tightening torques)
Page 99 / 133