- 105 -
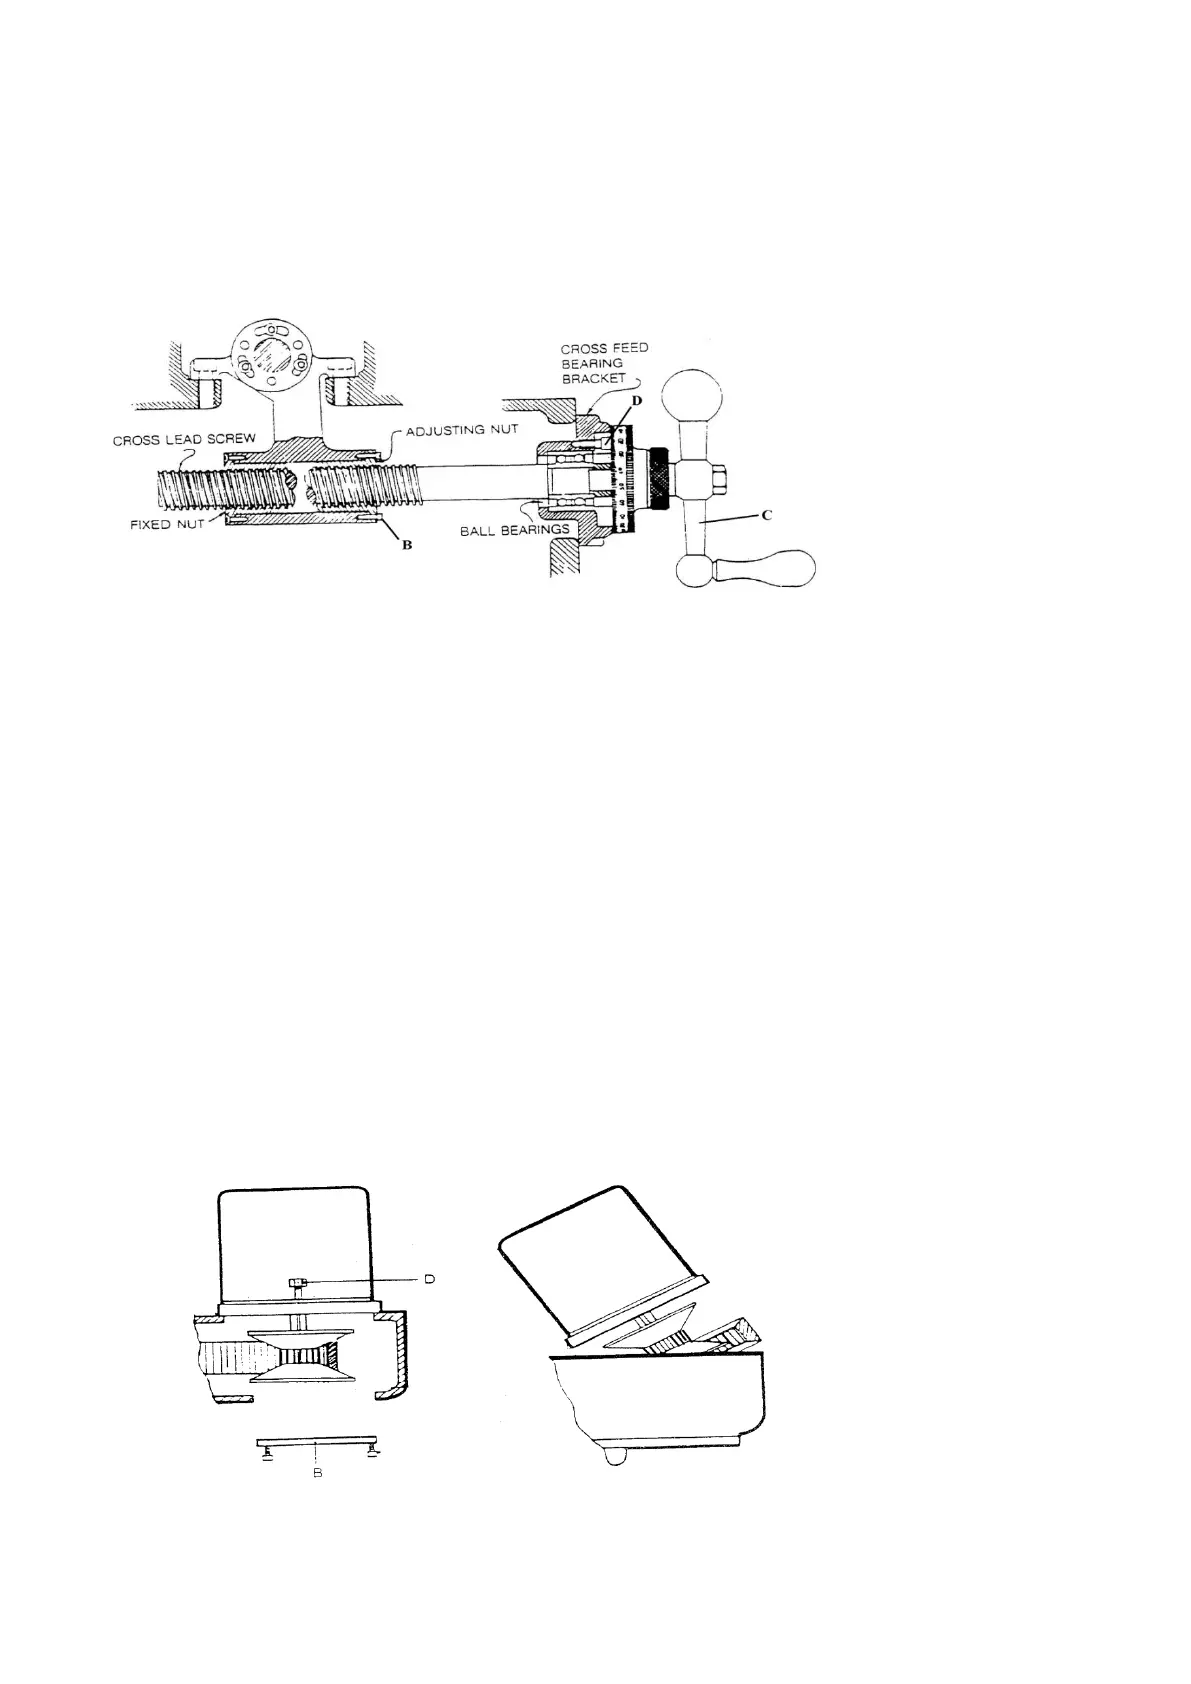
Cross leadscrew adjustment
Crank the saddle to middle position, withdraw 4 screws “D”, pull the saddle
forward to expose screws “B”, unscrew screw “B” a few turns, slowly turn handle
“C” while tightening adjusting nut until 0.004” or 0.005” is obtained. Lock screw
“B” into tight position again, move the saddle to front and retighten 4 screws.
Figure 22. Crossfeed leadscrew assembly
7-5 Removing the Motor
Run the head at the lowest speed of both range and shut off the motor. This puts
the V belt in the position for disassembly.
1. DISCONNECT THE POWER and then remove the limit switch from the left side
of the belt housing.
2. Remove the cover (B) at the lower end of the motor shaft.
3. Remove the three screws and lift out the top bearing cap.
4. Now remove the screws (D) that fasten the motor to the belt housing. The motor
should be lifted slightly, tilt away from the spindle and toward the rear end of
the belt housing. This will put the V belt into a loosening position between the
two pulleys, and providing the slack needed to ship the V belt over the motor
pulley.
5. Now lift the motor high enough to rest the motor base GENTLY on the top edge
of the belt housing toward the spindle side. The V belt now can be slipped off
the motor pulley and the motor can be removed from the housing.
Removing motor