- 96 -
CAUTION
DO NOT SHIFT HI-LO LEVER WHILE THE MOTOR IS
RUNNING.
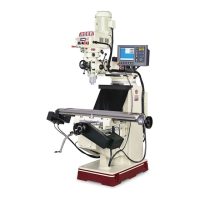
6-6 Power Feed Engagement Crank(#7)
Engages power feed worm gear. When lever is in right hand hole, power feed is
engaged. To disengage, pull knob out and turn crank clockwise and move to
opposite position.
NOTE
Handle must be moved in clockwise direction to engage or
disengage power feed. If handle is moved counter-
clockwise no damage will be done, but nothing will
happen.
CAUTION
POWER FEED GEAR MAY BE ENGAGED WHILE
SPINDLE IS TURNING. HOWEVER, IT SHOULD BE
ENGAGED SLOWLY TO AVOID DAMAGE TO THE
WORM GEAR. THE GEAR MAY BE DISENGAGED AT
ANY TIME. DO NOT USE POWER FEED AT SPEEDS
ABOVE 3000 RPM.
IMPORTANT
IT IS RECOMMENDED THAT THE POWER FEED
WORM GEAR BE DISENGAGED WHENEVER THE
POWER FEED IS NOT REQUIRED. THIS WILL AVOID
UNNECESSARY WEAR ON PWER FEED WORM GEAR.
6-7 Quill Feed Selector (#8)
This crank is used to select the feed rate. It is shifted by pulling knob out and
turning from one position to another. Feed rates are stamped on cover below each
hole. Feed is more readily engaged with spindle running.
6-8 Feed Reverse Knob (#10)
Position of this knob depends upon direction of spindle rotation. If boring with
right hand cutting tools, pull feed handle towards operator until clutch becomes
engaged.
Neutral position is between forward and reverse position. It is recommended that
he handle be left in neutral position when not in use.
6-9 Manual Feed Handwheel (#9)
Feed reversing knob should be in neutral position and feed control lever engaged.
Clockwise rotation of handwheel moves quill down. Manual Feed Handwheel and