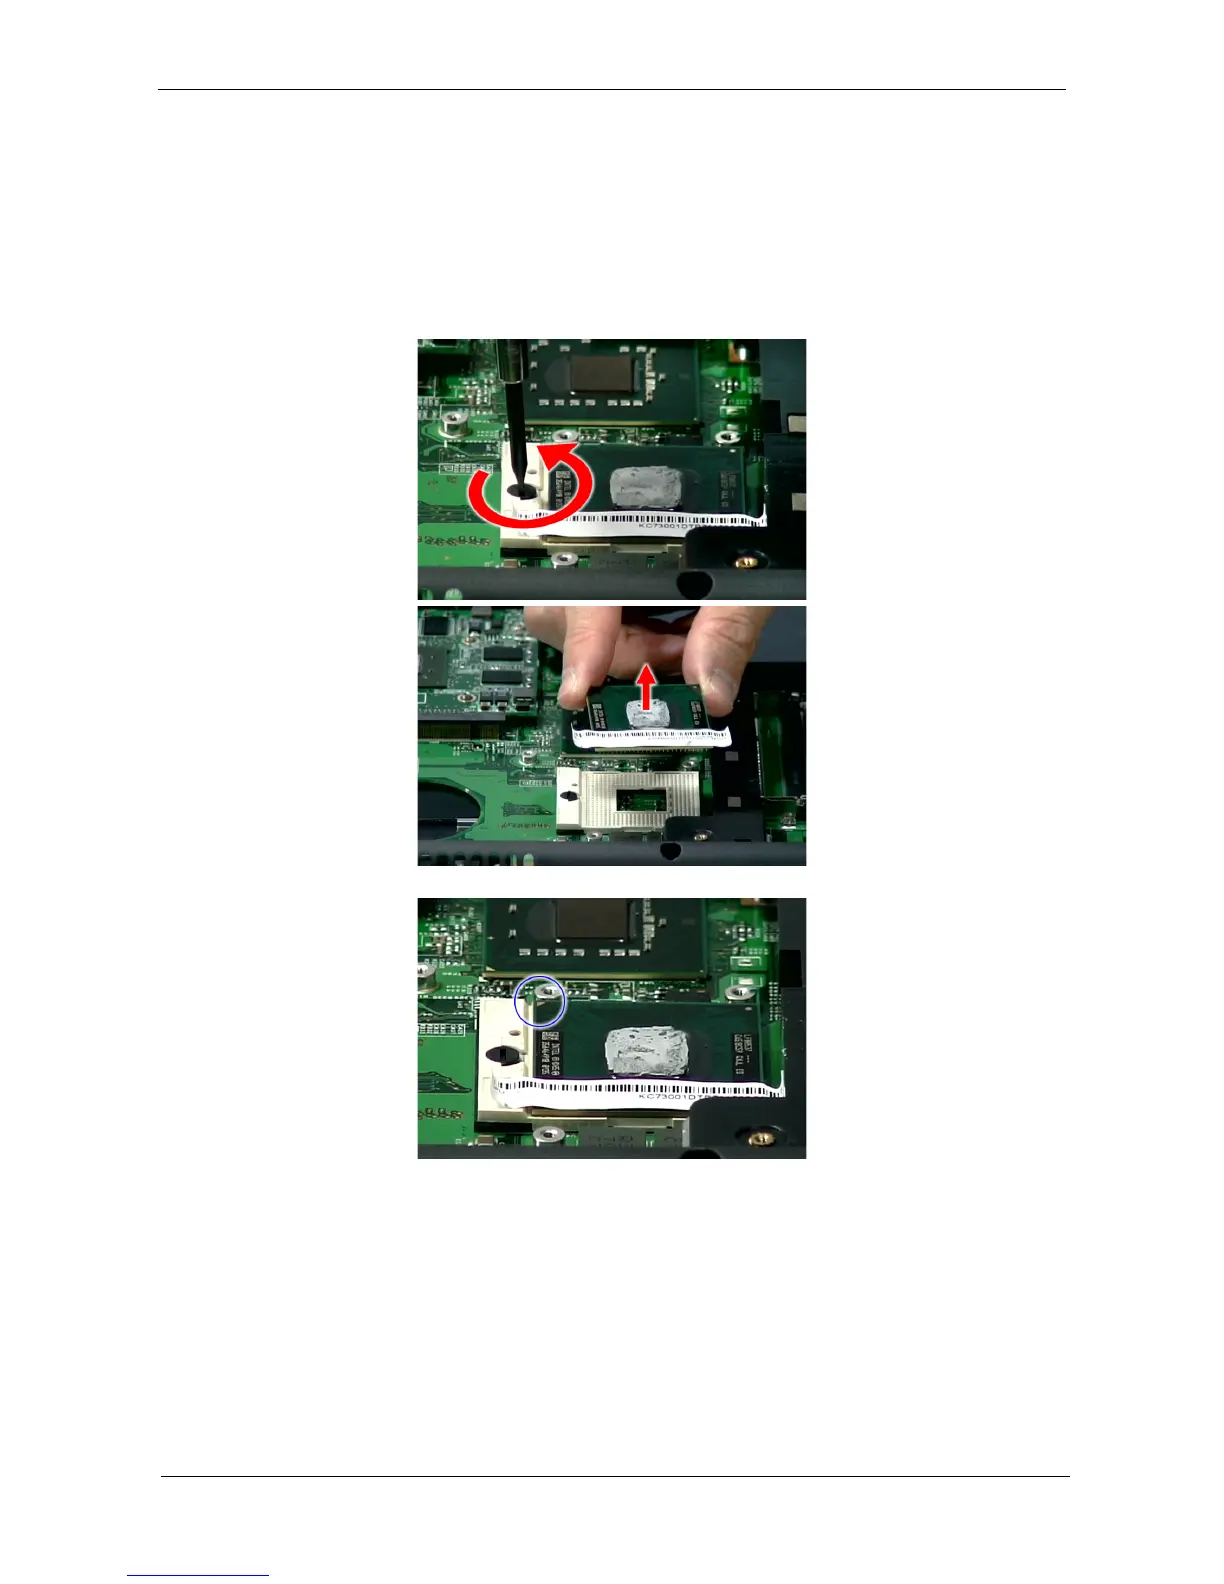
EasyManuals Logo

Acer Extensa 5220 Series Service Guide

Acer Extensa 5220 Series
180 pages
To Next Page IconTo Next Page
To Previous Page IconTo Previous Page
Page #83 background imageLoading...
Page #83 background image
Chapter 3 73
Removing the CPU
1. See “Removing the Battery Pack” on page 60..
2. See “Removing the Lower Cover” on page 62..
3. See “Removing the Heatsink Fan Module” on page 70.
4. See “Removing the CPU and VGA Heatsink Module” on page 71.
5. Using a flat screwdriver, turn the CPU socket latch counter-clockwise to release the CPU, then remove
the CPU.
NOTE: When installing the CPU, make sure to install the CPU with PIN 1 at the corner as shown.
Removing the VGA board (for Discrete model only)
1. See “Removing the Battery Pack” on page 60.
2. See “Removing the Lower Cover” on page 62.
3. See “Removing the Heatsink Fan Module” on page 70.
4. See “Removing the CPU and VGA Heatsink Module” on page 71.

Table of Contents

Other manuals for Acer Extensa 5220 Series

Questions and Answers:

Question and Answer IconNeed help?

Do you have a question about the Acer Extensa 5220 Series and is the answer not in the manual?

Acer Extensa 5220 Series Specifications

General IconGeneral
Display15.4" WXGA (1280 x 800) TFT LCD
Optical DriveDVD-Super Multi double-layer drive
Operating SystemWindows Vista Home Basic
ProcessorIntel Celeron M 530
RAM512 MB DDR2
Storage80 GB HDD
GraphicsIntel Graphics Media Accelerator (GMA) X3100
Battery6-cell Li-ion
Weight2.8 kg
Wireless802.11b/g
LAN10/100 Mbps Ethernet
Ports3x USB 2.0, VGA, headphone/speaker/line-out jack, microphone-in jack

Related product manuals