with multiple key presses accessing the different selections.
Keypad 3 is also used for digit D. The characters * and # are
entered from the softkeys. Pressing keypad 0 will toggle the
selection between 0 and a blank. This key is used to remove the
selected digit. Moving the cursor within the field can be
accomplished with the right and left arrow keys. The up and
down arrow keys will increment or decrement the selected value.
When finished editing the DTMF digits field, press the “Done”
softkey.
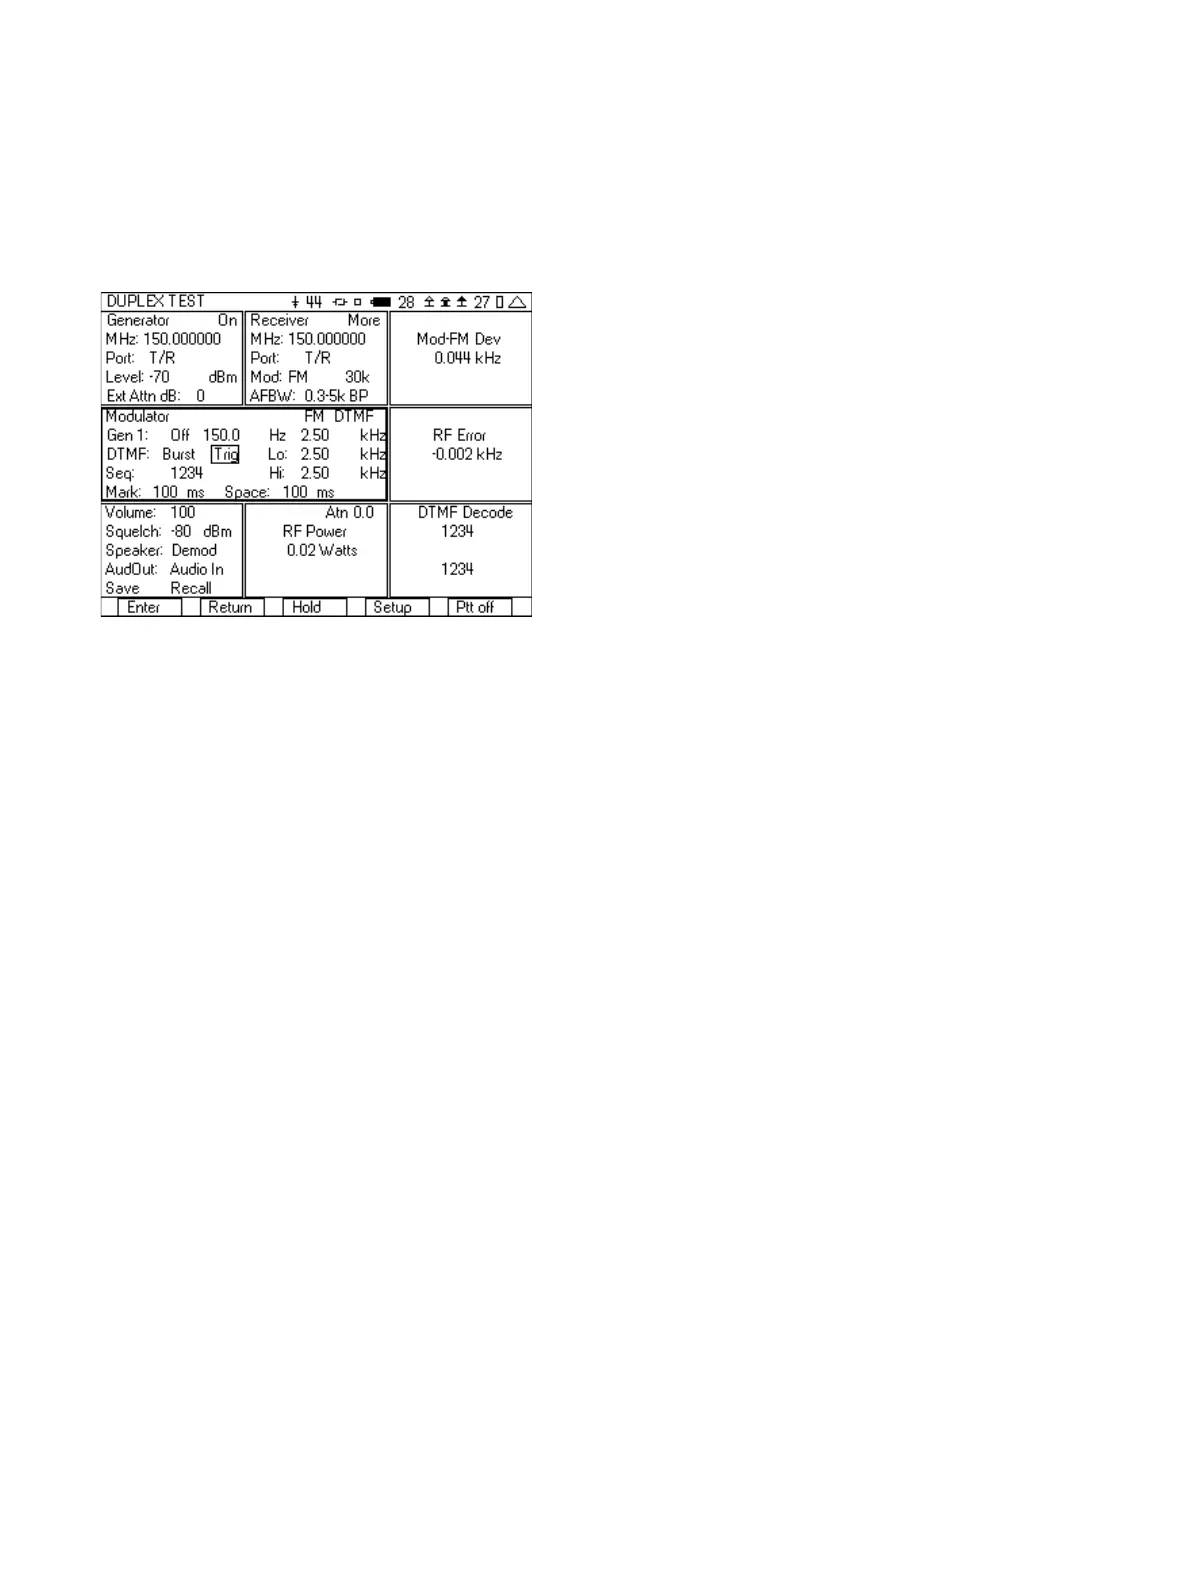
Figure 12 - DTMF test setup
9. In the lower left hand tile:
a. Set the squelch level to -80 dBm.
b. Set Speaker to Demod if you want to hear the digits that
are being demodulated.
10. Connect the radio’s transmitter to the T/R port of the 3500A.
Remember to use an attenuator if the power level of the radio
is greater than 20 W.
11. When the radio transmits DTMF, the digits are decoded and
displayed in the DTMF Decode tile.
12. Using the right softkey, turn on the 3500A Generator.
13. Move the cursor to the DTMF Trig field in the Modulator tile.
14. Each time the “Enter” softkey is pressed, the 3500A will send
the selected DTMF. If the generator and receiver frequencies
are the same, the 3500A will also decode its own DTMF
transmission.
After you have setup the 3500A for this test, you can save the setup
so that you do not need to go through these steps again. See the
section on Saving and Recalling setups for quick testing.
2.4 FM Receiver Testing
Here are the step by step instructions for performing a test on your
FM receiver. The purpose of this test is first to measure the SINAD
and distortion of the receiver and then next to find the
sensitivity of the receiver. This test is for a receiver with no squelch,
or with the squelch disabled.
1. Select the DUPLEX TEST screen.
2. Press the “Setup” softkey.
3. Place a 3 next to SINAD Meter, a 6 next to Distortion Meter, and
a 9 next to Audio Level.
4. Press the “Return” softkey.
5. In the Generator tile:
a. Set the frequency to the receive frequency of the radio
under test.
b. Set the Port to T/R.
c. Set level to -70 dBm.
d. Set the Ext Attn field to 0.
6. In Modulator tile:
a. The upper right hand selection should be Analog.
b. Set Gen 1 to On, 1000.0 Hz 3.00 kHz.
c. Set Gen 2, MIC and Ext Aud to Off.
7. Move to the SINAD Meter tile and select Audio In.
8. Move to the Distortion Meter tile, select Audio In.
9. Move to the Audio Level Meter tile, select Audio In.
10. Move to the Audio Lvl Meter tile, select Audio In.
11. Connect to the radio under test.
a. Connect the antenna of the radio to the T/R port of the
3500A.
b. Connect the demodulated audio of the radio to the Audio
In port on the front of the 3500A.
12. Turn the 3500A generator on by pressing the right most softkey
until the indicator in the upper right hand corner of the
Generator tile says On.
13. Using the Audio Level meter, adjust the volume of the radio to
obtain the rated output level. This will vary by radio manufacture.
14. Record the Audio Distortion and SINAD.
15. Move to the Generator tile.
16. Set the Level field to -100 dBm.
17. Press Edit, and using the down arrow key, decrease the Level in
1 dB increments until you find the level that results in a
12 dB SINAD reading. This RF Level is your 12 dB receiver
sensitivity.
After you have setup the 3500A for this test, you can save the setup
so that you do not need to go through these steps again. See the
section on Saving and Recalling setups for quick testing.
3 Digital Radio Transceiver Testing with the 3500A
Two of the new digital radio systems develop over the past few
years are DMR and NXDN™. NXDN is an FDMA standard with each
channel having a bandwidth of either 6.25 kHz or 12.5 kHz,
depending on the selected digital data rate of the channel.
Channels that have a 4800 baud rate have a bandwidth of 6.25 kHz
with the 9600 baud rate channels having a 12.5 kHz bandwidth.
DMR on the other hand is a 2-slot TDMA channel, with a bandwidth
of 12.5 kHz, but with a potential of having two simultaneous digital
calls. The 3500A is able to perform transmitter/receiver testing on
both of these new digital radio systems. In addition, the 3500A is
able to perform required measurements on the more mature P25
digital radio system. All three of these systems use a similar type of
8