For the very latest specifications visit www.aeroflex.com
e. The radio test software should now be able to display the
bit error rate, and by lowering the level of the
generator in the 3500A, you should be able to find the
sensitivity of the receiver of the radio.
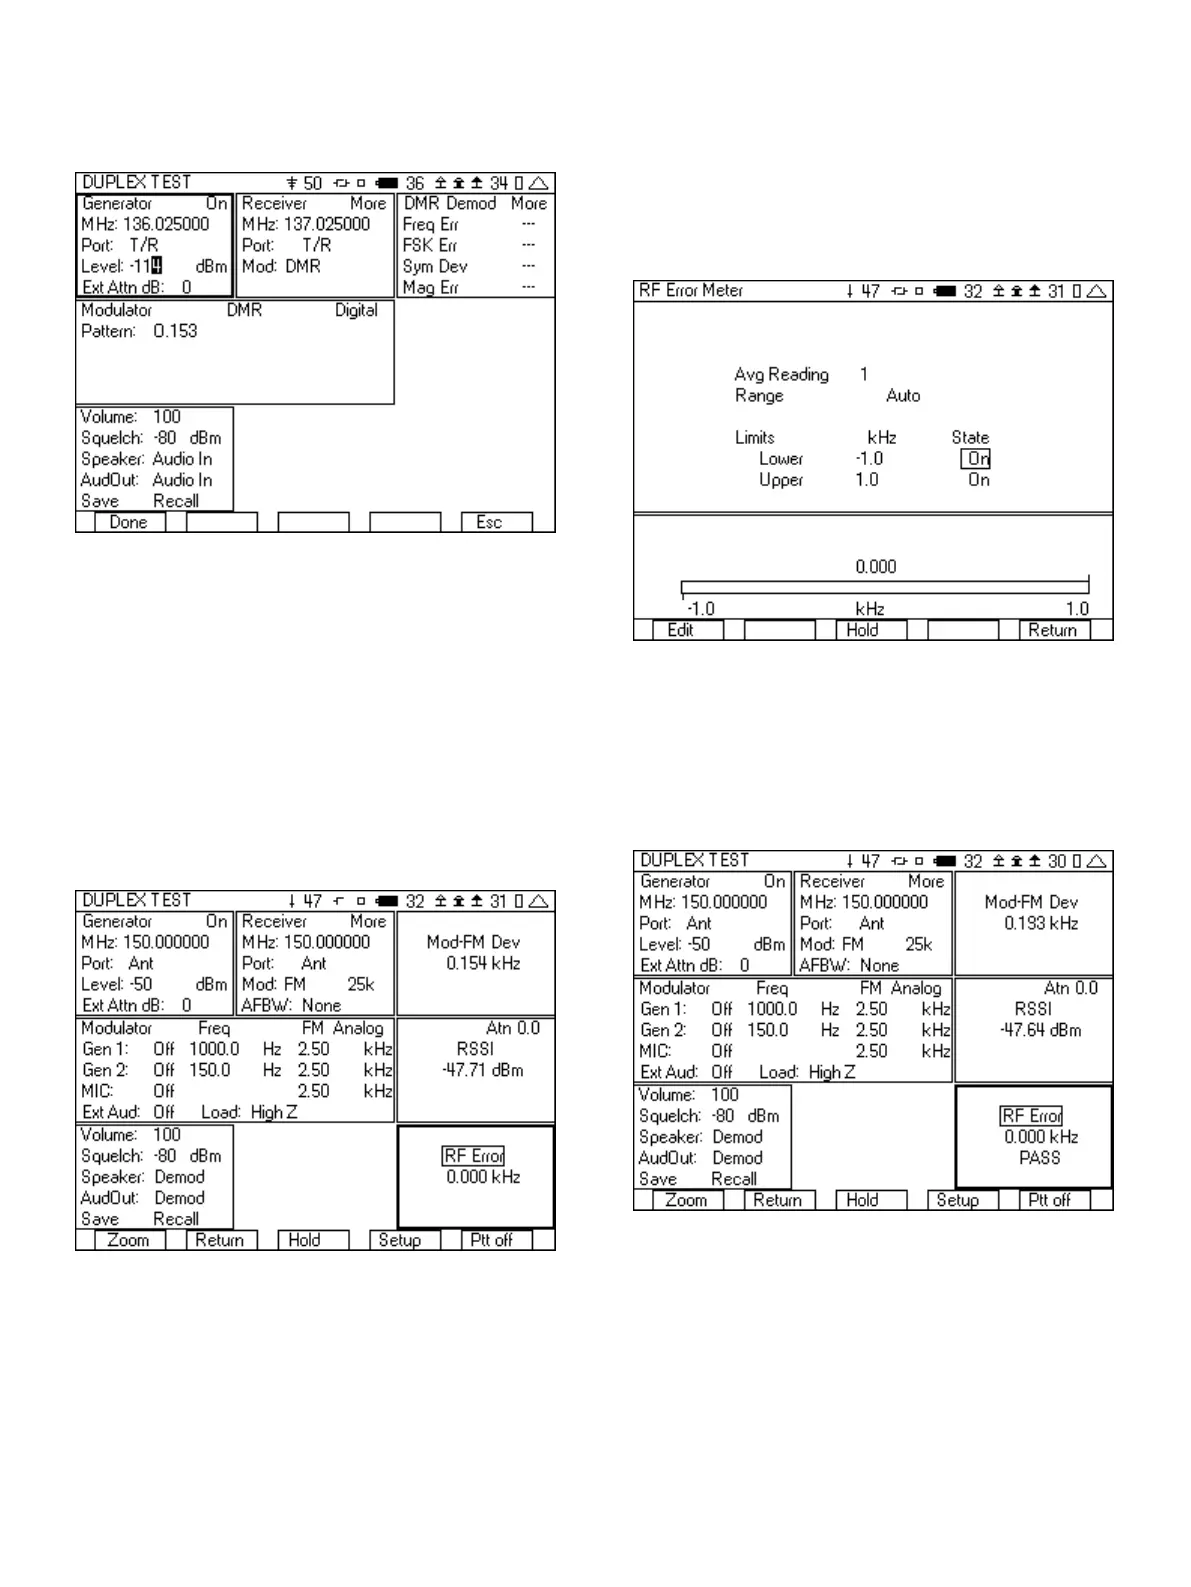
Figure 18 - DMR setup for measuring receiver sensitivity
4 Setting Up Pass/Fail Criteria
Any of the meters in the 3500A can be expanded from their mini
size into a full screen sized meter. A zoomed in meter includes
more setup fields, including a setup for pass/fail. Here are the
instructions for setting the pass/fail fields.
1. Move with the right or left arrow through the tiles of the screen
until the desired meter is selected.
2. When the desired meter is selected, the first softkey should be
named “Zoom”. Press the first softkey. Figure 19 shows the
cursor on RF Error with the first softkey labeled “Zoom”.
Figure 19 - Duplex test screen with RF Error meter
3. The meter should now be expanded into the full screen size. This
full screen size includes a setup for the pass/fail criteria.
4. Using the arrow keys move the cursor to the Lower limit and
enter the desired value.
5. Next move to the Upper limit and enter the desired value.
6. The next move of the cursor moves to the Lower limit State. With
this you can enable or disable the lower limit. For some meters
you may not care about the Lower limit, so this field allows you to
either enable this or leave it off.
7. The Upper limit state can also be turned on if desired for the
selected meter. For this example we are setting an upper and
lower limit for RF frequency error and we will enable both the
upper and lower limit.
Figure 20 - Zoomed in RF Error meter
8. Press the “Return” softkey.
9. For this example, as long as the frequency error is with the upper
and lower limit of ±1.0 kHz, the minimized RF Error meter will
display PASS. If the RF Error is out of the pass/fail range the meter
will display FAIL-LOW or FAIL-HIGH.
Figure 21 - RF Error meter showing PASS
5 Saving and Recalling Setups for Quick Testing
In the lower left hand tile of each of the radio test screens is a Save
and Recall field. Once the cursor is moved to either of these two
fields, the first softkey changes to “Zoom”. Pressing the “Zoom”
softkey changes the screen to the Save or Recall screen. From
these two screens you can save or recall setups so that you don’t
have to go through the process of setting up the 3500A for each
type of analog or digital radio that you need to test.
13