Check
9, CPU
Fuse High
Lead V
oltage
1.
Turn on
the
4339B
.
2.
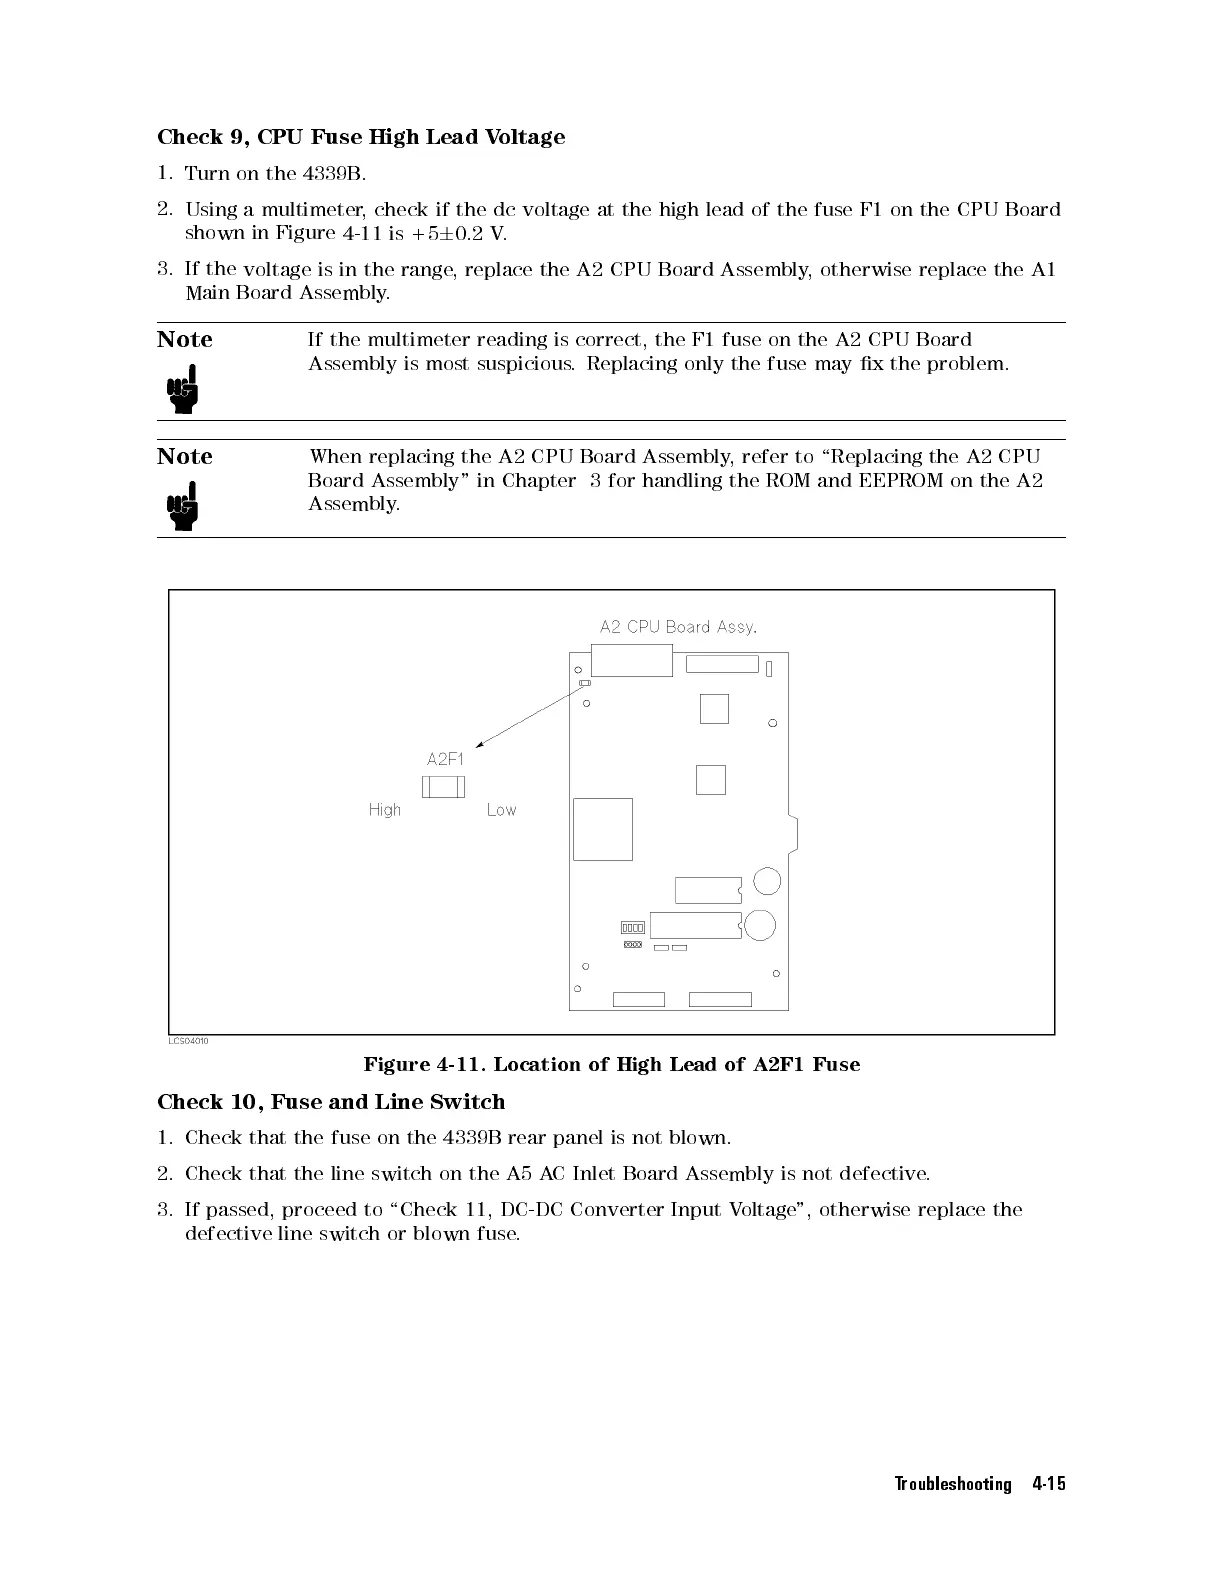
Using a
multimeter
,
check
if
the
dc
voltage
at
the
high
lead
of
the
fuse F1
on the
CPU Board
shown
in Figure
4-11
is
+5
6
0.2
V
.
3.
If the
voltage is
in
the
range
,
replace
the
A2
CPU
Board
Assembly
,
otherwise replace
the A1
Main
Board
Assembly
.
Note
If
the
multimeter
reading
is correct,
the F1
fuse on
the
A2
CPU
Board
Assembly
is
most
suspicious
. Replacing
only the
fuse may
x
the
problem.
Note
When
replacing
the
A2
CPU
Board Assembly
, refer
to \Replacing
the A2
CPU
Board
Assembly"
in
Chapter
3
for handling
the ROM
and EEPROM
on the
A2
Assembly
.
Figure
4-11. Location
of High
Lead of
A2F1 Fuse
Check 10, Fuse and Line Switch
1. Check that the fuse on the 4339B rear
panel is not blown.
2. Check that the line switch on the A5 A
C Inlet Board Assembly is not defective
.
3. If passed, proceed to \Check 11, DC-DC Converter Input V
oltage", otherwise replace the
defective line switch or blown fuse
.
Troubleshooting 4-15
 Loading...


