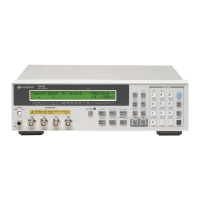
Do you have a question about the Agilent Technologies 4263B LCR and is the answer not in the manual?
Ensures instrument chassis and cabinet are connected to safety earth ground via power cable with earth blade.
Prohibits operating the instrument in the presence of flammable gasses or fumes for safety.
Advises against removing covers and emphasizes disconnecting power before touching circuits.
Recommends having a second person present when performing internal service or adjustments.
Warns against installing substitute parts or performing unauthorized modifications due to hazard introduction.
Highlights potentially dangerous procedures that require following specific instructions.
Specifies conditions under which the warranty does not apply, such as improper maintenance or misuse.
Explains specifications, measurement explanations, and how to verify conformance to published specifications.
Explains how to adjust, troubleshoot, and repair the 4263B.
Introduces the Service Manual and its four-chapter structure for adjustments and repair.
Provides general information for servicing the 4263B, including recommended equipment.
Details adjustments required to ensure the 4263B meets specifications after repair.
Offers information on replacing 4263B assemblies and lists replaceable parts.
Provides troubleshooting information for the 4263B, including theory of operation.
Contains information to adapt the manual to earlier versions or configurations of the 4263B.
Describes jumper and switch settings on the A2 CPU Board Assembly for replacement.
Provides information on instruments covered by this manual and required equipment for adjustments and troubleshooting.
Explains the serial number format and its significance for manual applicability.
Describes adjustments for ensuring specifications after repair or performance test failures.
Highlights safety notes, cautions, and warnings for safe operation and maintenance.
Lists the necessary equipment for performing adjustments.
Updates signal source level adjustment data in EEPROM to the set value.
Lists equipment required for Signal Source Level Adjustment.
Details the setup for obtaining signal source level adjustment data.
Lists equipment for Impedance Measurement Om Adjustment.
Details the setup for obtaining impedance measurement adjustment data for 0m test leads.
Lists equipment for Impedance Measurement 1m Adjustment.
Details the setup for obtaining impedance measurement adjustment data for 1m test leads.
Provides replaceable parts lists and disassembly procedures for major assemblies.
Details how to order parts, including part numbers and quantities.
Explains the availability and warranty of restored replacement assemblies.
Warns about susceptibility to ESD damage and requires a static-safety workstation.
Describes tools and fasteners required for disassembly, noting Pozidrive type.
Provides the common procedure for gaining access to assemblies by removing the cover.
Provides assembly-level troubleshooting information, including theory of operation.
Lists warnings and cautions for protection and to prevent equipment damage.
Lists the equipment required for troubleshooting.
Explains how the 4263B measures impedance using vector voltage to current ratio.
Checks DC-DC converter output voltages against specified ranges using test pads.
Explains how to adapt the manual to earlier versions or configurations of the 4263B.
Guides users to Table A-1 for making specific manual changes based on instrument serial number.
Describes jumper and switch settings on the A2 CPU Board Assembly for replacement.
Shows default jumper and switch settings for the A2 CPU Board Assembly.
| Type | LCR Meter |
|---|---|
| Frequency Range | 100 Hz to 100 kHz |
| Frequency | 100 Hz, 120 Hz, 1 kHz, 10 kHz, 100 kHz |
| Basic Accuracy | 0.1% |
| Display | LCD |
| Measurement Parameters | L, C, R, D, Q, θ |
| Interface | GPIB |


 Loading...