Checking for Leaks 7
Agilent 7890 Series Troubleshooting 141
16
From the keypad, press [Service Mode]. Select Diagnostics >
Front or Back Inlet > Pneumatics Control > Septum Purge control.
17 Scroll to the Constant duty cycle and enter 50. Wait 10 seconds.
18 Press [Front Inlet] or [Back Inlet]. Scroll to Pressure and press
Off/No.
19 Quickly turn off the carrier gas supply at its source, if
possible. The goal is to prevent any residual pressure from
the supply lines from leaking into the closed system and
causing a pressure rise and masking leaks. (Such leaks in
through the EPC module typically do not impact runs.) If the
setup does not include shutoff valves at the GC, or if
changing the source pressure is not practical, skip this step.
If there is a relatively large volume in the supply tubing
leading up to the GC, consider whether or not there could
have been a leak into the system when evaluating the test
results.
20 Monitor the pressure for 10 minutes. Use the timer by
pressing [Time] and [Enter].
For GCs with no device installed in the carrier flow path:
A pressure drop of less than 0.5 psig (0.05 psi/min or less;
3.4 kPa or 0.34 kPa/min) is acceptable.
If the pressure drops much faster than the acceptable rate,
see “To Correct Leaks in the Split Splitless Inlet”. Retest.
For a GC with a 7697A Headspace Sampler:
A pressure drop of less than 1.7 psig (0.17 psi/min or less;
11.7 kPa or 1.17 kPa/min) is acceptable. If the 7697A passes
all its leak tests (restriction, pressure decay, and cross port),
and if the GC inlet pressure decay test passes without the
7697A installed, check the 7697A carrier flow path. See the
Headspace Sampler documentation.
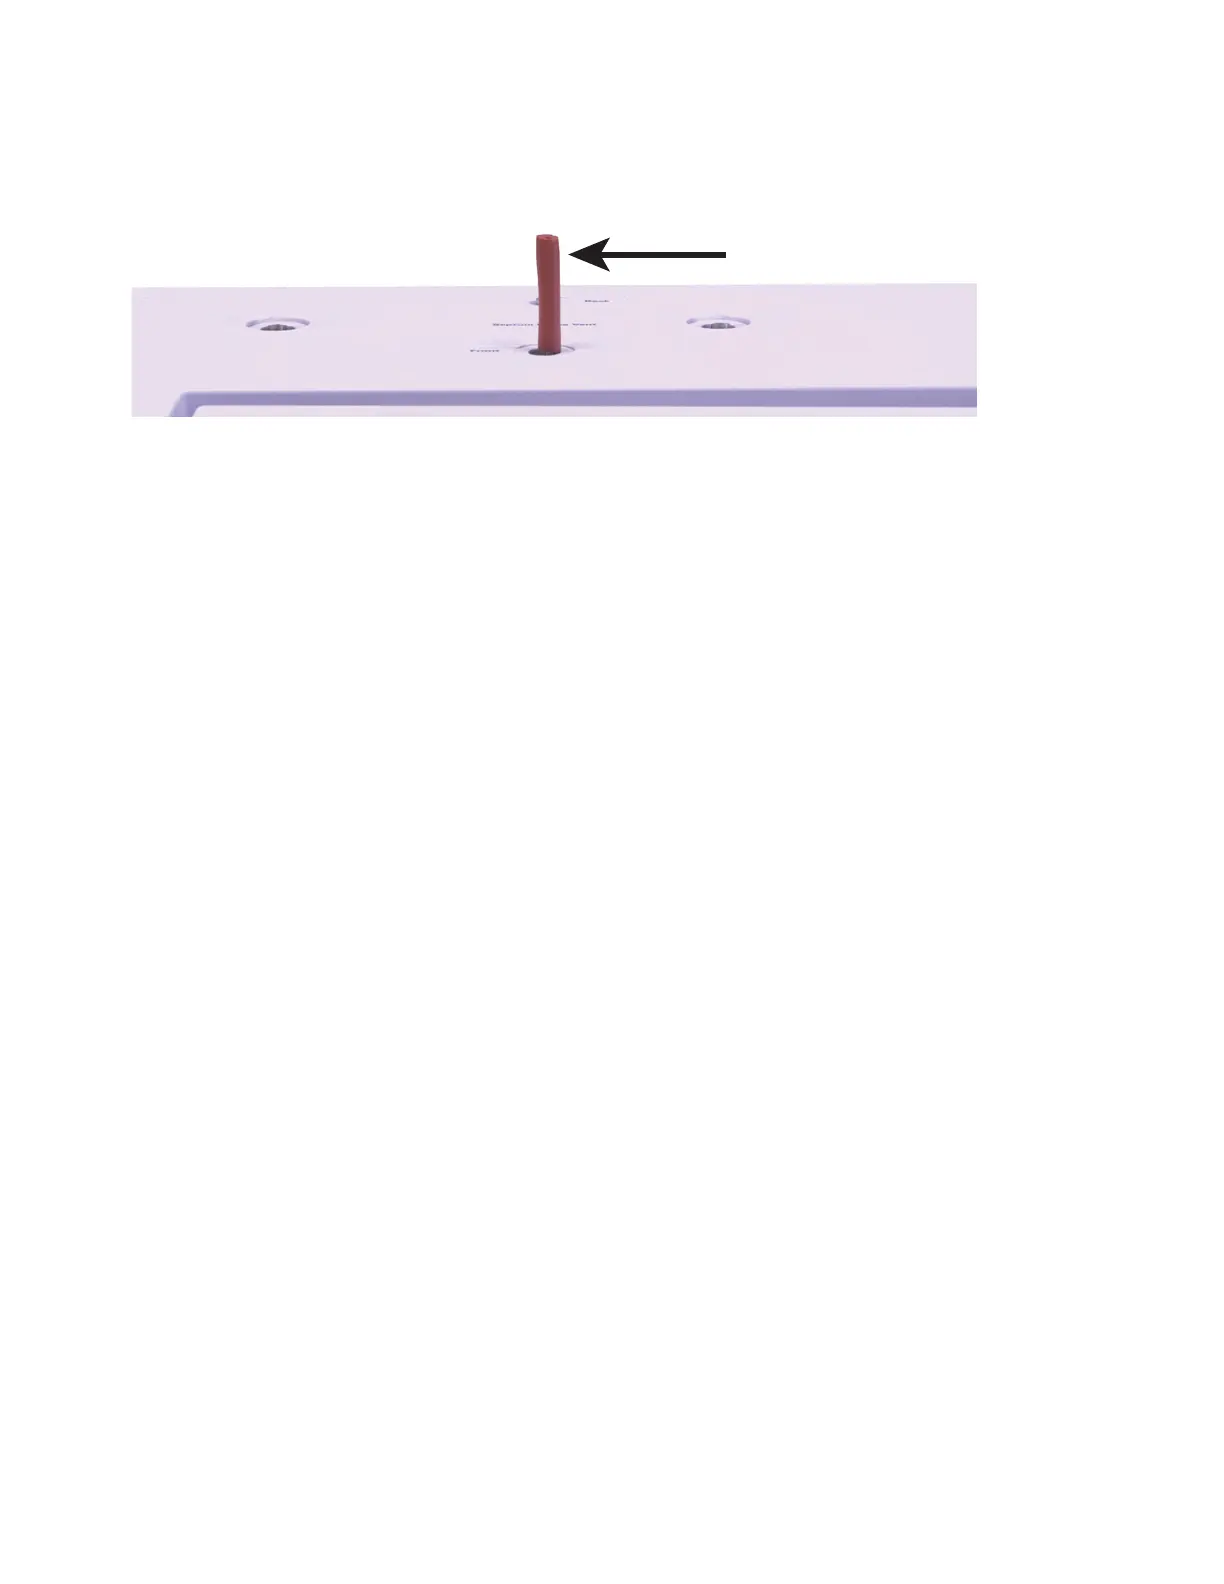
Front purge vent shown plugged
 Loading...