20
Startup Guide
The startup guide starts automatically when the unit is
started for the rst time. The guide can also be started
manually subsequently (menu under “Setup”), e.g. to retro-
install a CO
2
sensor.
The most important settings can be made using the startup
guide. The guide must be run completely. When making
settings, the guide jumps automatically to the appropriate
menu point and back.
Startup guide menu points:
• Set Default Flow, see page 19.
• Set Default Temp, see page 19.
• Set High Temperature, see page 19.
• Set Date and Time, see page 19.
•
Set Night Time Cooling and Timer-Controlled
Ventilation, see page 17.
• Set CO
2
level lower limit and upper limit and Start/
Stop of the unit with CO
2
sensor, see page 25.
•
Set the code for the screen lock and the Service
Reset, see page 20.
• Set the activation of the screen lock, see page 20.
•
Start unit (starts the unit with the current program-
ming and terminates the startup guide).
4.2.4.6. Lock Screen
The control panel can be locked to prevent accidental
operation using the screen lock.
Activate screen lock:
Press “
LOCK SCREEN”.
>> The screen will lock immediately. The control panel
will show the main screen.
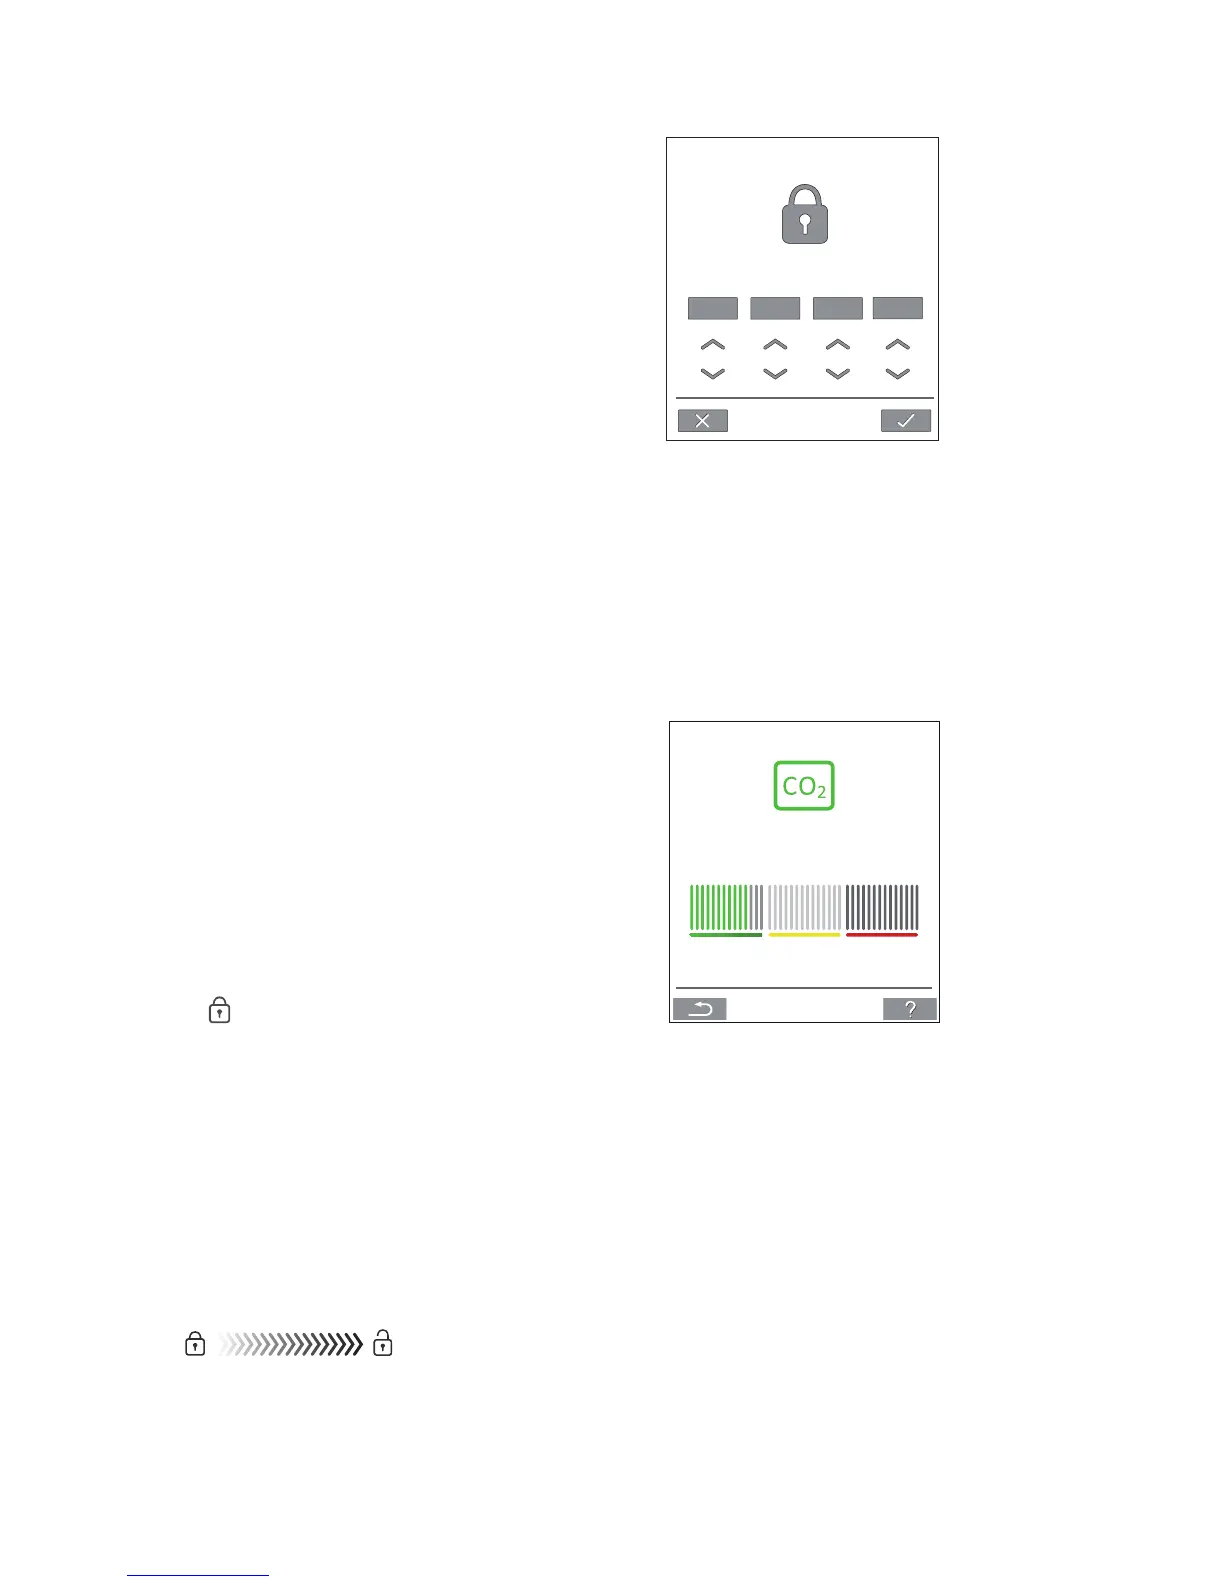
The screen lock is protected by a 4 digit code (Default:
“9732”). The code can be changed and the activation of
the screen lock can be changed to manual, automatic or
inactive by using the Startup Guide or the programs Airlinq
User Tool and Airlinq Service Tool.
Deactivate the screen lock:
Press padlock on the control panel main screen and drag
in direction of arrow.
Set code:
0 0 0
0
Set code by pressing the up arrow to increase the value,
and down arrow to reduce it.
Press tick.
>> The screen will be unlocked.
4.2.5. CO
2
Status
LEVEL
756 PPM
If the unit has a CO
2
sensor, the room’s current CO
2
level will
be shown on the control panel.
When the sensor sends a signal to the unit, the CO
2
symbol
will show on the control panel main screen. The symbol will
be green, amber or red depending on level.
Press symbol (pos.5 under ”Control Elements” on page 11).
>> CO
2
status will be shown.