6. Replace the two screws (#6-32x1/4") that secure the power-supply unit bracket to the power-supply unit.
7. Replace the graphics-card bracket and slide the release latch to the lock position.
8. Route the power-supply unit cables through the securing clip.
9. Connect the power-supply cables to the system board.
10.Connect the graphics-card power cables to the power-supply unit.
11. Place the computer in an upright position.
12. Route the power-supply unit cables through the slot on the right side of the computer.
13. Connect the power-supply unit cables to the power-supply unit extension cables on the right side of the computer.
Next steps
1. Install the
right-side cover.
2. Install the top cover.
3. Install the left-side cover.
4. Follow the procedure in
After working inside your computer.
Coin-cell battery
Removing the coin-cell battery
Prerequisites
1. Follow the procedure in Before working inside your computer.
WARNING: Before working inside your computer, read the safety information that is shipped with your computer. For
more safety best practices, see the Regulatory Compliance home page at www.dell.com/regulatory_compliance.
CAUTION: Removing the coin-cell battery resets the BIOS setup program’s settings to default. It is recommended that
you note the BIOS setup program’s settings before removing the coin-cell battery.
2. Remove the left-side cover.
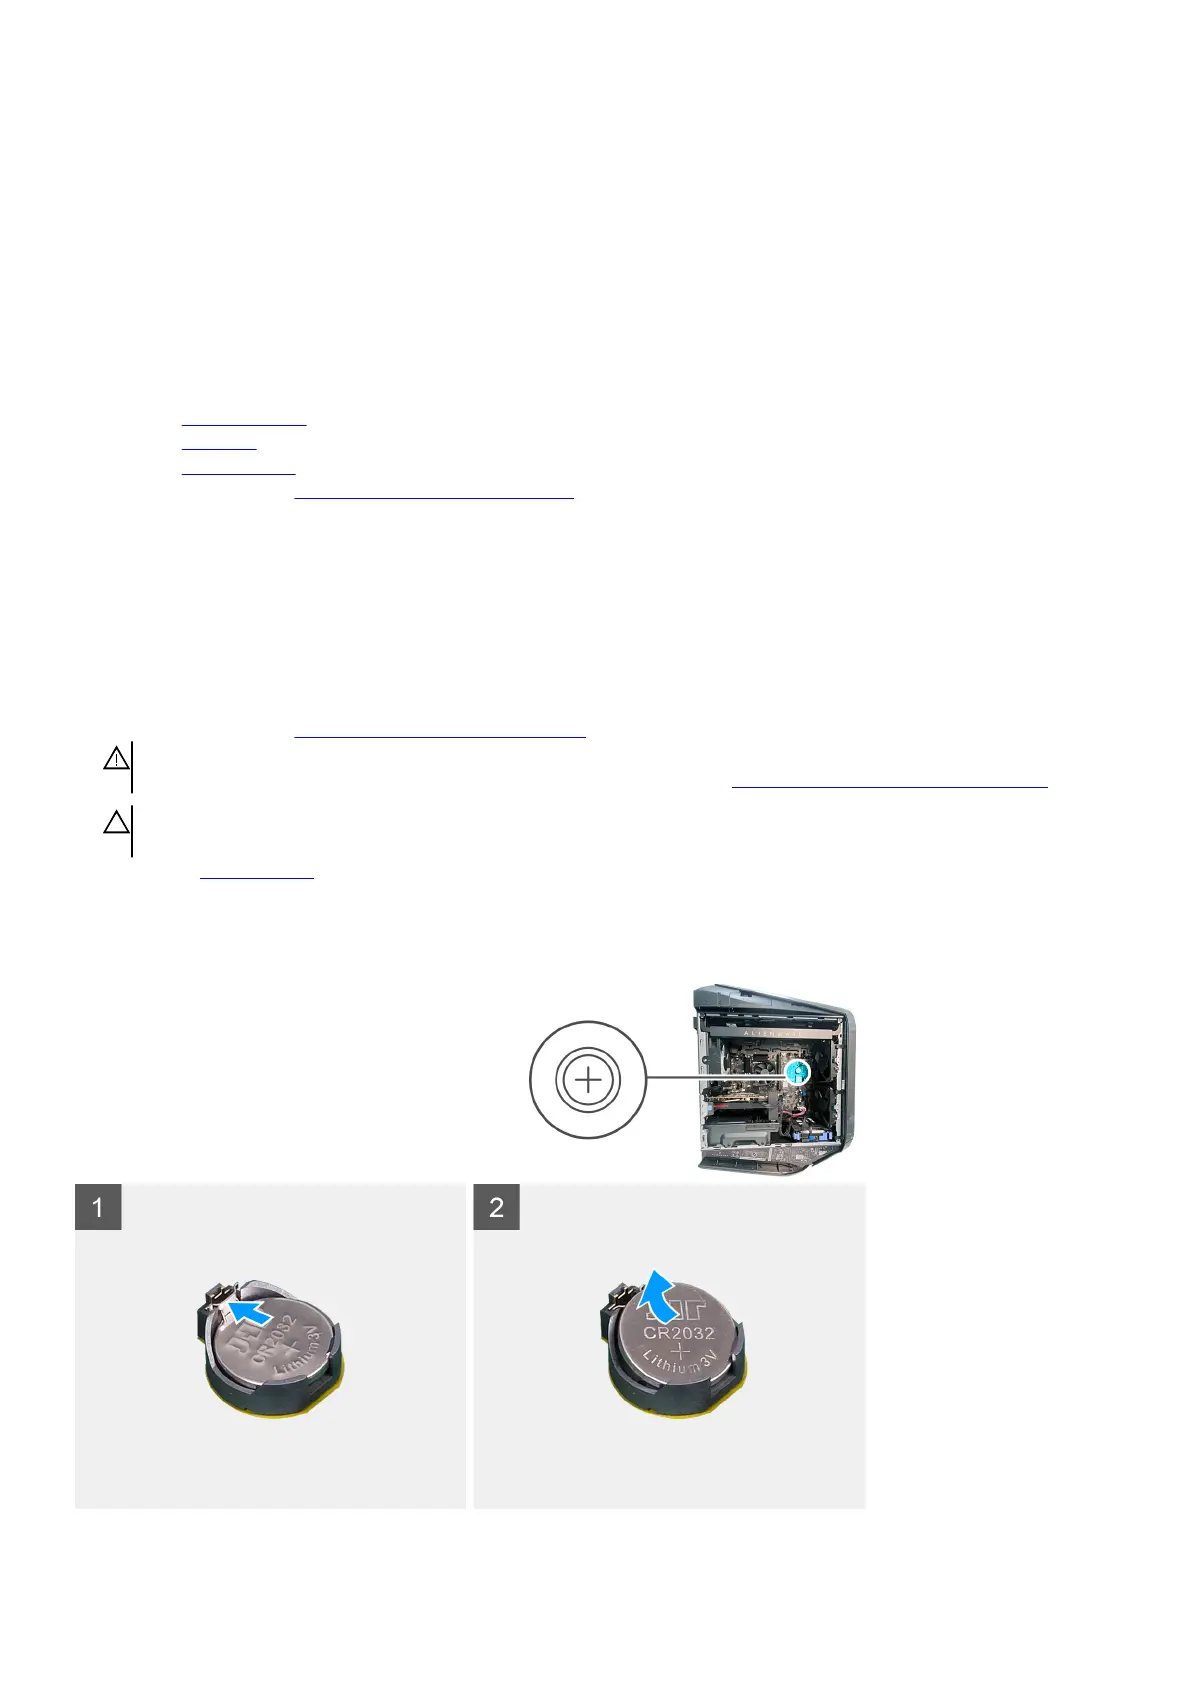
About this task
The following images indicate the location of the coin-cell battery and provide a visual representation of the removal procedure.
39