2–3
Installing Your Remote I/O Adapter Module
Publication
17946.5.3 - May 1996
Mounting on a Wall or Panel
To mount the remote I/O adapter module on a wall or panel, you
must have the 1794-NM1 mounting kit. The kit contains a special
plate and screws necessary for wall/panel mounting. Proceed as
follows:
Install the mounting plate on a wall or panel as follows:
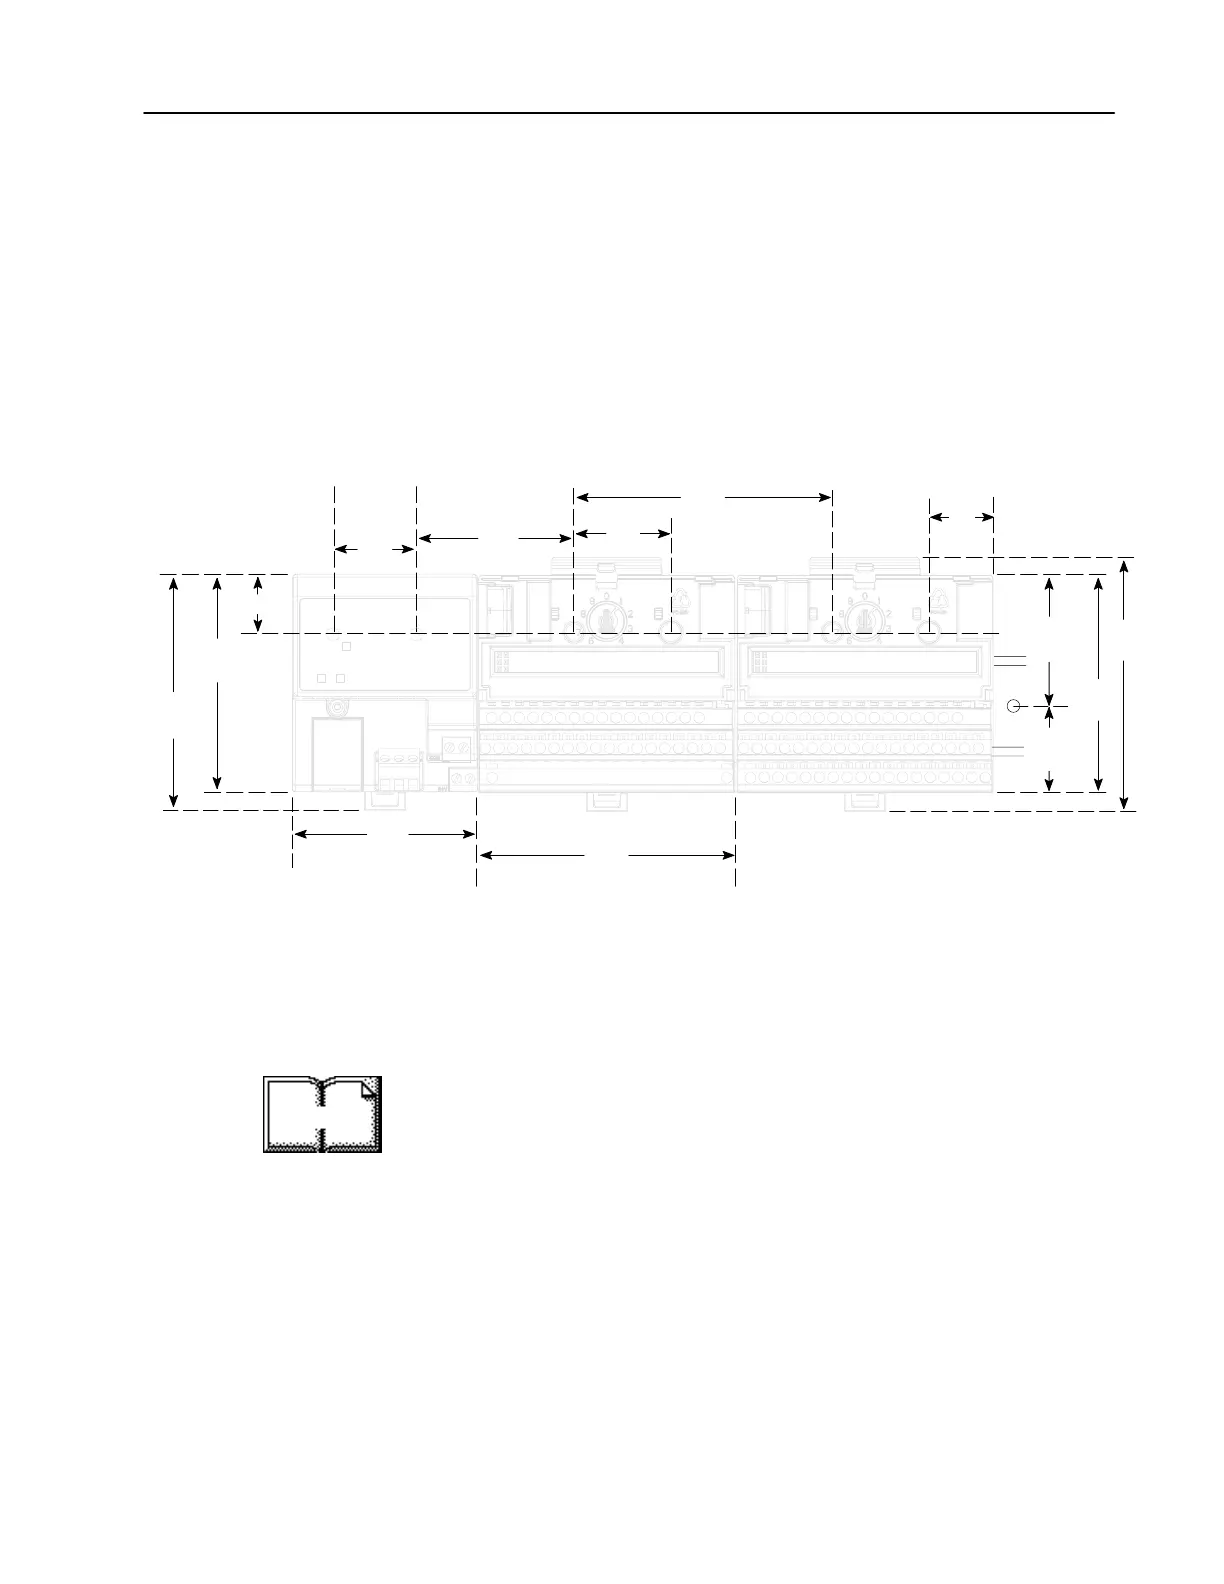
1. Lay out the required points on the wall/panel as shown in the
drilling dimension drawing.
1.4
(35)
Inches
(Millimeters)
3.4
(87)
3.2
(80)
2.7
(68)
3.7
(94)
3.2
(80)
3.7
(94)
1794 Terminal Base Units
3.7H x 3.7W x 2.7D
(94H x 94W x 69D)
.83 (21)
0.9
(23)
2.3
(59)
1794 Adapters
3.4H x 2.7W x 2.7D
(87H x 68W x 69D)
1.4
(35)
3.7
(94)
2.0
(50)
1.2
(30)
A
A
= Mounting hole dimensions for optional
mounting kit
2. Drill the necessary holes for #6 self-tapping mounting screws.
3. Mount the mounting plate (1) for the adapter module using two
#6 self-tapping screws (18 included).
Important: Make certain that the mounting plate is properly
grounded to the panel. Refer to “Industrial Automation
Wiring and Grounding Guidelines for Noise Immunity,”
publication 1770-4.1.
More
 Loading...