68 M413438
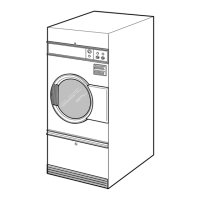
Section 5 Service Procedures
To reduce the risk of electric shock, fire, explosion, serious injury or death:
• Disconnect electric power to the tumbler before servicing.
• Close gas shut-off valve to gas tumbler before servicing.
• Close steam valve to steam tumbler before servicing.
• Never start the tumbler with any guards/panels removed.
• Whenever ground wires are removed during servicing, these ground wires must be
reconnected to ensure that the tumbler is properly grounded.
W002
WARNING
© Copyright, Alliance Laundry Systems LLC – DO NOT COPY or TRANSMIT
83. DRIVE CHAIN
a. Disconnect electrical service to tumbler.
b. Support chain guard and remove screws
holding guard to rear of tumbler. Remove
guard.
c. Loosen jam nut on idler sprocket locking bolt
and move sprocket to the right to relieve chain
tension. Refer to Figure 41.
d. Run chain off sprocket drive and lift chain off
cylinder sprocket.
e. Reinstall chain and drive guard.
84. IDLER SPROCKET
a. Disconnect electrical service to tumbler.
b. Support chain guard and remove screws
holding guard to rear of tumbler. Remove
guard.
c. Remove jam nut and sprocket from bolt.
d. Reinstall chain and chain guard.
NOTE: After installing chain and sprocket, adjust
chain. Refer to Adjustments section.
85. SHEAVE, IDLER HOUSING AND IDLER
SHAFT
a. Support drive guard and remove screws
holding guard to rear of tumbler. Remove
guard.
b. Run belt off sheave and motor pulley.
c. Loosen jam nut on idler sprocket and move
idler sprocket to the right. Refer to Figure 41.
d. Run chain off drive sprocket.
e. While supporting idler housing, remove the
upper and lower bolts, nuts, and lockwashers
holding guide rails to trunnion housing and
motor bracket. Refer to Figure 41.
f. Remove the sheave, guide rails and idler
housing as an assembly from the rear of the
tumbler.
g. Remove snap ring from idler shaft. Refer to
Figure 42.
h. Loosen two setscrews holding sheave to idler
shaft and pull sheave off idler shaft.
IMPORTANT: Key must be properly positioned on
idler shaft when installing sheave.
NOTE: After installing sheave, adjust belt and
chain.
Figure 42
T041se1a
SNAP
RING
SETSCREWS