EasySet 2 BAG0217.9
3.2 Performing boundary spreading
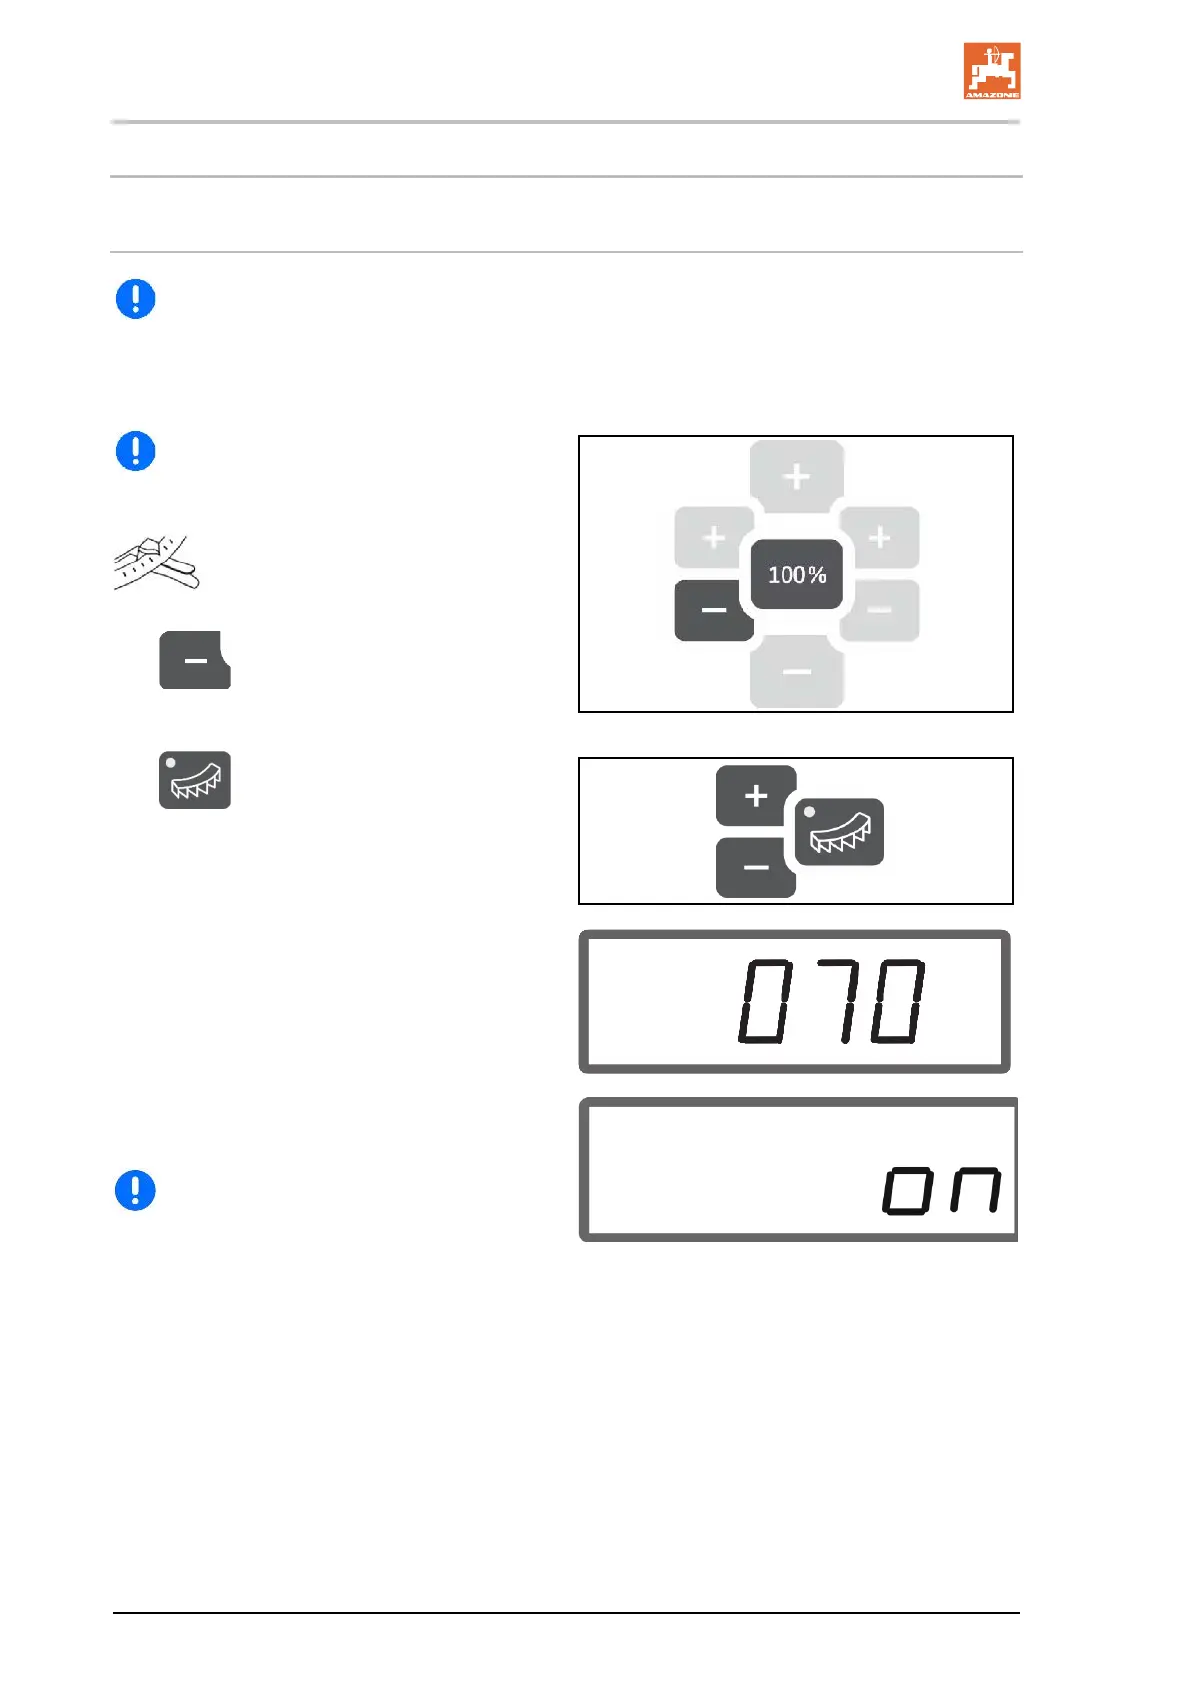
Electrically operated limiter
Read the value for adjusting the angle of
the limiter (0-100) from the setting chart.
Depending on the boundary spreading
method, the spread rate must be reduced on the
boundary side.
Read the value for the reduction of the
shutter position from the setting chart.
1.
Before boundary spreading / ditch
spreading, reduce the rate on the boundary
side.
2. Activate the limiter for boundary
spreading.
The LED shows the activated limiter.
→
Brief display of the limiter position (1-100)
→
Display ON for 5 seconds after opening the
shutter. Then it switches back to the Work
display.
If the shutters are opened when the limiter
is activated, an signal tone is issued. This also
indicates boundary spreading.