Replacing the piston diaphragm
• Ensure the correct position for the recesses and/or holes on the
hydraulic cylinders.
• Secure the piston diaphragm (8) with a washer disc and a bolt
(11) on the piston (9), so that the rim shows on the cylinder head
side (7).
• Always tighten the nuts (1,2) crosswise using the specified
torque. Improper tightening of the nuts causes warping, which
results in leaks.
gether with the holding washer from the piston (9).
2. If the piston diaphragm has been punctured, drain the oil/spray
liquid mixture from the pump housing.
3. Remove the hydraulic cylinder (10) from the pump housing.
4. Clean the pump housing by flushing it thoroughly with diesel oil
or paraffin.
5. Clean all sealing faces.
6. Insert the cylinder (10) back into the pump housing.
7. Fit the piston diaphragm (8).
8. Align the cylinder head (7) on the pump housing and tighten the
bolts (6) evenly in a crosswise fashion.
Use thread lock for medium-fixed connections!
9. Fit the valve groups (5) after testing and cleaning.
10. Insert new O-rings.
11. Mount the suction (3) and pressure port (4) on the pump hous-
ing.
12. Tighten the nuts (1,2) crosswise using a torque of 25 Nm (BP
160-185) / 20 Nm (AR 250-280).
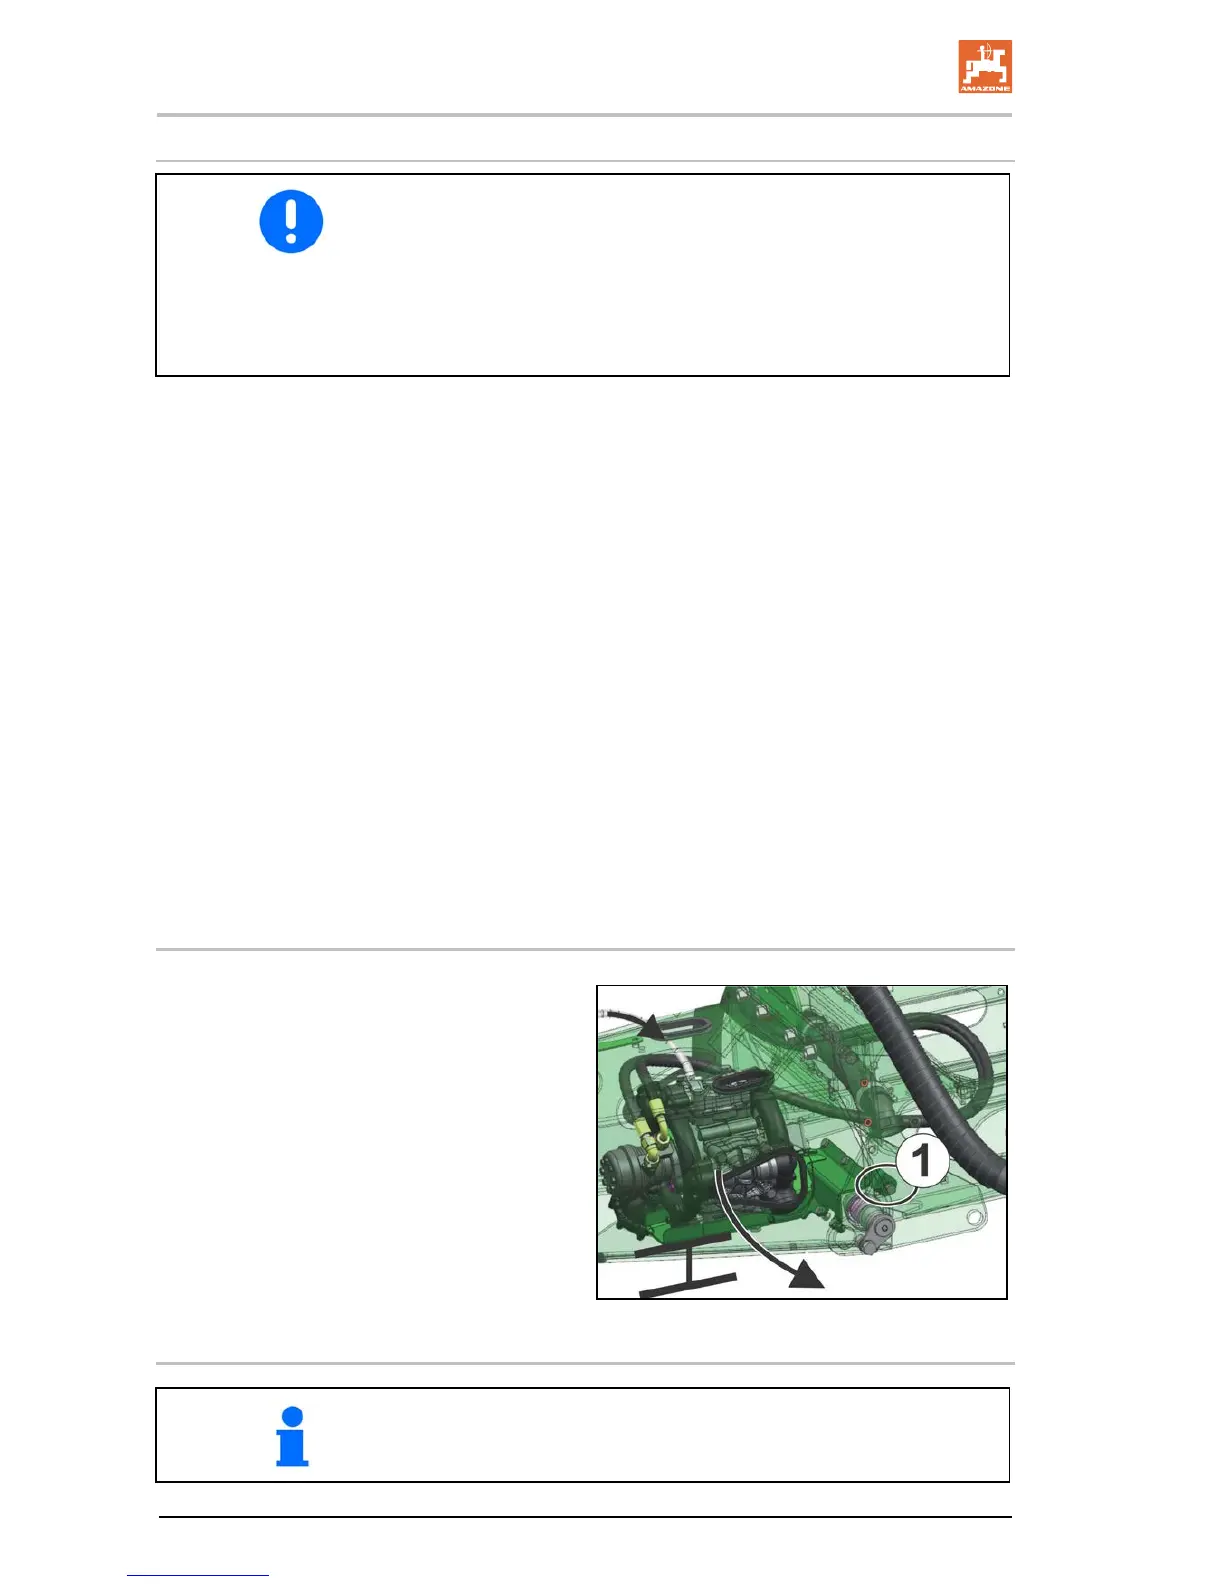
14.14.6 Swivelling flushing water pump
The flushing water pump is integrated in the
drawbar.
For maintenance work, it may be necessary to
pivot the pump down and out of the drawbar.
To do so, loosen the bolted connection (1).
Before: disconnect the hoses and put a support
under the pump.
 Loading...