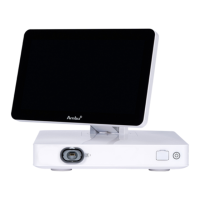
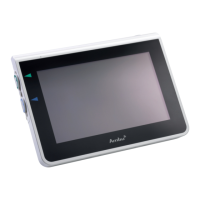
4. First-Time Setup
Before using the displaying unit for the first time, follow the steps described here. Letters in
grey circles
refer to the illustrations in the Quick Guide on page 2.
1. Unpack the displaying unit and verify that no parts are missing. Refer to the parts
described in chapter 2.
2. Closely examine the displaying unit and other parts for any damage. Do not use the
displaying unit if it is damaged in any way
A
.
3. Place the displaying unit on a hard and leveled surface. Be aware to place the displaying
unit in a position where the power cord is accessible. The displaying unit can be placed
on a medical cart to make it moveable. Make sure proper position of the displaying unit to
avoid falling down during transportation.
4. If necessary, connect the supplied Wi-Fi antenna to the back of the displaying unit.
5. Connect the power cable to the power inlet on the back of the displaying unit using the
supplied power cable (see section 2.3). Connect the other end to a suitable power outlet
and switch on the power outlet
B
.
6. If needed, connect an external monitor
C
and/or medical imaging recorder to the back
of the displaying unit.
7. If necessary, manually adjust the orientation of the touch screen of the displaying unit
D
. The touch screen's position and orientation can be adjusted to a preferred position via
the adjustable positioning arm connected to the base.
8. Turn ON the displaying unit by short pressing the power button. The indicator light in
the power button switches from orange (STANDBY mode) to green (ON)
E
.
The user interface takes approximately 20 seconds to start up, but a live image is available
soon after the monitor is turned on if a visualization device is connected. If no visualization
device is connected, the interface will illustrate how to correctly connect a visualization device
to the displaying unit.
5. Setting Up the Software
In this chapter, the numbers in circles refer to the described part on the images.
On the user interface of the displaying unit, the tool bar containing the main system menus,
Live View
, Archive , Login and Settings , is always accessible on the left side of
the screen and the active menu is emphasized with a green colour
1
.
1
5.1. Software Installation
No installation is required for the software. For software updates/upgrades refer to chapter
8.2.
5.2. How to Log In
By default, login is required to gain full functionality of the displaying unit. Without logging in,
the default user is active, and you only have access to the functions in Live view, the Current
procedure folder and to view Device info in About under the Settings
tab.
10