57
5.10. Endoscope Buttons Configuration
By default, the buttons on a connected endoscope are configured as shown in the table below.
Default Configuration of Endoscope Buttons on Ambu® aScope™ Gastro
Button 1 Button 2 Button 3 Button 4
Short press
Photo ARC* Timestamp Stopwatch
Long press
Video (Disabled) (Disabled) (Disabled)
* Advanced Red Contrast, see section 7.3.9.
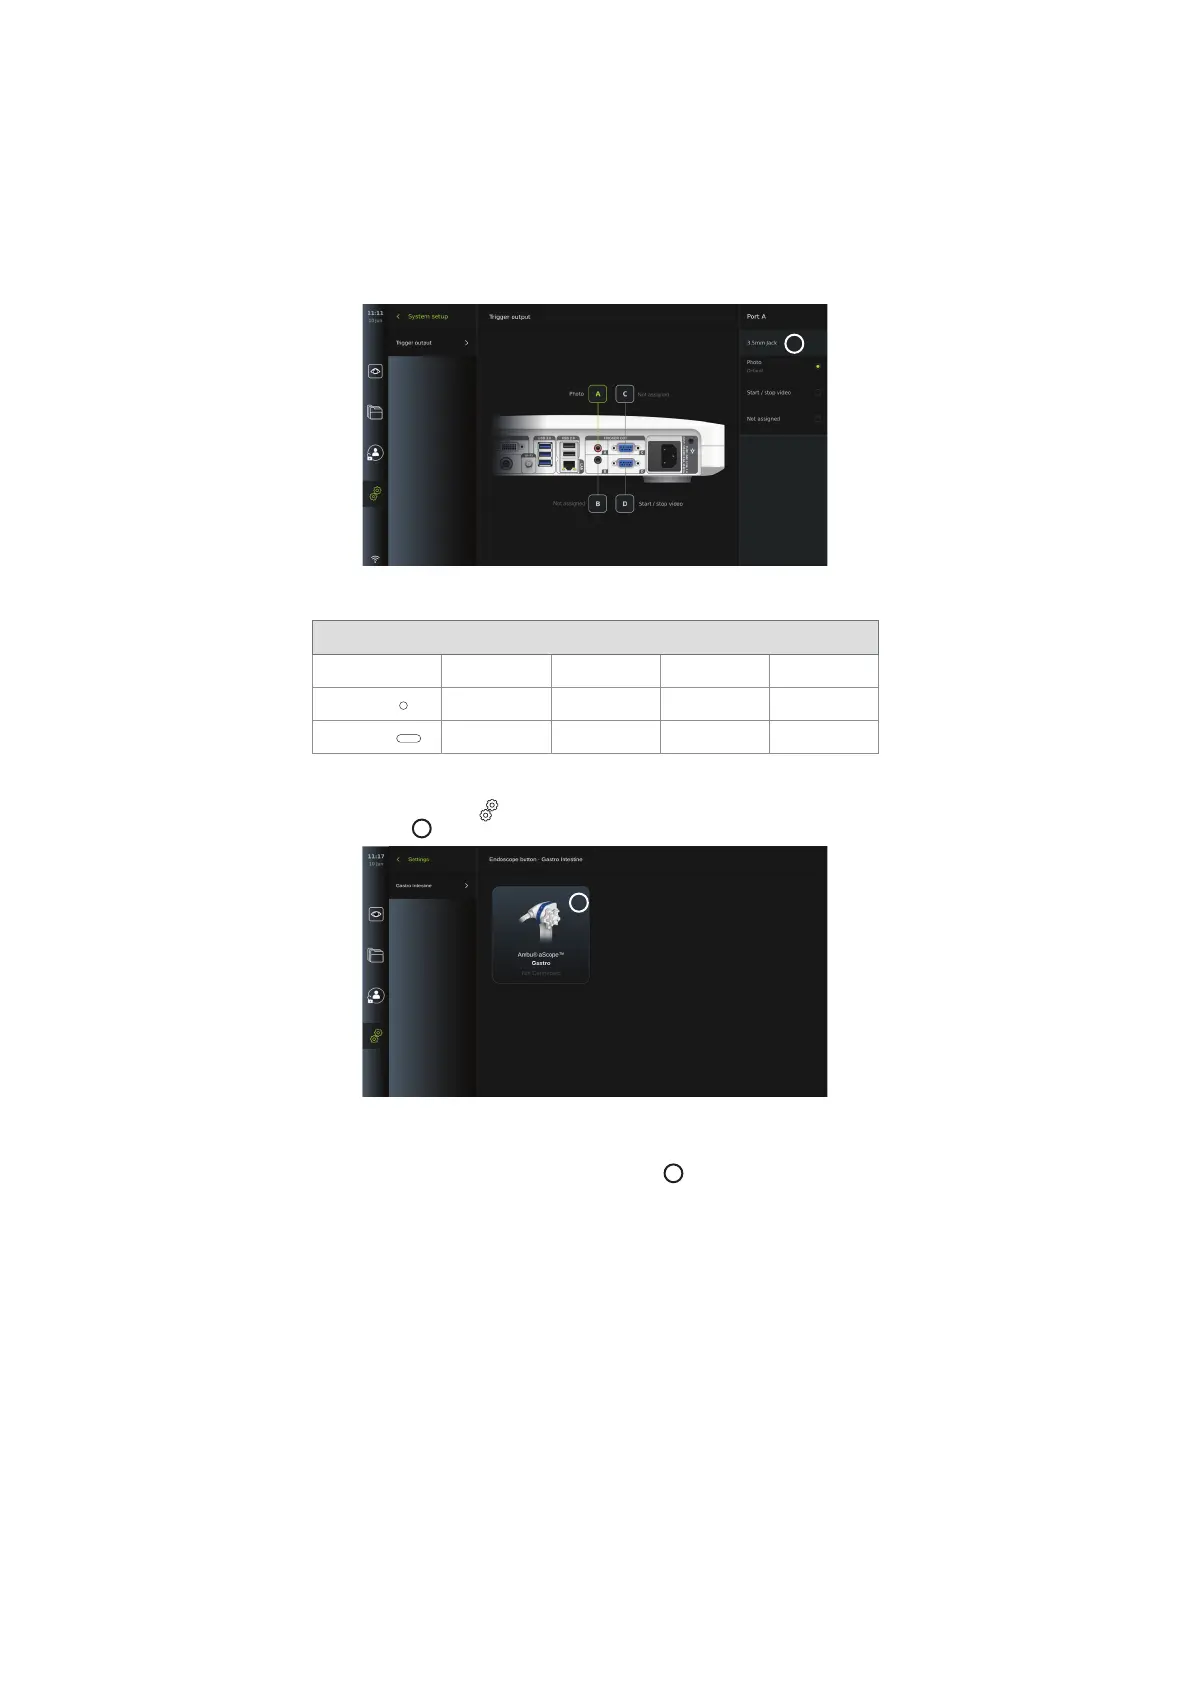
To view the current configuration of a compatible endoscope type or to reconfigure the
buttons, press the Settings
tab in the tool bar, press Endoscope buttons and select an
endoscope type
57
. An overview will appear.
57
NOTE: With administrator login, Ambu® aScope™ Colon will also be visible on the screen. The aScope™ Colon
will only be available for specific markets. Please contact your local Ambu representative for further
information.
To reconfigure a button, select the corresponding number
58
and select the desired function
for long or short press in the selection menu that appears on the right side of the screen. Be
aware that Administrator login is required for reconfiguration. Test if the system behaves as
expected.
The updated button configuration will automatically be saved on the displaying unit for the
type of endoscope selected. For a short description of each function, refer to section 7.3.
22