Settings Pages
18
Modero S Series Touch Panels - Configuration & Programming Manual
Master Connection
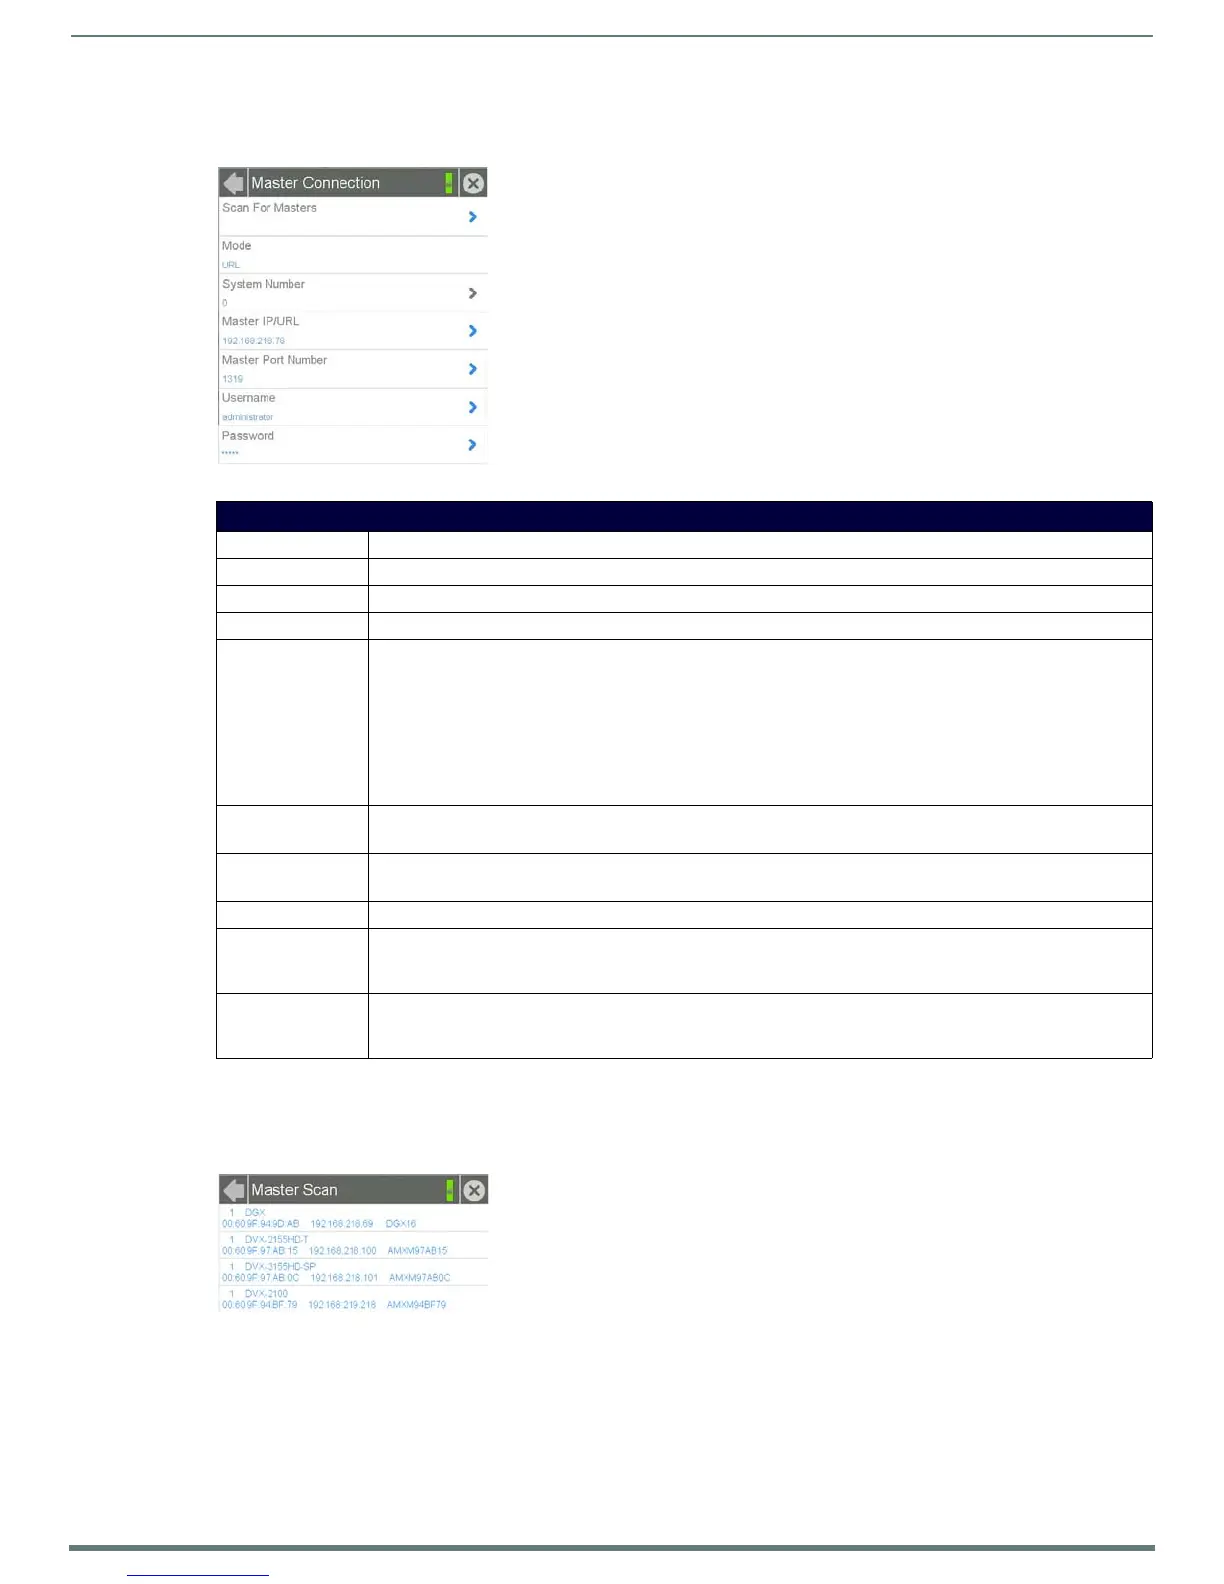
The Master Connection page (FIG. 16) controls the method of connection to a NetLinx Master.
Scanning for Masters
To quickly and easily identify all of the available Masters on the network. use the Scanning for Masters page. The site survey on this
page passively listens to network traffic and presents all the compatible Masters for easy selection. Selecting the desired Master
automatically updates the Master connection and makes an automatic connection.
To scan for available Masters:
1. From the Master Connection page, press the Scanning For Masters button.
2. In the Master Scan page, select the Master for the Modero S Series panel. The Master Connection page will automatically
display the information on the selected Master.
FIG. 16
Master Connection page
Master Connection Page
Back: Click the left-facing arrow to return to the previous page.
Connection Status: A green bar signifies that the panel has an active connection to the Master.
Close: Click the “X” button to shut the Settings page and return to the main display.
Scan For Masters Click this button to open the Master Scan page (page 18).
Mode: Cycles between the connection modes: URL, Listen, and Auto.
• URL - In this mode, enter the IP/URL, Master Port Number, and username/password (if used) on the Master. The
System Number field is read-only - the panel obtains this information from the Master.
• Listen - In this mode, add the panel address into the URL List in NetLinx Studio and set the connection mode to
Listen. This mode allows the Modero touch panel to “listen” for the Master’s communication signals. The System
Number and Master IP/URL fields are read-only.
• Auto - In this mode, enter the System Number and a username/password (if applicable). Use this mode when
both the panel and the NetLinx Master are on the same Subnet. The Master IP/URL field is read-only.
System Number: Allows entry of a system number. Default value is 0 (zero).
NOTE: Available in Auto Mode Only - disabled when URL or Listen is selected.
Master IP/URL: Sets the Master IP or URL of the NetLinx Master.
NOTE: Available in URL Only - disabled when Listen or Auto is selected.
Master Port Number: Allows entry of the port number used with the NetLinx Master. Default = 1319.
Username: If the target Master has been previously secured, enter the alpha-numeric string (into each field) assigned to a
preconfigured user profile on the Master. This profile should have the predefined level of access/configuration
rights.
Password: If the target Master has been previously secured, enter the alpha-numeric string (into each field) assigned to a
preconfigured user profile on the Master. This profile should have the predefined level of access/configuration
rights.
FIG. 17 Master Scan page
 Loading...