Upgrading Firmware
96
MVP-9000i 9" Modero® ViewPoint® Touch Panel with Intercom
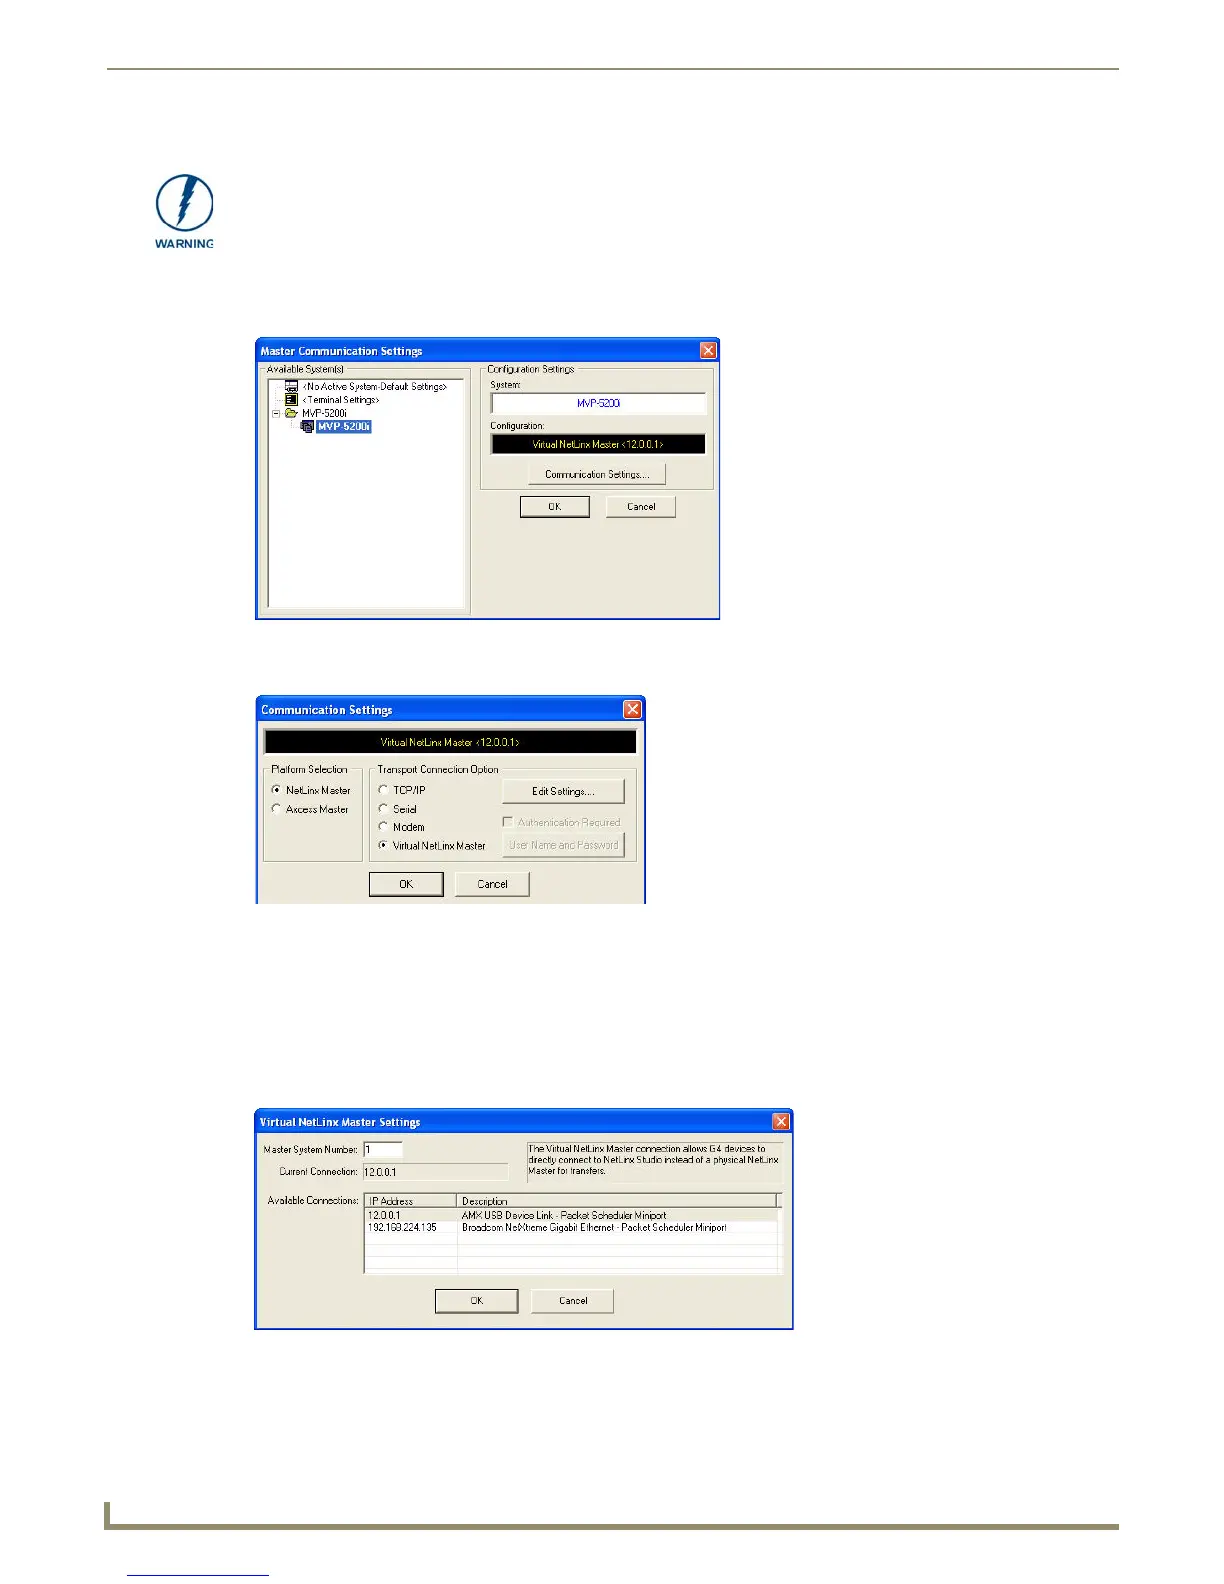
1. Launch NetLinx Studio 2.x and select Settings > Master Communication Settings from the Main menu to open
the Master Communication Settings dialog (FIG. 106). If this is the first time the device needs to be configured,
refer to the Configuring Modero Firmware via the USB Port section on page 186.
2. Click the Communications Settings... button to open the Communications Settings dialog box (FIG. 107).
3. Click on the NetLinx Master radio button from the Platform Selection section.
4. Click on the Virtual Master radio box from the Transport Connection Option section to configure the PC to
communicate directly with a panel. Everything else, such as the Authentication, is greyed
5. -out because this connection is not going through the Master’s UI.
6. Click the Edit Settings button on the Communications Settings dialog to open the Virtual NetLinx Master Settings
dialog (FIG. 108).
7. Within this dialog, enter the Master System number. The default is 1.
8. In the Available Connections section, click on the IP address for the touch panel to select it.
Establishing a USB connection between the PC and the panel, prior to installing the
USB Driver, will cause a failure in the USB driver installation.
FIG. 106 Master Communications Settings dialog box
FIG. 107 Communications Settings dialog box
FIG. 108 Virtual NetLinx Master Settings
 Loading...