17
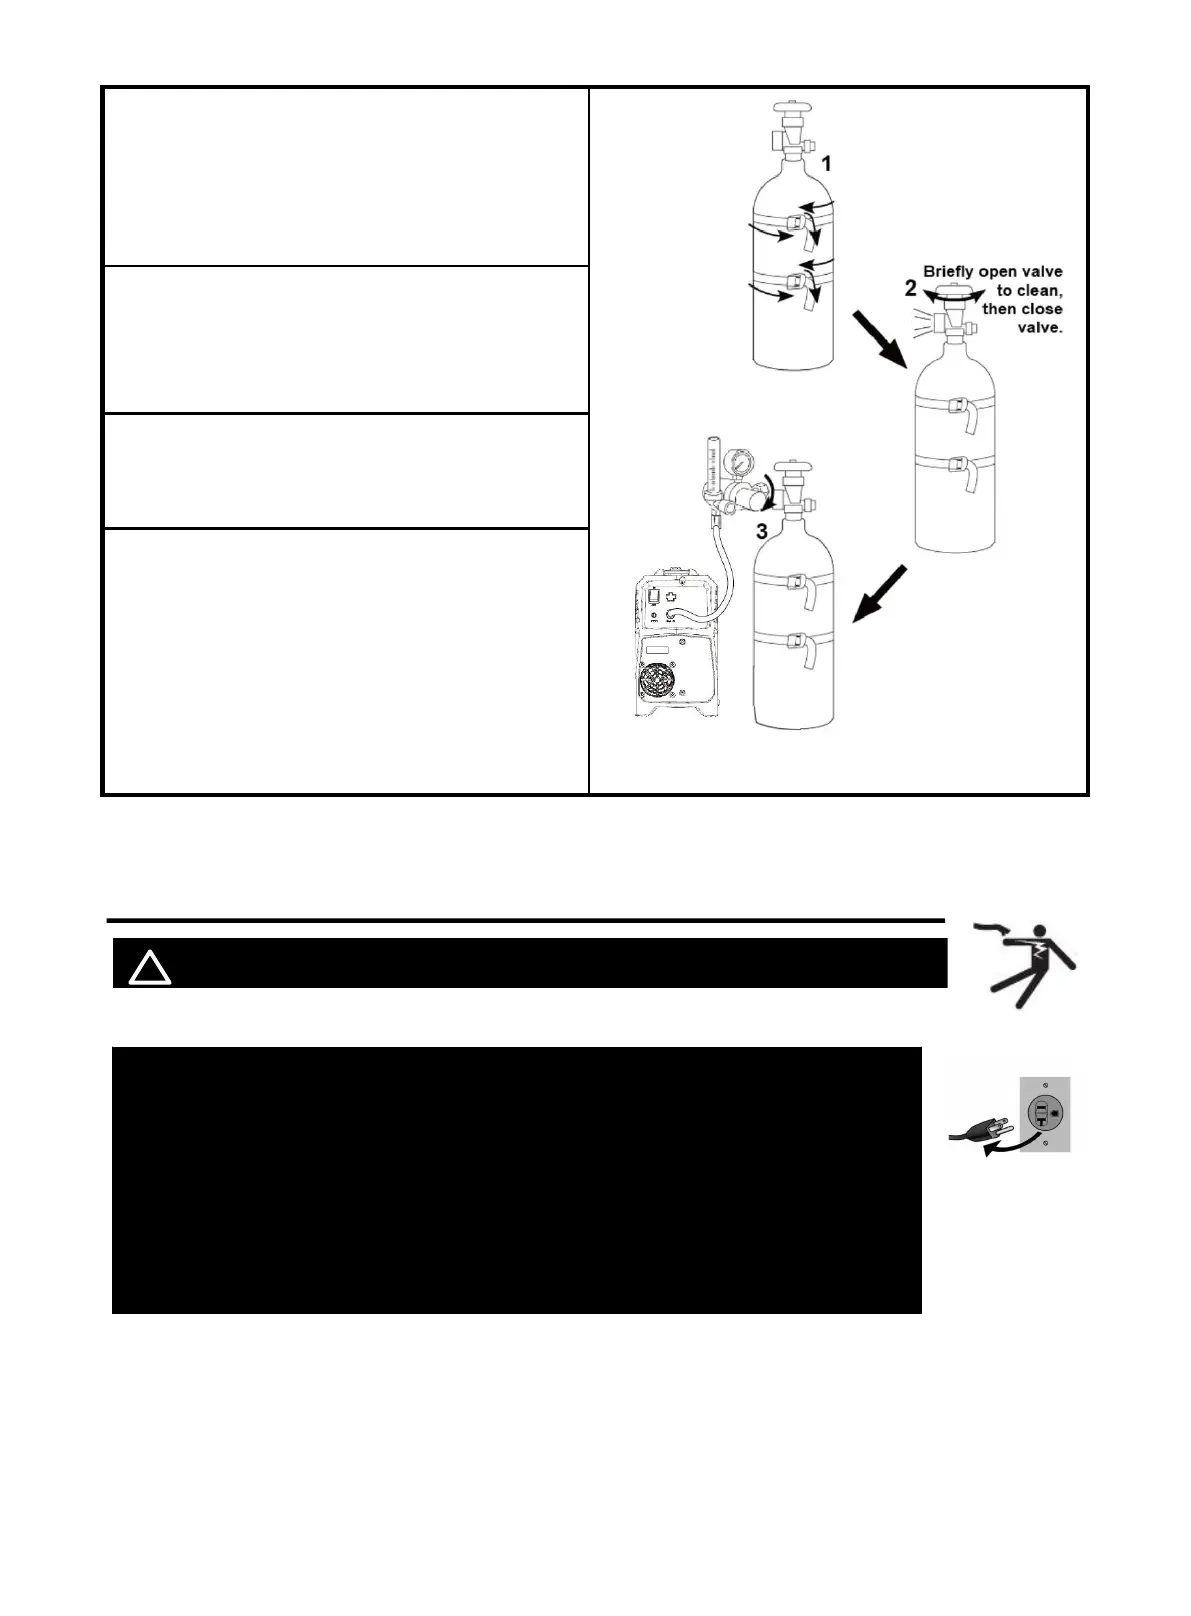
1. With assistance, place an 100% CO2 cylinder
(not included) onto a cabinet or cart near the
Welder and secure the cylinder in place with two
straps (not included) to prevent tipping.
2. Remove the cylinder’s cap. Stand to the side
of the valve opening, then open the valve briefly to
blow dust and dirt from the valve opening. Close
the cylinder valve.
3. Locate the Regulator and close its valve until it is
loose, then thread Regulator onto cylinder and
wrench-tighten connection.
4. Connector the gas hose to the Regulator’s
Outlet and the welder’s Gas inlet connector.
NOTICE:
The gas hose connector MUST be tightly
connected to the socket to avoid air leakage.
5.2 Input Power Connection
! WARINING BEWARE OF ELECTRIC SHOCK!
NOTICE: The following steps require applying power to the Welder
with the cover open.
To prevent serious injury from fire or electric shock:
1.DO NOT touch anything, especially not the ground clamp, with the
gun or welding wire or an arc will be ignited.
2. DO NOT touch internal Welder Components while it is plugged in.
The MIG250 operates with a 110V or 220V power supply. Plug the Power Cord into a
properly grounded. Set MIG Gun down on nonconductive, nonflammable surface away
from any grounded objects. And then turn the Power Switch ON.
Figure 22
https://www.arccaptain.com/