36
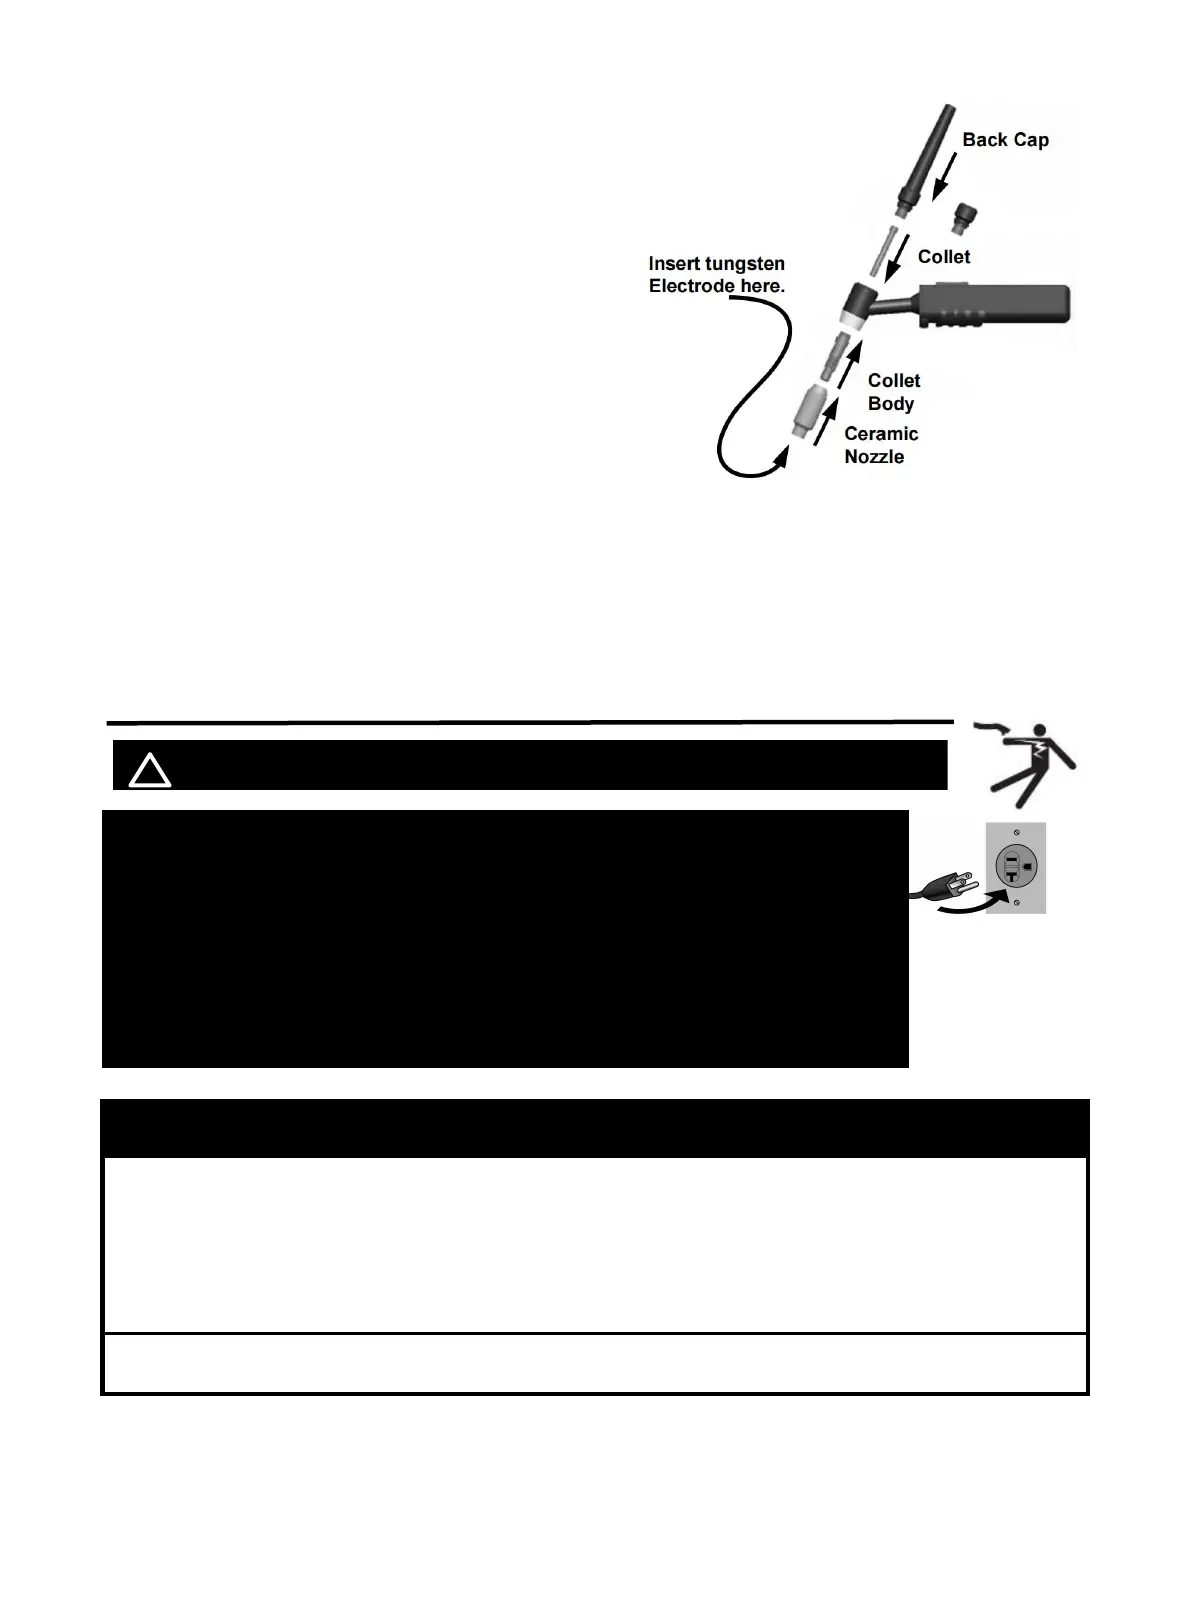
Assemble tig torch
1. Consult Settings Chart, on top of Welder, to determine
proper Tungsten Electrode size to be used with thickness
of material to be welded.
2. Match Collet and Collet Body sizes to Tungsten
Electrode size.
3. Thread Collet Body into the front of the Torch.
4. Make sure Ceramic Nozzle size is appropriate for
application.
5. Thread Ceramic Nozzle onto Collet Body.
6. Insert Collet into back of Torch and into Collet Body.
7. Insert Tungsten Electrode into Collet on front of Torch.
8. Lock Electrode in place with Back Cap. Electrode
should protrude 1/8" to 1/4" beyond the Ceramic Nozzle.
NOTE: The tig torch and tungsten electrode are not included in the machine. If you need to
purchase, please log in to the official website: WWW.ARCCAPTAIN.COM
8.5 Lift tig Welder Operation
! WARINING BEWARE OF ELECTRIC SHOCK!
NOTICE: The following steps require applying power to the Welder
with the cover open.
To prevent serious injury from fire or electric shock:
1.DO NOT touch anything, especially not the ground clamp, with the
gun or welding wire or an arc will be ignited.
2. DO NOT touch internal Welder Components while it is plugged in.
Operation steps
1. Open gas cylinder’s valve all the way.
NOTE: TO PREVENT DEATH FROM ASPHYXIATION:
Do not open gas without proper ventilation. Fix gas leaks immediately. Shielding gas can displace
air and cause rapid loss of consciousness and death. Shielding gas without carbon dioxide can be
even more hazardous because asphyxiation can start without feeling shortness of breath.
2.
Set Flow Gauge to SCFH value
Figure 52
https://www.arccaptain.com/