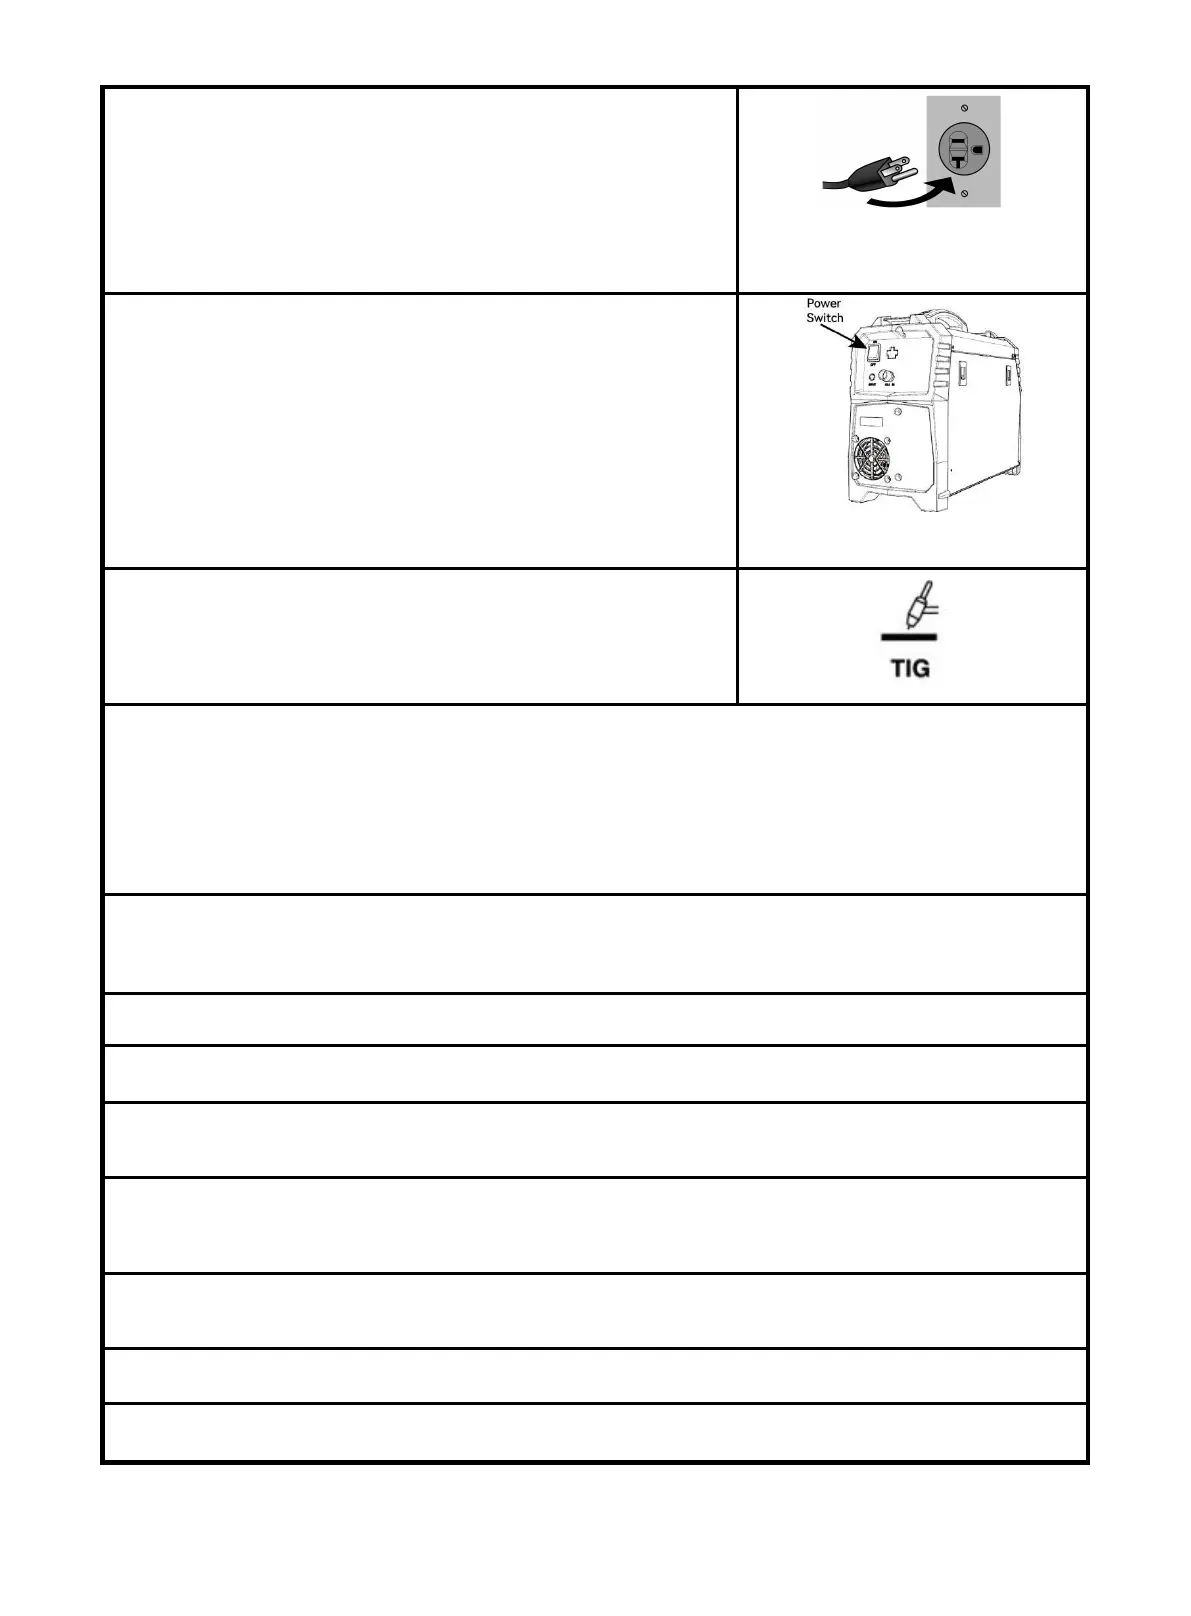
37
3. connect power cord
NOTE: Turn the Power Switch off before connecting Power
Cord. Plug the Power Cord into a properly grounded and rated
receptacle that matches the plug. The circuit must be equipped
with delayed action-type circuit breaker or fuses.
4. Turn the Power Switch ON.
NOTE: Set TIG Torch down on nonconductive, nonflammable
surface away from any grounded objects.
The Operation interface will light up and the Cooling fan will rotate.
5. Select Lift TIG
NOTE:Welder is now energized and open circuit Voltage is
present.
6. Hold TIG Torch in one hand and the TIG Rod (sold separately) in other hand. Both hands need to wear
protective gloves.
WARNING! TO PREVENT SERIOUS INJURY: Metalwork bench must be grounded when TIG
welding.
NOTE: Maintain a constant distance between the Tungsten Electrode and the workpiece: between
1 and 1.5 times the diameter of the Electrode.
7. The initial settings may need to be adjusted after stopping and carefully inspecting the weld. Please refer
to 6.7 Lift TIG Welding parameters table,Proper welding takes experience.
8. Open valve on TIG Torch to start gas flow.
9. To initiate welding arc, touch Electrode to work piece and lift.
10. When welding puddle is hot enough, tilt Torch backward about 10-15 degrees from vertical and
move it back slightly. Add TIG Rod material as needed to the front end of the weld puddle.
11. Alternate between pushing the torch/weld puddle and adding the TIG Rod material.
NOTE: Remove the TIG Rod each time the Electrode is advanced, but do not remove it from the gas shield.
This prevents oxidation from contaminating the weld.
12. When finished welding, pull Torch away from work piece until welding arc is broken, then return the gas
coverage until weld solidifies.
13. Close valve on TIG Torch and turn Right Knob to OFF to turn off power to TIG Torch.
14. Set TIG Torch down on nonconductive, nonflammable surface away from any grounded objects.
Figure 53
Figure 54
https://www.arccaptain.com/