30
SECTION 7
MAINTENANCE INFORMATION
2. Remove electrolyte
container from the
plastic storage bag.
Remove the strip of
caps. Put the strip
aside as you will use
it later to seal the
battery cells. For
batteryllinguseonly
the dedicated acid
container that comes
with the battery as it
contains the proper
amount of electrolyte
forthatspecicbat-
tery. This is important
to service life and battery performance. Do not pierce, or
otherwise open the foil seals on the electrolyte container.
Do not attempt to separate the individual electrolyte
containers.
3. Place the electrolyte container with the foil seals facing
downintothe cellllerportsonthe battery.Holdthe
container level and push down to break the foil seals.
Electrolytewillstarttoowintothebatteryandairbubbles
will be seen inside the container. Do not tilt the electrolyte
container.
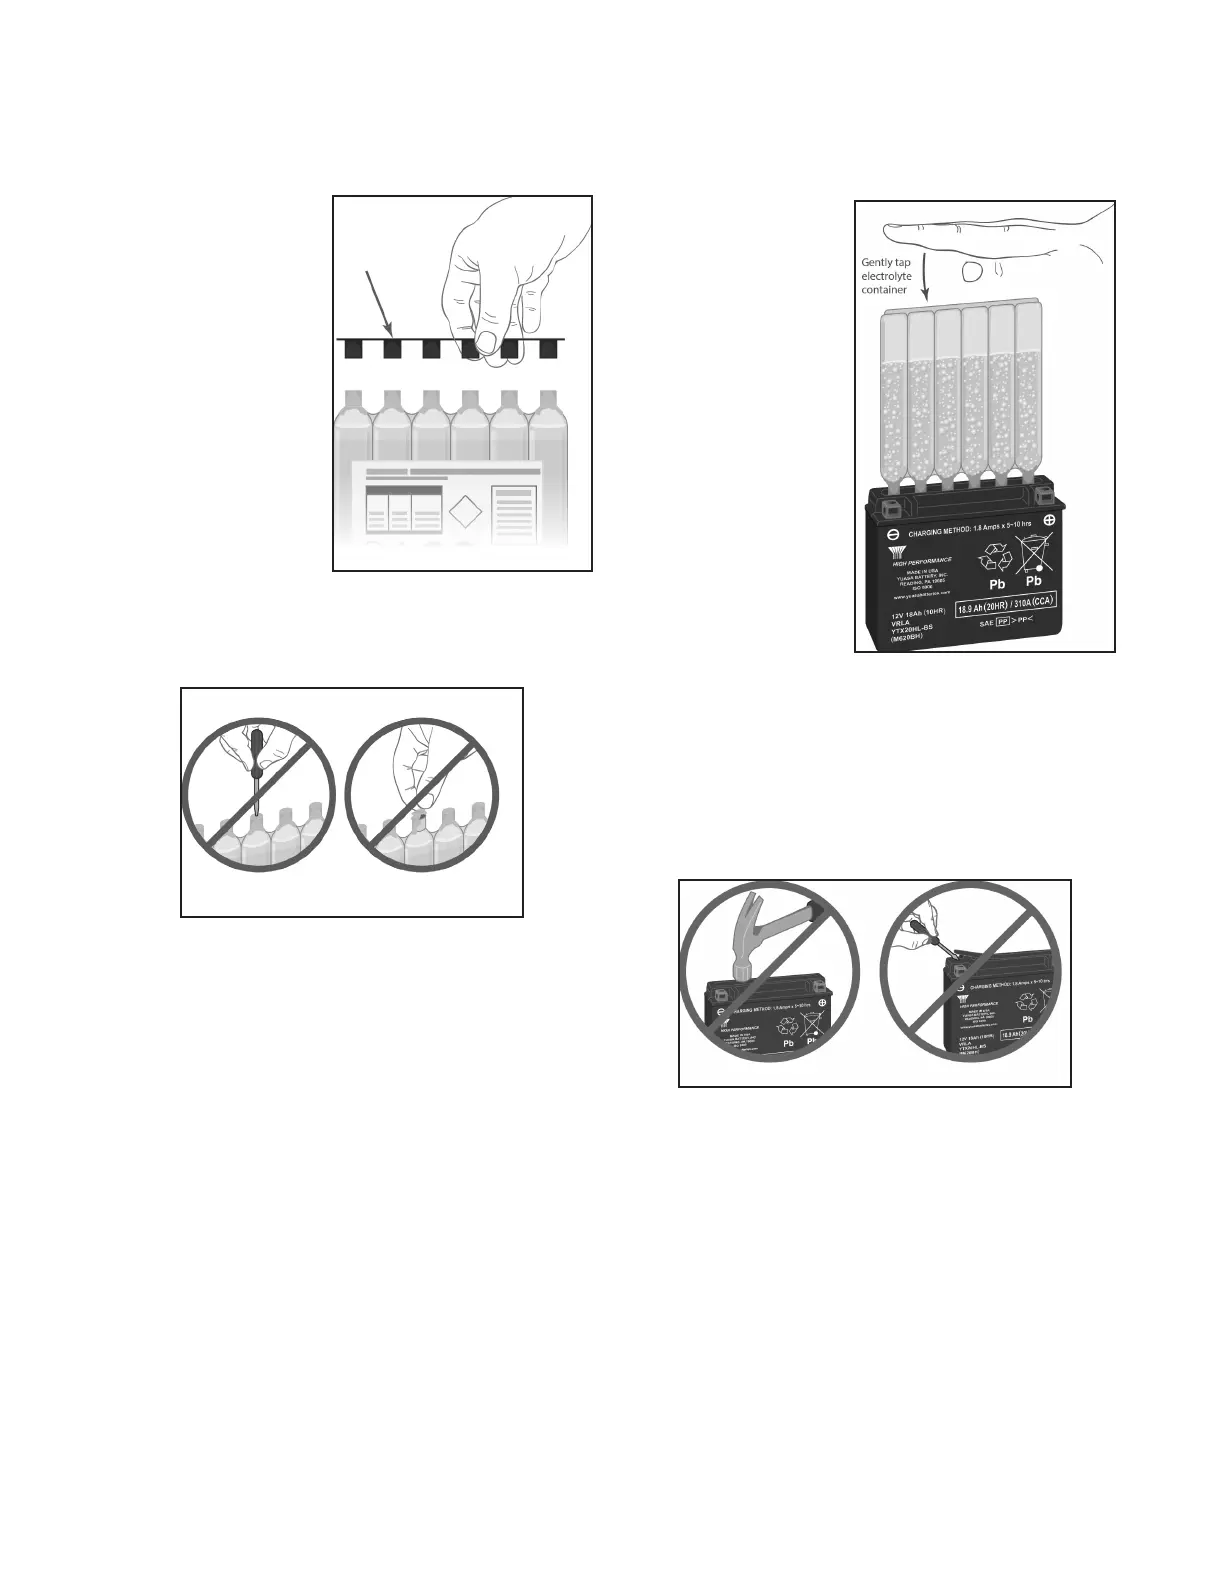
4. Checktheelectrolyteow.Keepthecontainerinplacefor
20 minutes or longer until it empties completely. If no air
bubblesarecomingupfromthellerports,orifcontainer
cells haven’t emptied completely after 20 minutes, tap
the container and/or battery case a few times to cause the
electrolytetoowintothebattery.Donotremovetheacid
container from the battery until it is completely empty. The
battery requires all of the electrolyte from the container for
proper operation.
Bubbles will appear as the
electrolytecontainerlls
the battery indicating the
owofbatteryacid.Tap
the container periodically
to keep the electrolyte
owinguntilthecontainer
is completely empty.
Never puncture the top
of the acid container to
speedupthelling
process.
5. Remove the empty electrolyte container from the battery.
Fully insert the strip of sealing caps (previously removed
fromtheelectrolytecontainer)intothebatteryllingports.
Makesurethestripofcapsisfullyinsertedandushwith
the top of the battery. Insert the caps by hand, do not use a
hammer or excessive force. Never remove the strip of caps
or add water or electrolyte to the battery during its service
life.
Afterlling,thesealingcapsshouldbeinstalledusinghand
pressure only. The sealing cap should never be removed
once the battery is activated.
6. For batteries with ratings of less than 18 AH, let the bat-
tery stand for 20 to 60 minutes. For batteries with higher
AH ratings, and/or having the High Performance rating
(designated by an “H” in the part number/name) allow the
battery to stand for 1 to 2 hours. Yuasa AGM batteries have
the amp hour (AH) printed on the front of the battery case.
The stand, or rest period, allows the electrolyte to permeate
into the plates for optimum performance.
7. Newly activated AGM batteries require an initial charge.
After adding electrolyte, a new battery is approximately
75-80% charged. After the “stand” period (step 6), charge
the battery to bring it to a full state-of-charge. The battery